Troubleshoot Initialization and Registration
Before troubleshooting more specific initialization and registration issues, review basic MobilePush SDK troubleshooting information for Android and iOS implementations. Doing so can help you identify and resolve any fundamental issues affecting your implementation.
Unless your application successfully initializes the MobilePush SDK, contacts and devices don’t appear in Engagement. First, ensure the SDK is initialized correctly.
Engagement can take up to five minutes to process and display new device registrations. If your devices or contacts don’t show up after successful SDK initialization, wait at least five minutes and check for the contact key again by doing the following.
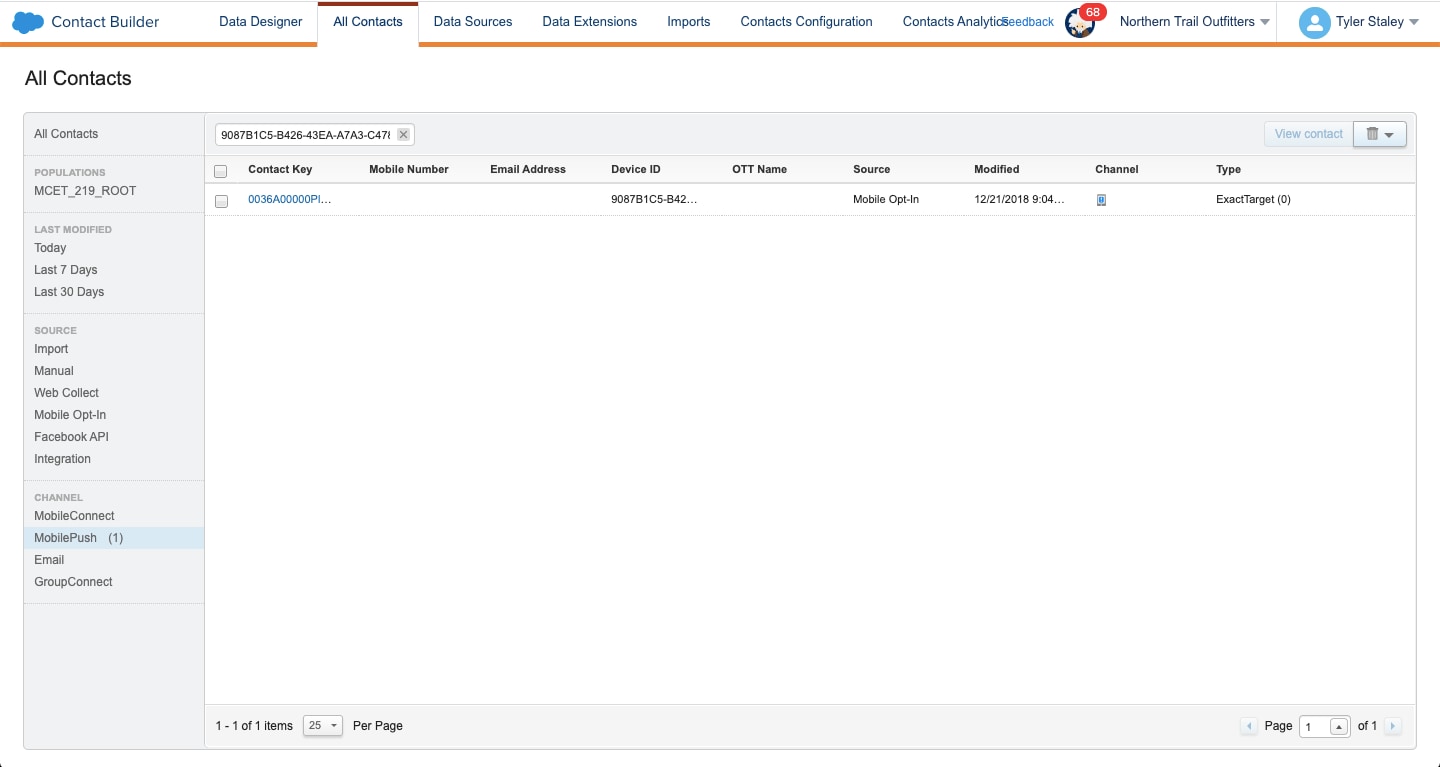
- In Engagement, navigate to Audience Builder > Contact Builder > All Contacts.
- Select the MobilePush channel in the left navigation.
- Search for and select the contact key or device ID for the user that you’re troubleshooting.
You can’t look up a contact in Engagement if you didn’t set a contact key. When you don’t set a contact key, Engagement generates and assigns a corresponding contact key to the contact as a random GUID. To identify the GUID and determine whether the device was registered, follow these steps.
- In Engagement, navigate to Audience Builder > Contact Builder > All Contacts.
- Select the MobilePush channel in the left navigation.
- Search for and select the contact key or device ID for the user that you’re troubleshooting.
Talk to your marketer about revising your contact key strategy.
A device ID is analogous to an instance of an app installation. Whenever a contact installs your app, the MobilePush SDK creates a corresponding device ID. MobilePush SDK creates a New device ID for a contact in these example scenarios:
- If the contact purchases a new mobile device and installs your app.
- If the contact deletes the app and then later reinstalls your app.
- If the contact does a factory-reset of the device and then reinstalls the app.
You can’t delete additional device IDs. There’s also no age-decay criteria to automatically delete less-active devices. However, you can review the device IDs associated with a contact by doing the following.
- In Engagement, navigate to Audience Builder > Contact Builder and click the All Contacts tab.
- Select the MobilePush channel in the left navigation.
- Search for and select the contact key or device ID for the user that you’re troubleshooting.
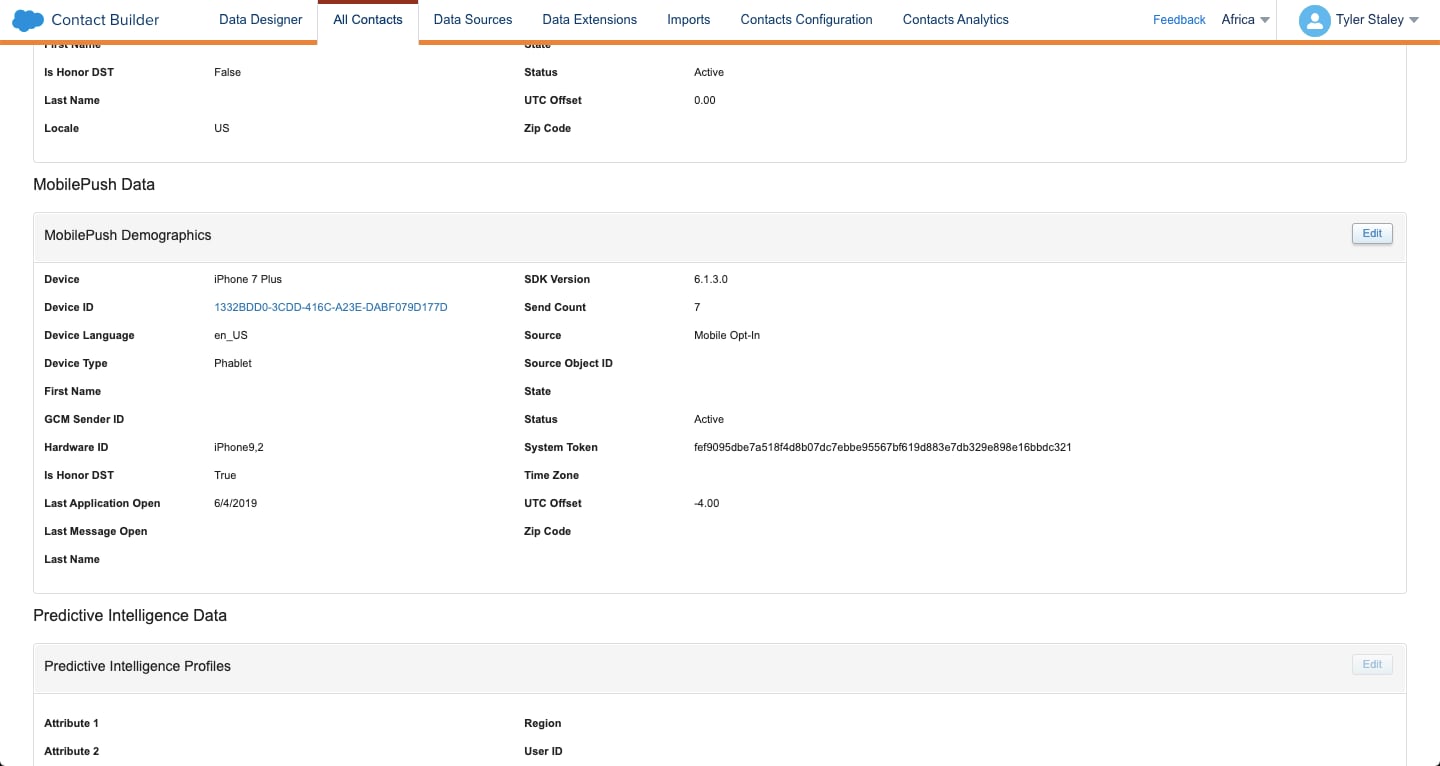
- On the contact’s Attributes tab, locate the MobilePush section.
- Review the MobilePush channel details for the contact, including device IDs.
Engagement determines whether a device is eligible to receive push notifications in these ways.
-
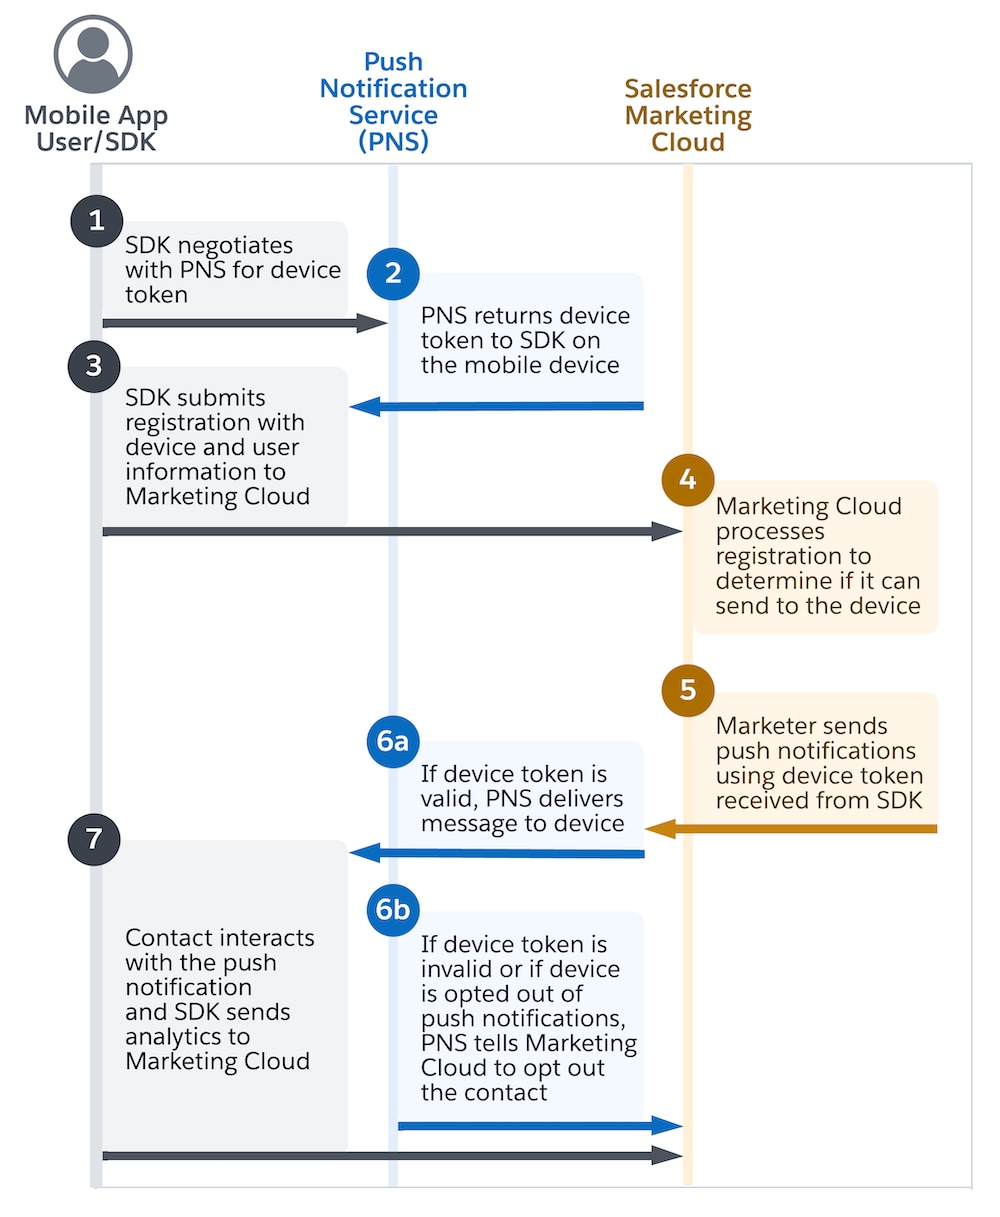
User Engagement: When a user launches the app, the app can send registration data to Marketing Cloud, even if the device is opted out of receiving push notifications. This scenario is represented in step 3 of this diagram. However, older devices can remain inactive for a while, stored away in a drawer for months or even years, therefore being unable to communicate with Marketing Cloud. In this scenario, older device IDs can remain opted in and persist in Marketing Cloud.
-
Push Notification Service (PNS): The PNS notifies Marketing Cloud that the device can no longer receive notifications. After it receives this notification, Marketing Cloud waits to receive confirmation of a device’s eligibility to receive push notifications. After receiving this confirmation, Marketing Cloud opts the device out from future push notifications. However, Marketing Cloud is careful when opting out devices. It waits until it’s explicitly instructed by the PNS that a device has opted out, or until there are three consecutive delivery failures from the PNS. This scenario is illustrated in step 6b of the MobilePush SDK operational diagram.
For information about resolving common causes of contact dissociation, see Contact Dissociation. You can also delete dissociated contacts from your account.
If your app doesn’t set the contact key in the device registration, Engagement automatically generates and assigns a random GUID to represent that contact in Engagement. For information about setting the contact key, see Register Contacts with Engagement.
There are several reasons why attributes don’t appear in Marketing Cloud. To troubleshoot this issue, first make sure that the SDK is fully initialized before it makes registration calls or method updates. If a device attempts to make one of these updates, the requests fail. Add logging to your Android or iOS, and then review the logs for errors.
Attributes can also be cleared using the SDK’s clear method. If you use the clear method, the registration call updates to reflect the cleared state. This update means that the SDK doesn’t send any attributes to Marketing Cloud. Make sure that your code doesn’t clear any attributes that were previously set. You can also use the getSdkState() convenience method to view the output from the SDK’s current state.
Finally, make sure that the attributes that you send to Marketing Cloud exist in Contact Builder. In Contact Builder, go to Data Designer > MobilePush Data. Select and review the attributes that are associated with the Demographics table. Make sure that the attributes you send to the SDK exactly match the attributes in Contact Builder.