Customize Push Notification Functionality for iOS Apps
Extend push notification support in your mobile app beyond the built-in functionality of basic configuration with the following customization options.
- Custom Sound
Play a custom sound when a push notification arrives.
- Interactive Notifications
Display buttons on your push notifications.
- Rich Notifications
Include photos and videos.
- Custom Keys
Send extra data along with a push notification. For example, add tracking to your mobile app.
- URL Handling
Handle URLs from push notifications
This feature uses a sound included in your mobile app as a custom audio signal when a push message arrives on the mobile device.
- Add a file named
custom.cafto your project. The cloud push payload looks for a file namedcustom.caf.
- Add the
custom.cafaudio file to the Copy Bundle Resources folder in Xcode for your app.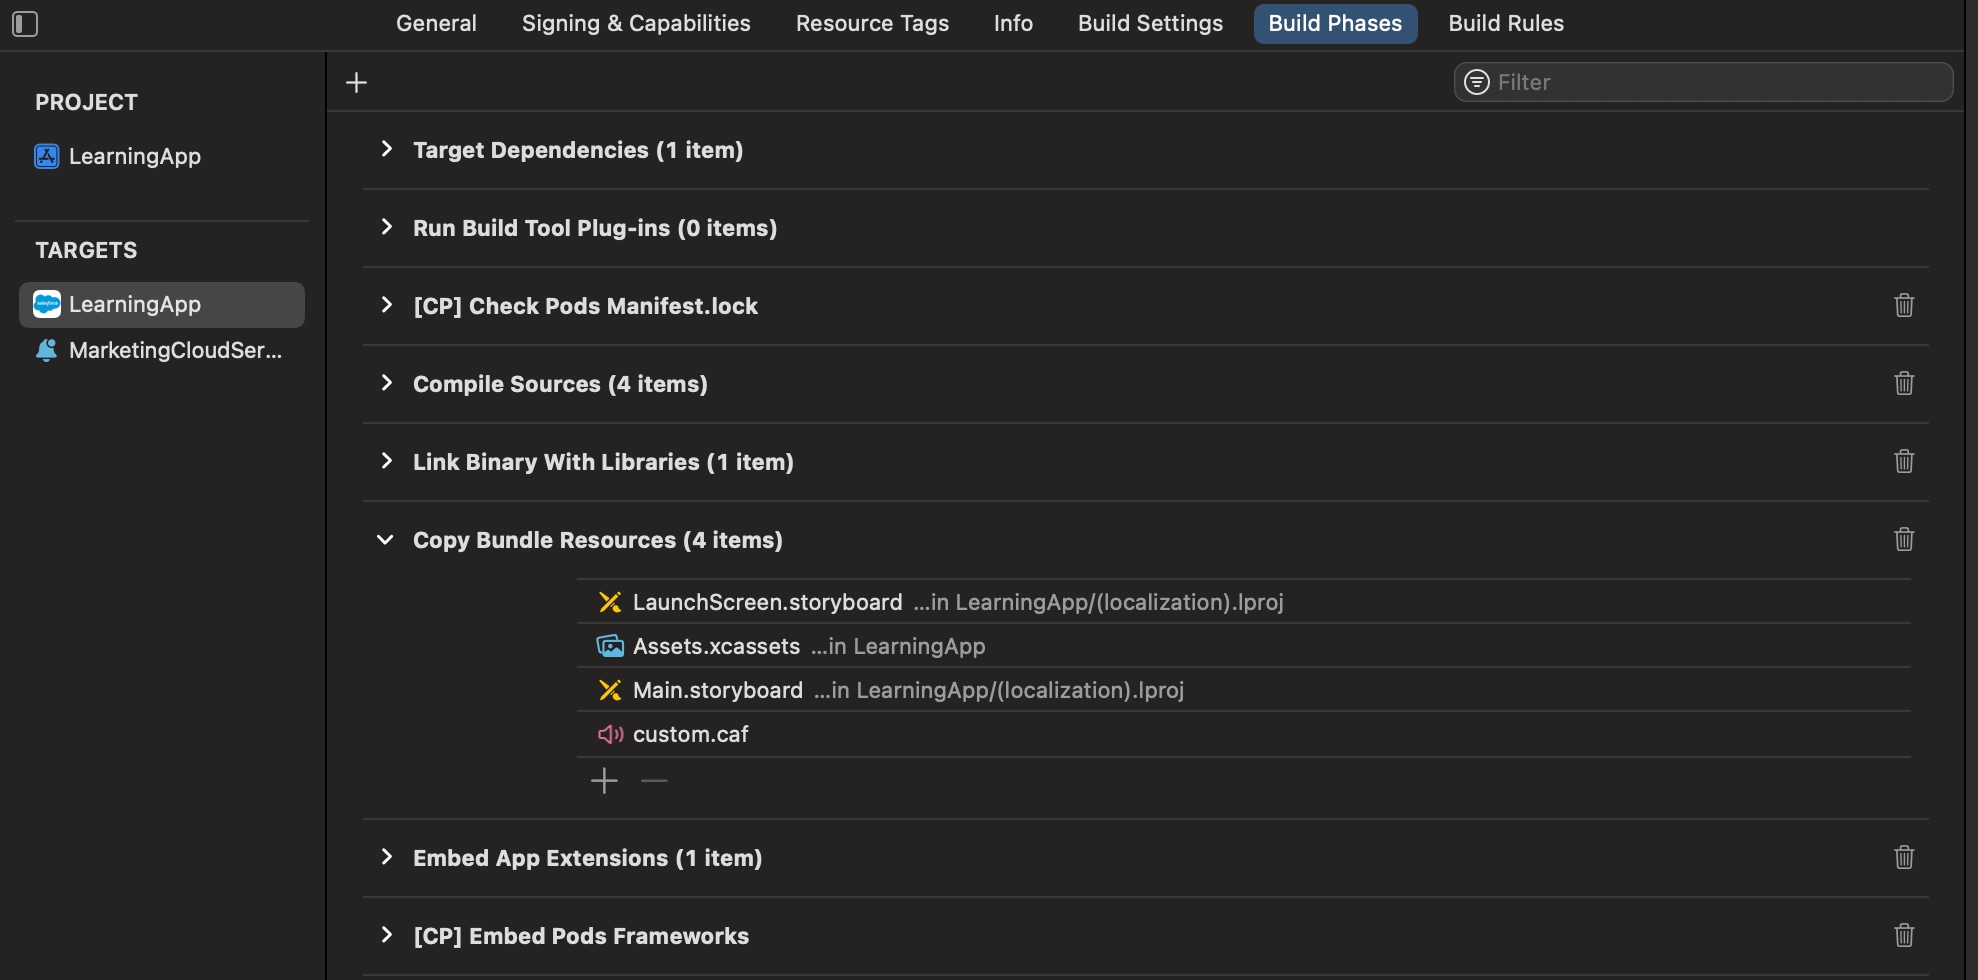
- To prevent Xcode from using cached files, perform a clean build folder in Xcode. In the Product menu, hold the Option key and select Clean Build Folder.
- Enable the custom sound option on the MobilePush Administration page. You might need to work with a Marketing Cloud Engagement admin to enable this option.
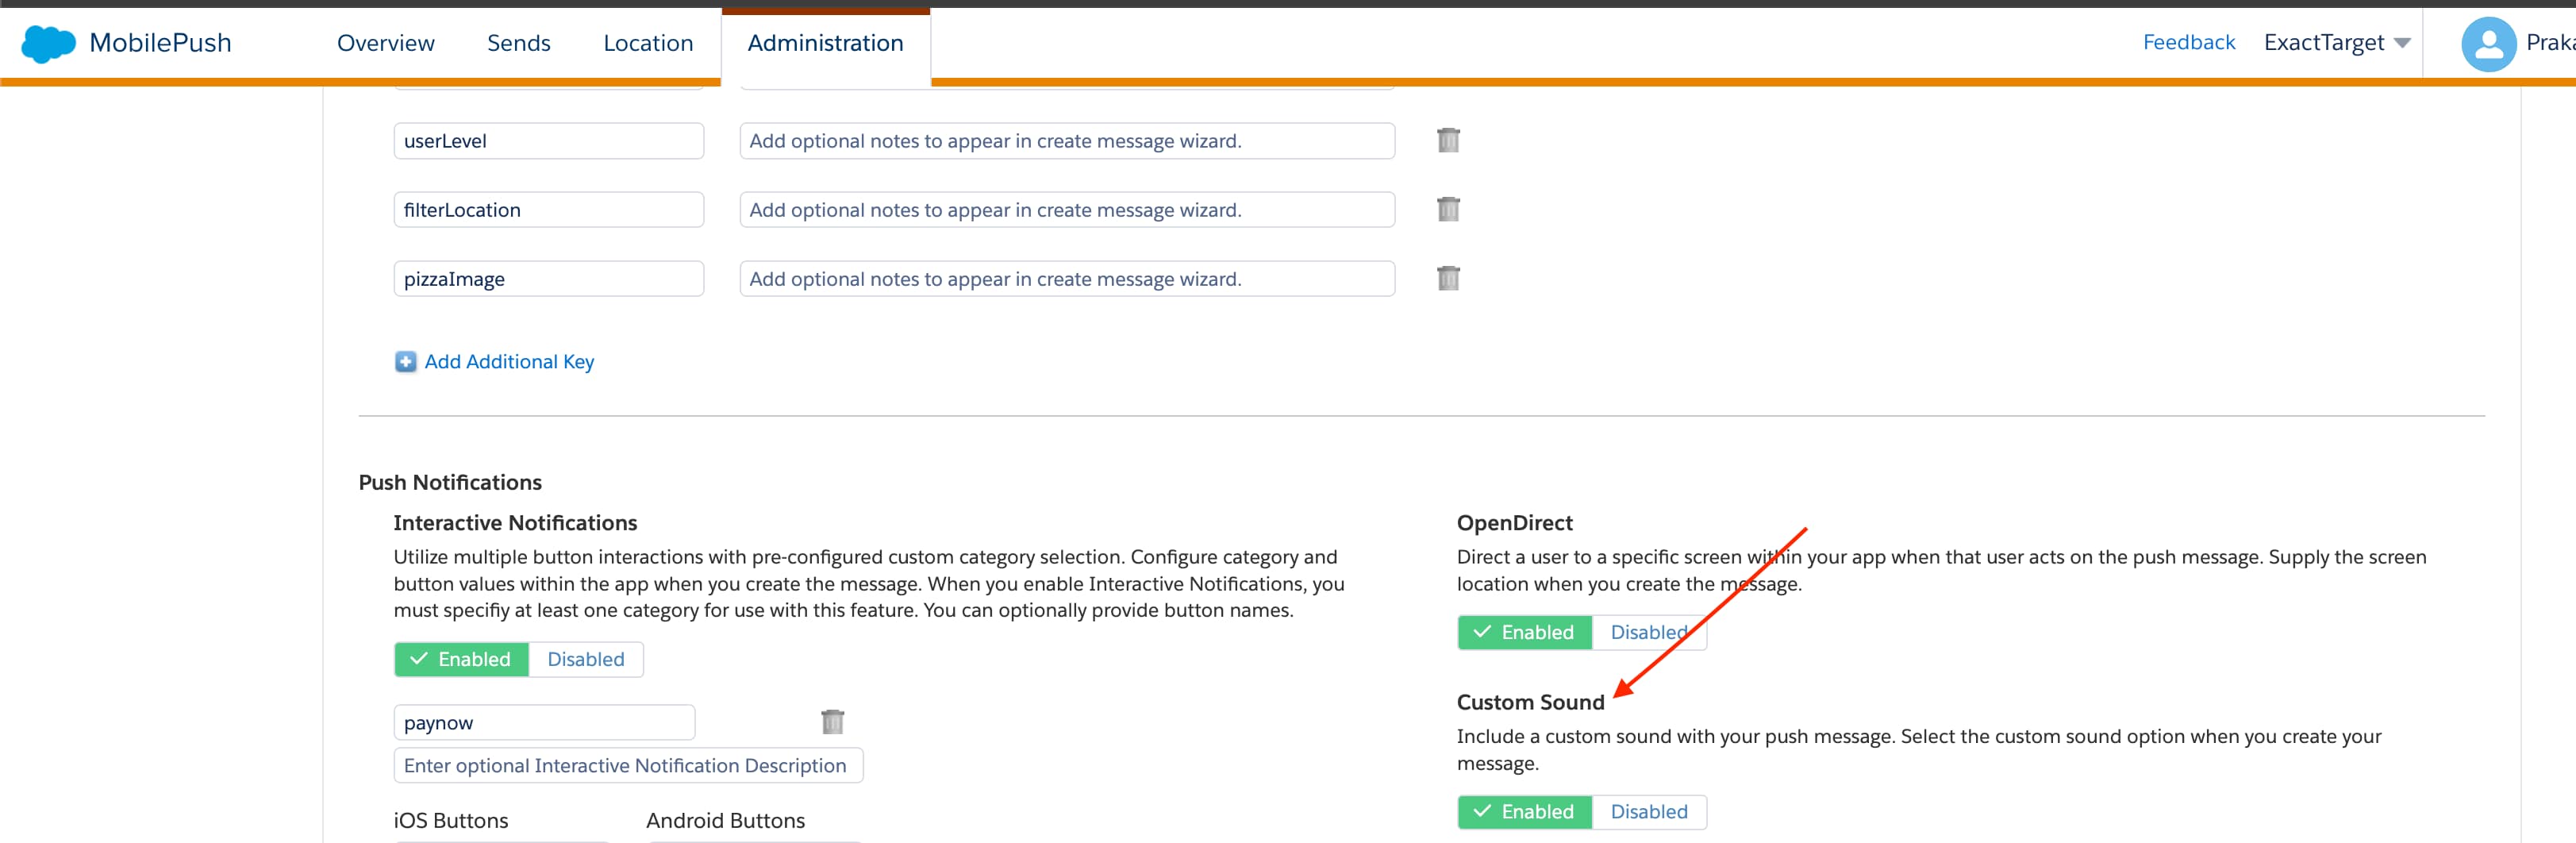
Use interactive notifications to add buttons to push notifications from your mobile app. Engagement sends the category name for these interactive notifications in the message payload.
-
To set up interactive notifications for your app, use the sample code in the Example Implementation section as a reference and adapt it to your specific requirements.
The sample code applies to the
AppDelegate.mdidFinishLaunchingWithOptionsapplication delegate method. The sample code shows how to create a category namedExample. When you send this category with the payload from Engagement, the notification displays in the notification center with buttons for user interaction. -
To check if your action triggered and your app performed the necessary response, examine the push notification’s payload in your push handler. Use the sample code in the Example: Handle Actions section as a reference and adapt it to your specific requirements.
-
After setup, ask your Engagement admin to enable interactive notifications on the MobilePush Administration page.
This code example shows how to customize push notifications for iOS apps that use SDK version 10 or higher.
For version 8 of the SDK, use this code.
For version 7 of the SDK, use this code.
In your push handler, examine the push notification’s payload to see if your action is triggered and if your application performed the action.
This code example shows how to handle actions using version 10 or higher of the SDK.
For version 8.1 of the SDK, use this code.
For version 8.0 of the SDK, use this code.
For version 7 of the SDK, use this code.
Rich notifications include images, videos, titles, and subtitles from the MobilePush app and mutable content. Mutable content can include personalization in the title, subtitle, or body of your message.
- Make sure that your app is built for iOS version 10 .
- Include a service extension for your app that can handle mutable content. For information on adding a service app extension, see Modifying and Presenting Notifications.
- Make sure that your app is registered for push notifications via the MobilePush SDK.
Skip these steps if you’ve already integrated Notification Service Extension during the MobilePush Extension SDK integration.
- Click File > New > Target.
- Select Notification Service Extension.
- Name and save the new extension.
- In your project target’s General settings, confirm that the new extension is listed in the Frameworks, Libraries, and Embedded Content section. If not, add it.
The Notification Target must be signed with the same Xcode Managed Profile as the main project.
This service extension checks for a _mediaUrl element in request.content.userInfo. If found, the extension attempts to download the media from the URL, creates a thumbnail-size version, and then adds the attachment. The service extension also checks for a _mediaAlt element in request.content.userInfo. If found, the service extension uses the element for the body text if there are any problems downloading or creating the media attachment.
A service extension can timeout if it’s unable to download. In this code sample, the service extension delivers the original content with the body text changed to the value in _mediaAlt.
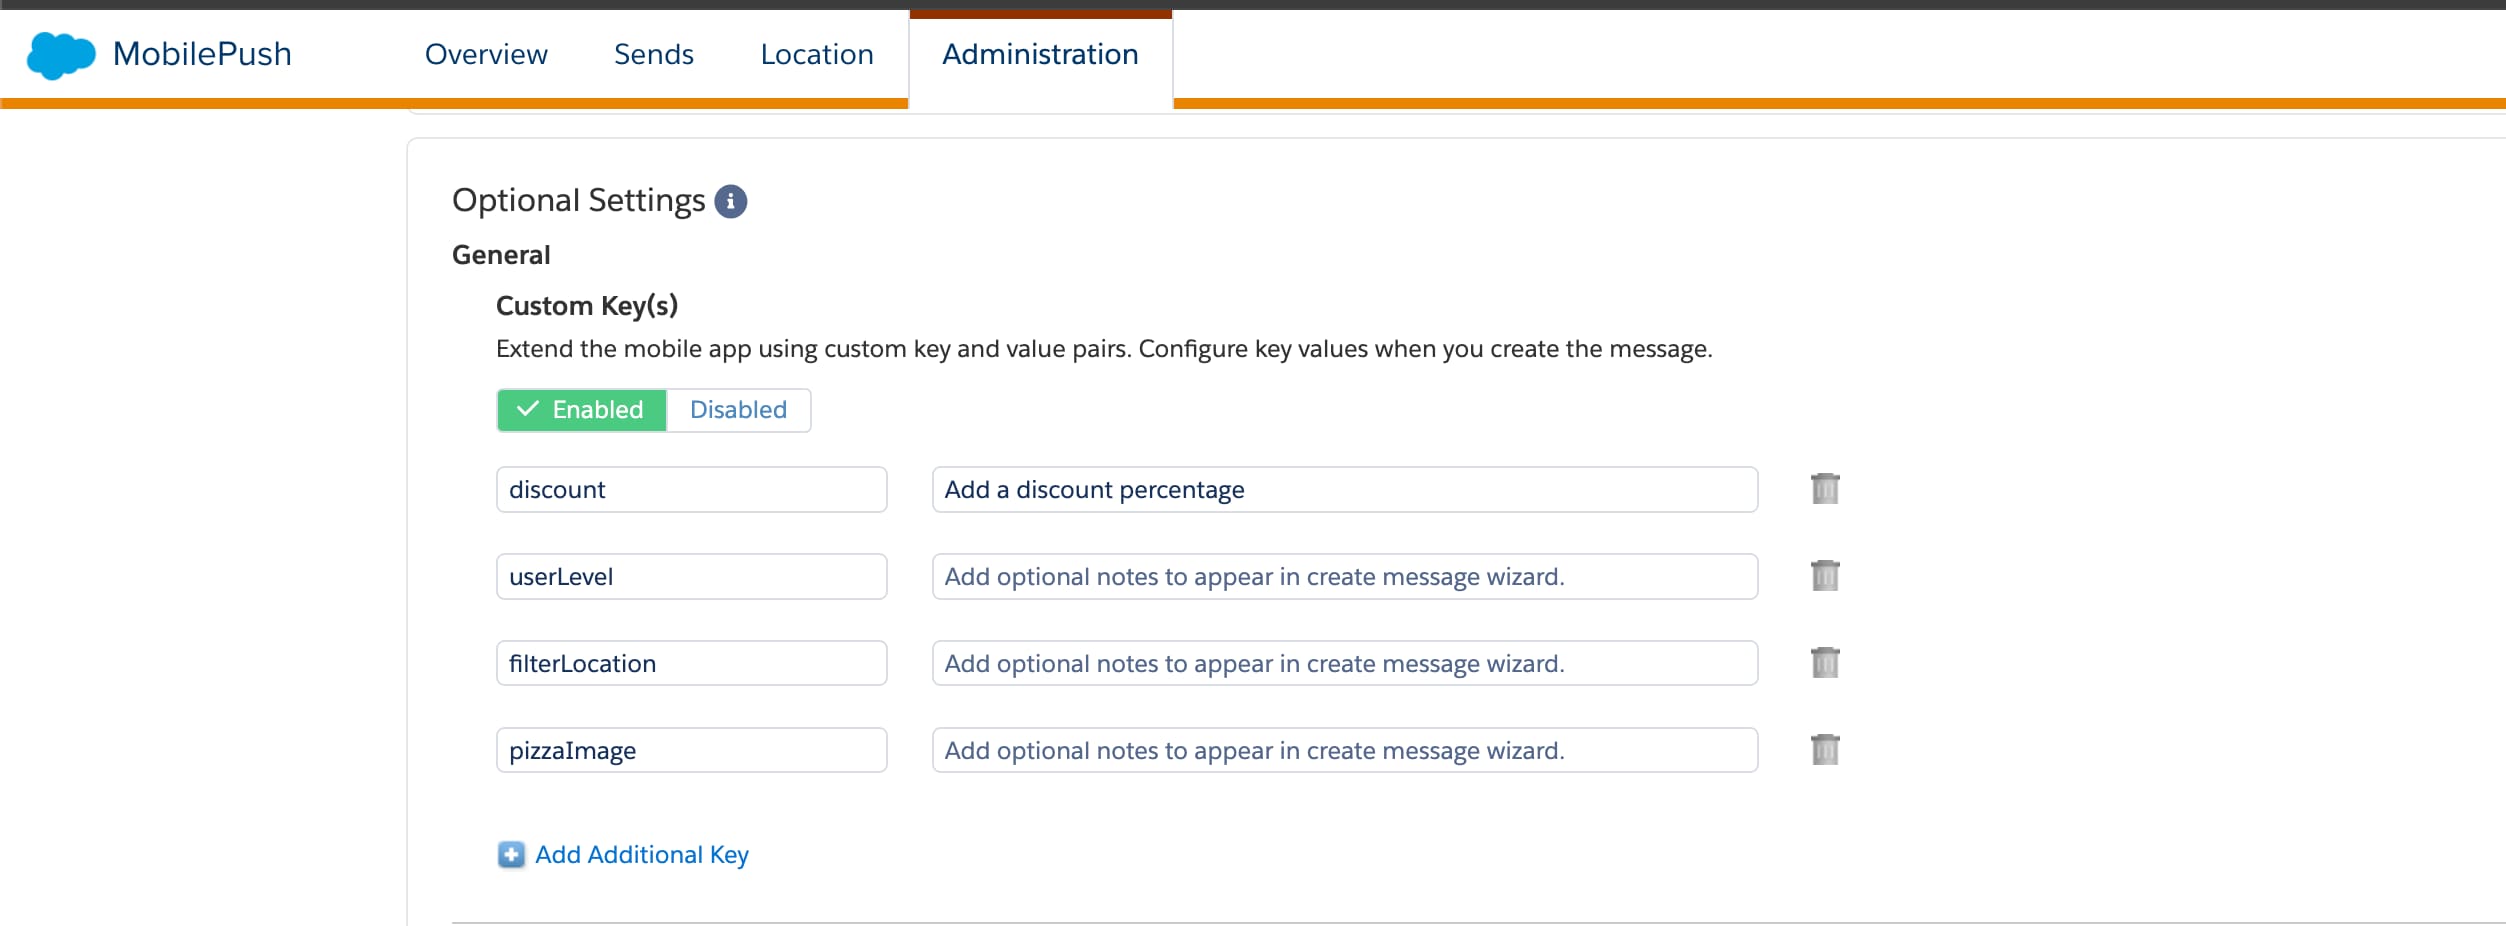
Use custom keys to send extra data along with a push notification. You can use custom keys to add tracking or additional functionality to your app. For example, you can define a custom key that allows a third-party application to provide custom tracking information regarding customer usage on your mobile app. This data can include an ID value used by the app to retrieve additional data or other function.
You must enable this feature in the Administration page on the Engagement UI.
To implement custom key support in your app, extend your push notification handler to extract the push’s userInfo dictionary and the values contained in it.
This code example shows how to handle custom keys using version 10 or higher of the SDK.
For version 9 of the SDK, use this code.
For version 8.1 of the SDK, use this code.
For version 8.0 of the SDK, use this code.
For version 7 of the SDK, use this code.
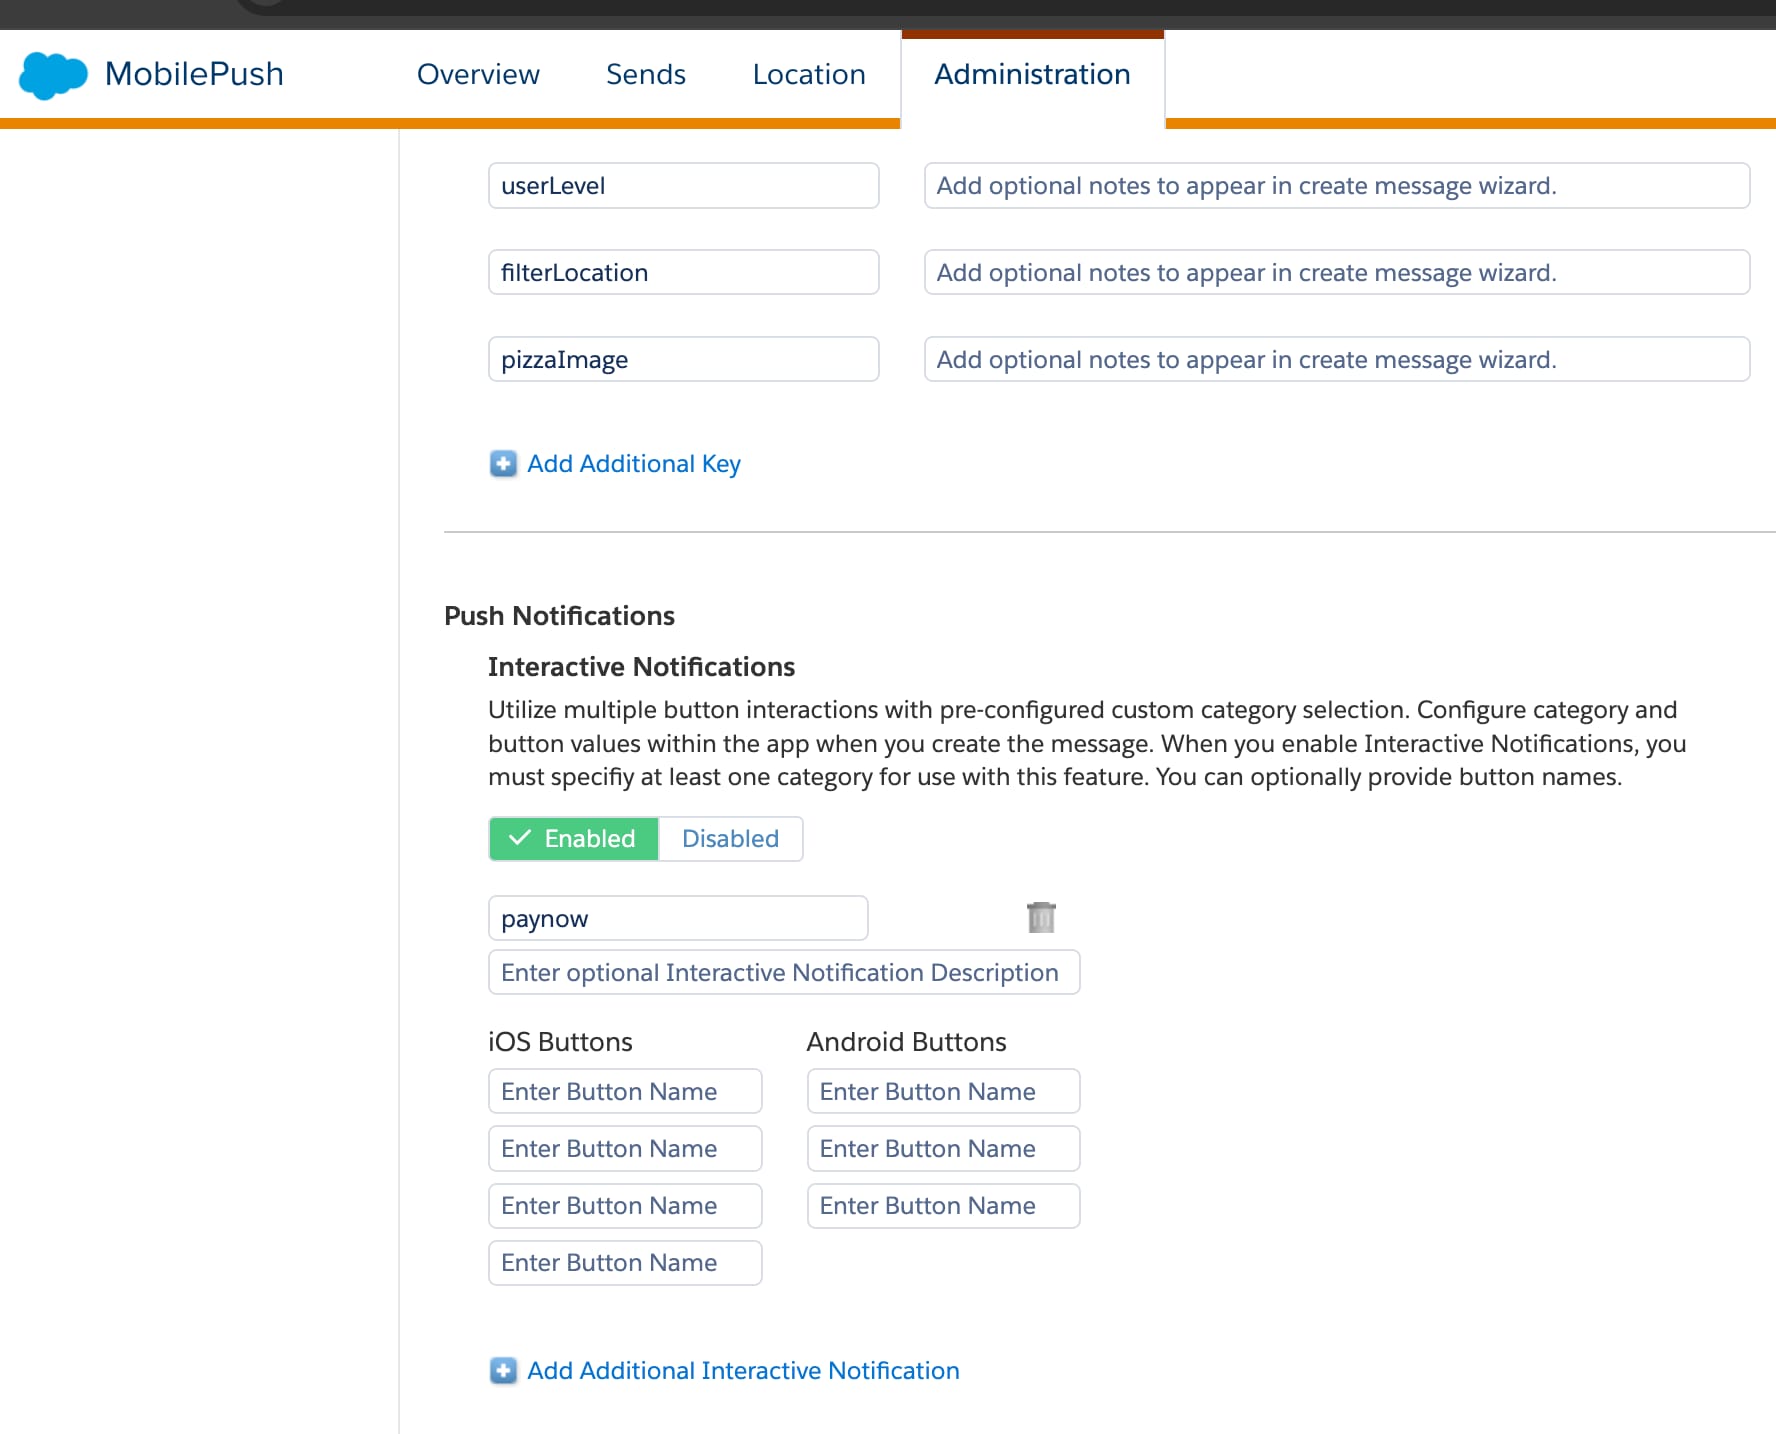
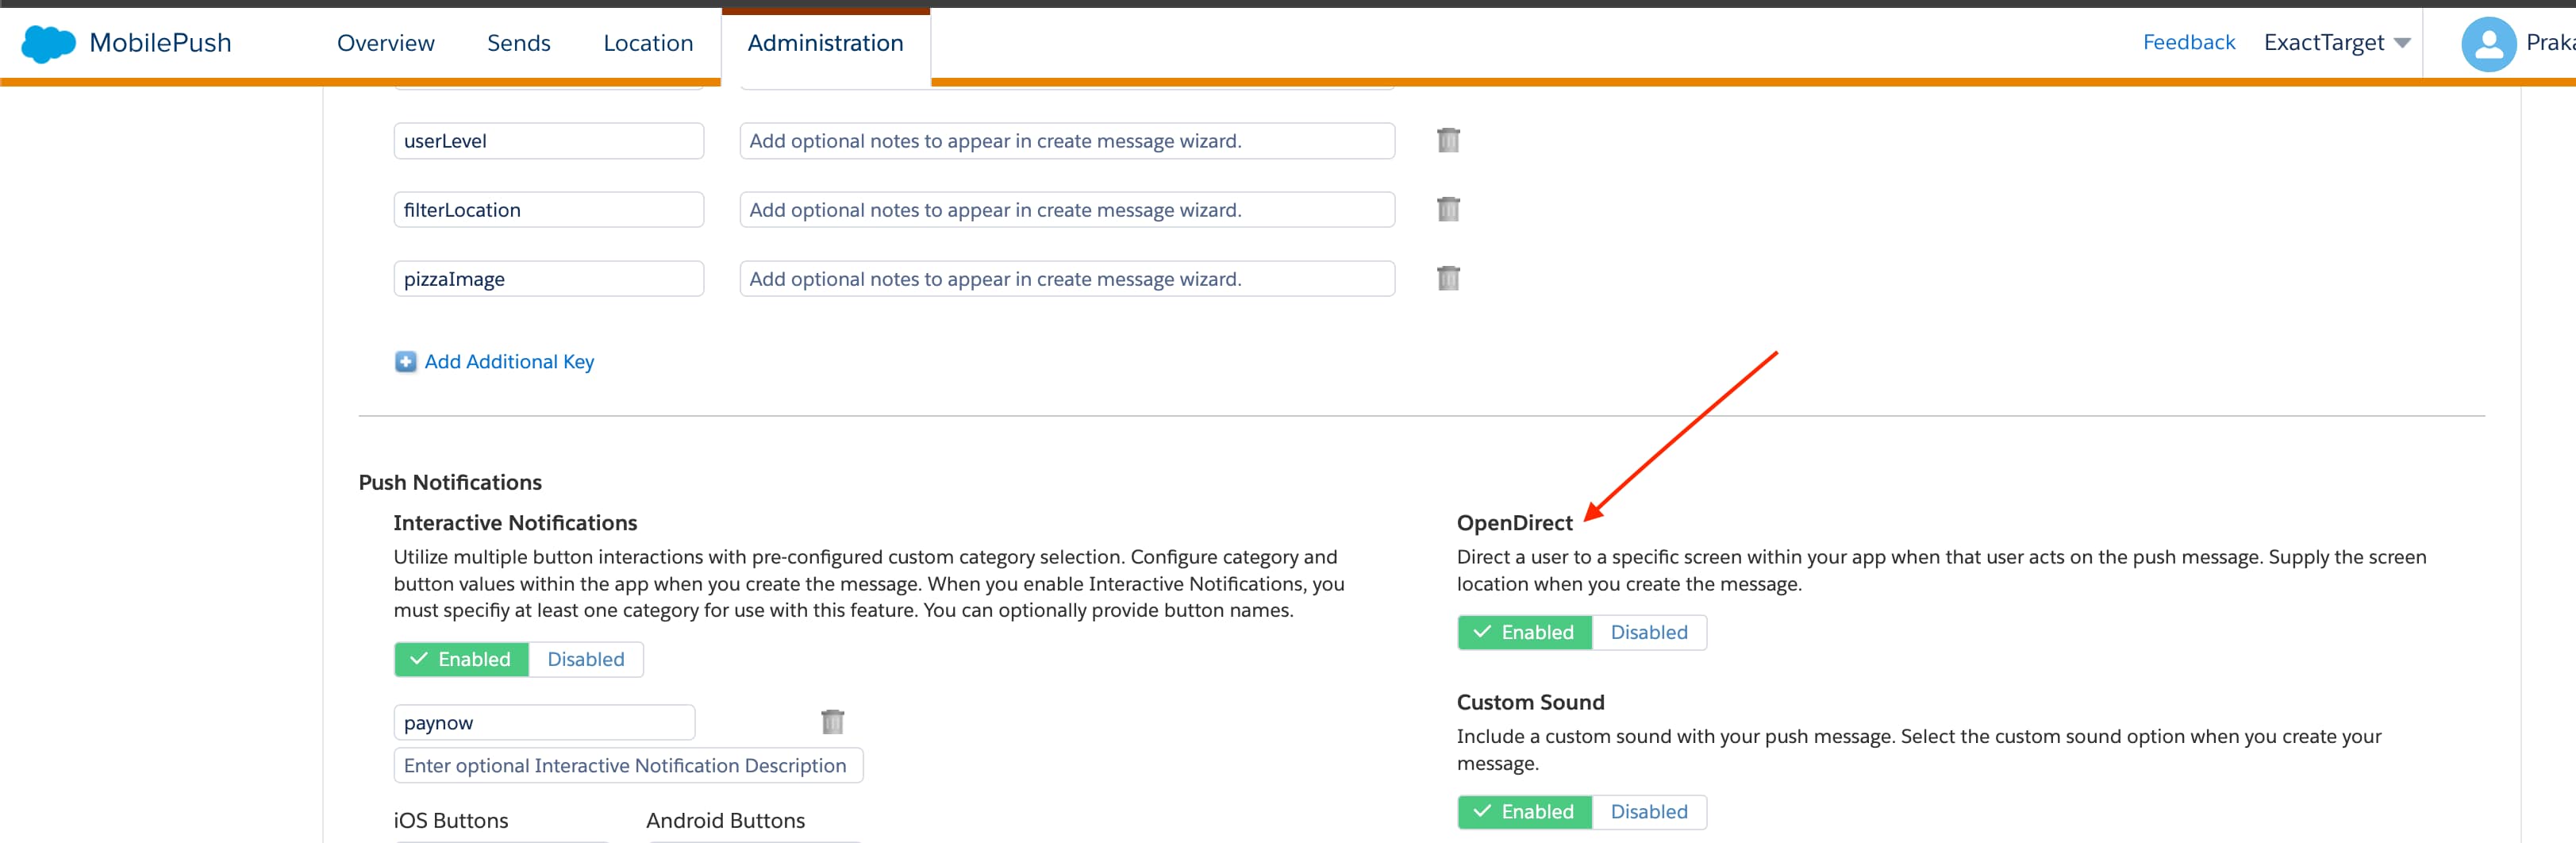
OpenDirect customized push messages contain a URL in the payload. The MobilePush SDK can pass this URL to your application to handle. For information about handling URLs from push notifications that use OpenDirect, see Handle URLs.
A marketing admin can enable OpenDirect on the MobilePush Administration page in Marketing Cloud Engagement.
The SDK doesn’t automatically present URLs from these sources:
- CloudPages URLs from push notifications
- OpenDirect URLs from push notifications
- CloudPages URLs from inbox messages using the built-in
UITableViewdelegate
To handle URLs from these sources, follow these steps.
- Implement the
URLHandlingDelegate(v8.x) orMarketingCloudSDKURLHandlingDelegate(v7.x) protocol in your app. - Use
setURLHandlingDelegate(v8.x) orsfmc_setURLHandlingDelegate:method to set a delegate for the protocol. - Next, you’re prompted to implement the protocol method
sfmc_handleURL:type:
When an OpenDirect or CloudPages push notification is received, the SDK passes a NSURL value to sfmc_handleURL:type:. This value contains the push notification or inbox message, and includes the URL. A type value also reflects the source of the URL, which is either SFMCURLTypeCloudPages or SFMCURLTypeOpenDirect.
If the development language is Swift, the class that implements the URLHandlingDelegate (in version 8 or later) or MarketingCloudSDKURLHandlingDelegate (in version 7) delegate must be Objective-C compatible. This means that you must prefix the class with @objc and extend NSObject, as shown in this example.
This code example shows how to handle URLs using version 10 or higher of the SDK.
For version 8.1 of the SDK, use this code.
For version 8.0 of the SDK, use this code.
For version 7 of the SDK, use this code.
Starting with version 9.0.0, the MobilePush iOS SDK tracks successful delivery of push notifications to the SDK. To enable this feature, contact your Engagement admin.
For more information, see MobilePush Install, Inactive Devices, Push Delivery Events