Metadata Operations

Metadata Operations

Overview

Say you want to change an existing Apex class or add a custom object to your production org. You first make and test these changes in a scratch org, check for conflicts, and then deploy the changes to another org for your team to access them. This ability to move changes between different Salesforce development environments such as scratch orgs and sandboxes, for various stages of testing before launching into production, is key to Salesforce development. Use these metadata operations to deploy your local changes to an org as a part of your application lifecycle management (ALM) process. With conflict detection turned on, you don’t have to worry about accidentally overwriting others’ changes in the org. You can track changes by easily viewing changes between your local files and your default org at any time. If you’re working in a team, you can retrieve the latest changes in your org to your local Salesforce project.

Retrieve Source

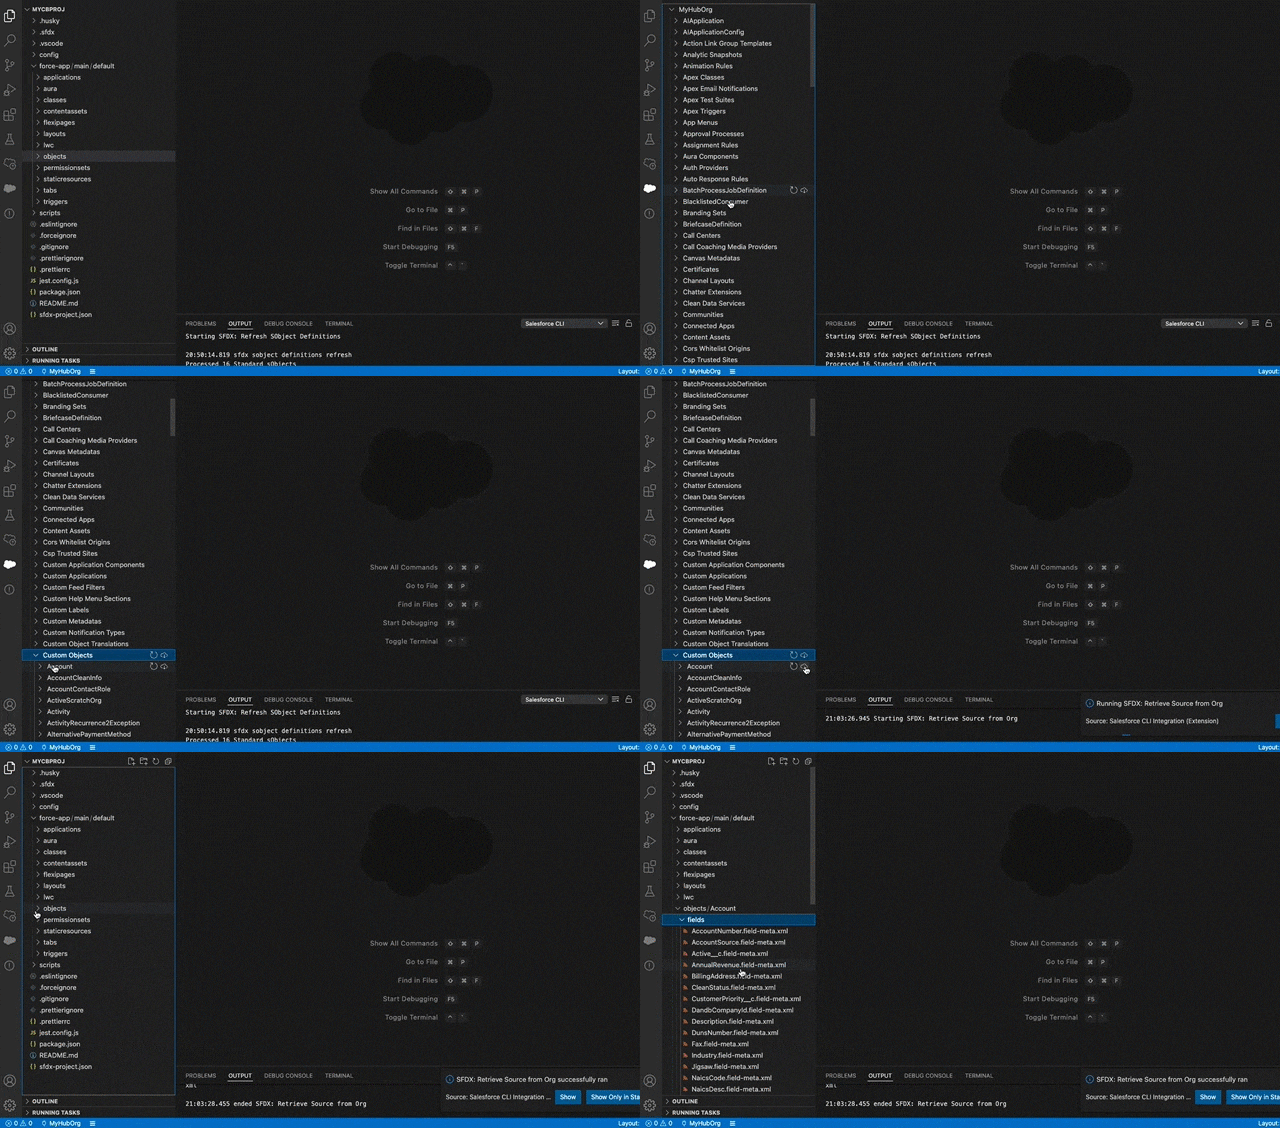
Use the SFDX: Retrieve Source from Org command to bring metadata from the default org into your local project. For non-source-tracked orgs, VS Code doesn’t automatically track changes to your org, so be sure to track the changes you retrieve. Retrieving source from an org overwrites the local versions of the source files.

Retrieve source from org

You can retrieve source for a manifest, source files, directories, or folders:

  • Manifest
    • In VS Code explorer or editor, right-click a manifest file and select SFDX: Retrieve Source in Manifest from Org.
    • With a manifest file open in the editor, open the Command Palette and run SFDX: Retrieve Source in Manifest from Org.
  • Source File or Directory
    • In VS Code explorer, right-click a source file or a directory and select SFDX: Retrieve Source from Org.
    • With a source file open in the editor, right-click in the editing pane and select SFDX: Retrieve This Source from Org.
    • With a source file open in the editor, open the Command Palette and run SFDX: Retrieve This Source from Org.

When you select an item to retrieve source, only the existing nested items in the directory structure are retrieved. For example, if you retrieve source for the classes folder, the Apex classes that currently exist in that directory are retrieved. The command doesn’t retrieve all the Apex classes in the org; it updates only the classes that exist in the folder. To retrieve a new Apex class, add that class (or all Apex classes) to a package.xml file and retrieve the source using the manifest file. You could also use a terminal to run sfdx force:source:retrieve --metadata ApexClass:YourApexClass.

You can also use Org Browser to retrieve source.

The project structure after you retrieve source:

your-app
├── README.md
├── sfdx-project.json
├── .sfdx
├── .vscode
│   ├── extensions.json
│   └── settings.json
├── force-app
|   └── main
|       └── default
|           ├── aura
|           ├── classes
|           └── objects
└── manifest
    └── package.xml

Deploy Source

Use the SFDX: Deploy Source to Org command to deploy metadata from your local project to your default org. When you deploy the code changes, the local version of the source files overwrites the metadata in your org. You can enable detecting conflicts between the local metadata and the org. See Detect Conflicts.

Deploy source to org

You can deploy source of a manifest, source files, directories, or folders:

  • Manifest
    • In VS Code explorer or editor, right-click a manifest file and select SFDX: Deploy Source in Manifest in Org.
    • With a manifest file open in the editor, open the Command Palette and run SFDX: Deploy Source in Manifest in Org.
  • Source File or Directory
  • In VS Code explorer, right-click single or multi-selected source files or directories and select SFDX: Deploy Source to Org.
  • With a source file open in the editor, right-click in the editing pane and select SFDX: Deploy This Source File to Org.
  • With a source file open in the editor, open the Command Palette and run SFDX: Deploy This Source File to Org.

Source Diff

The Source Diff command makes it easier to visualize the changes between files in your local project and the metadata in your org. You can look at diffs for an individual file or directory. Right-click on a file or folder and run SFDX: Diff File Against Org or SFDX: Diff Folder Against Org.

Source Diff command

View individual file diffs side by side. A file doesn’t show up in the list of diffs if it doesn’t exist locally or in the org.

Delete Source

You can delete source from your project and from your org.

  • In the VS Code explorer, right-click a source file or a directory and select SFDX: Delete from Project and Org.
  • With a source file open in the editor, right-click the file and select SFDX: Delete This from Project and Org.
  • With a source file open in the editor, open the Command Palette and run SFDX: Delete This from Project and Org.

Rename Component

You can rename a component and all the files (including test files for LWC components) associated with it using the SFDX: Rename Component command. The command prevents renaming if the new component name doesn’t follow required naming conventions. For Lightning Web Components, the command automatically auto-revises letter case if needed.

Renaming a component in a project doesn’t delete the component from the org. To rename components in your org:

  1. Log in to your org and delete the component with the older name.
  2. Rename the components in your project.
  3. Deploy the components with the updated name.

Feedback or Bugs | Edit this Article