Salesforce CMS opens up multiple ways and channels for you to surface all the varieties of your authored content — be it marketing materials, news articles or blog posts. One such quick and easy way is to use our Delivery APIs in a Spring Boot web application deployed on Heroku. Read more to find out how this can be done in few simple steps.
Salesforce CMS and headless content delivery
With content authored in Salesforce CMS, you can leverage the powerful Experience Builder to spin up rich and beautiful experiences for your customers. But what if you want to re-use the same content on a web-app or static site that you’ve hosted on a separate cloud platform?
We’ve got you covered. Salesforce CMS is a hybrid CMS, meaning your teams can create content in a central location and syndicate it to any digital touchpoint, whether it’s an experience powered by Salesforce or another system. Which means that with the help of the Headless Content Delivery APIs, content created once can be re-used across multiple channels. These can be anything ranging from Marketing Cloud, LEX apps to cloud platforms like Heroku or AWS Elastic Beanstalk to name a few!
In this blog, we’re going to see how to quickly and easily create a simple Spring Boot web application that re-uses content from Salesforce CMS using our headless APIs, and also get it up and running on Heroku.
Prerequisites:
- A Salesforce account with the CMS App enabled
- A Heroku account
- ‘Customize Application’ or ‘Modify All Data’ user permissions (to create Content Type)
Creating content in Salesforce CMS
Creating your blog content type
Content type defines the structure of content you create. These content types are global and available across workspaces. You can create content based on these types after they’re created. Until now, we’ve had to go and make an explicit POST call the Tooling API endpoint with a JSON payload to get a custom content type created.
Well, not anymore! Thanks to the lovely folks at Salesforce Labs, we now have an awesome AppExchange package called CMS Content Type Creator that makes building out your Content Type a breeze! So let’s get your blog content type created.

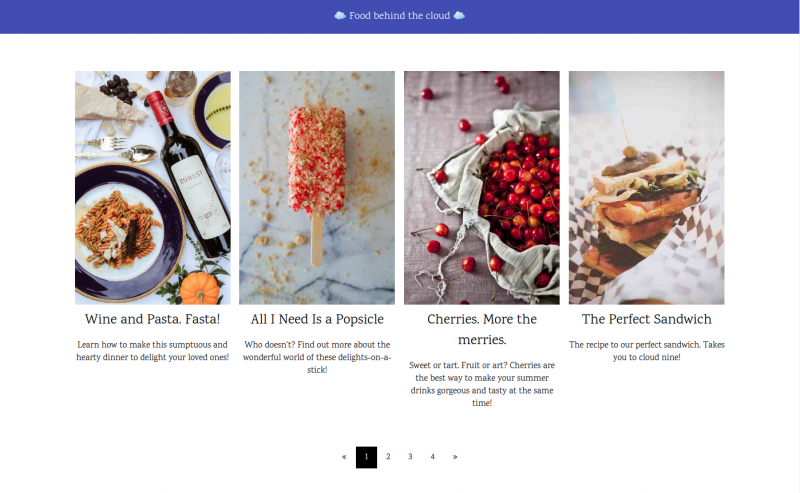
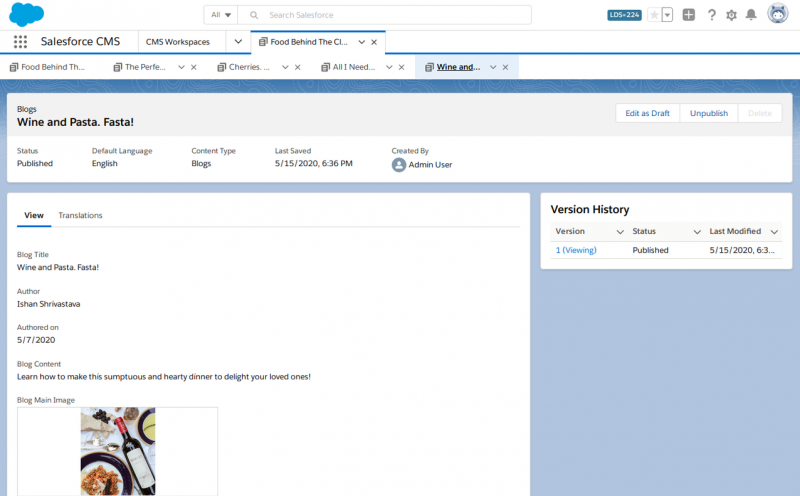
Authoring content
Follow this blog post to create content in a workspace, add channel, contributors and translation.
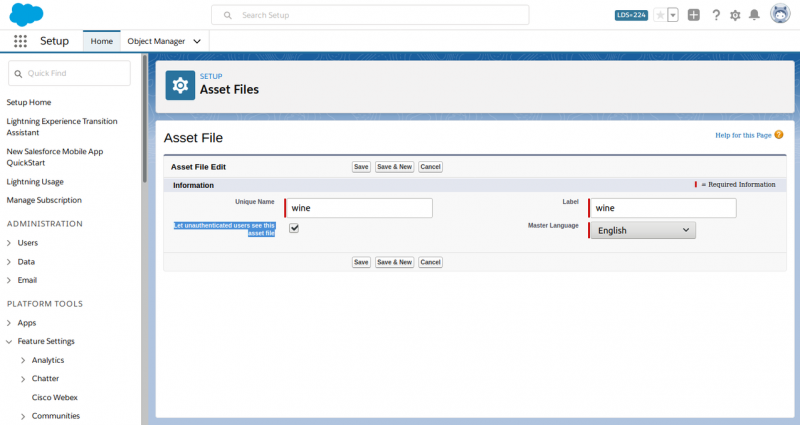
- Note: Since we want the images we use in blog articles to be available to public users on our deployed Heroku app, make sure to make the image asset files accessible to unauthenticated users. You can do this by going to Setup > Asset Files > Edit and enable the “Let unauthenticated users see this asset file” setting for your image asset files.
Configure a channel for your CMS Workspace
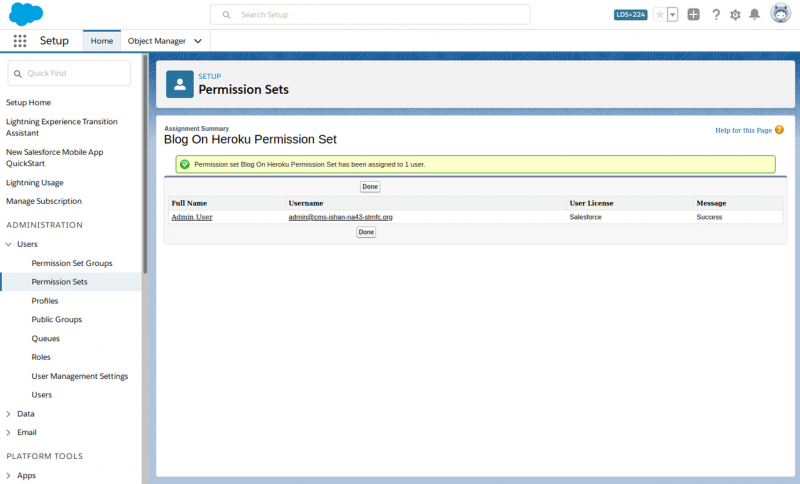
The content we’ve authored and published can be accessed using our headless APIs by configuring a channel for your CMS Workspaces. Channels are basically the end-points where you want your content to be shared to. In our case, we want to syndicate our content to a standalone Heroku app, so we’ll go ahead and create one using a permission set.
- Create a permission set for your Heroku app…

… and assign it to the user you want to be using in your Heroku app.
Click to add an image
- From the Salesforce CMS app, navigate to your CMS Workspace and create a new channel using the created permission set.
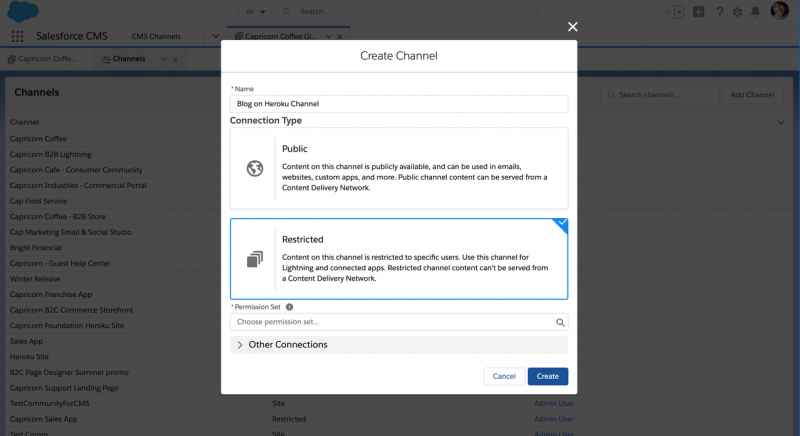
- Channel created! Hang on. We’re almost done with the setup now…
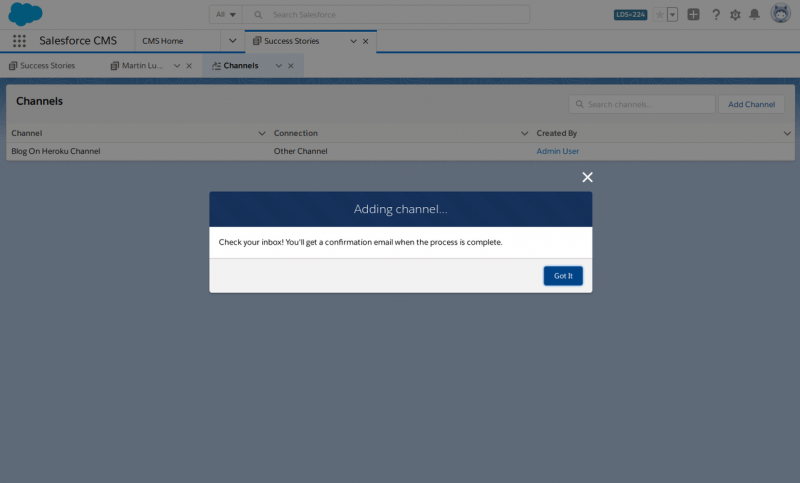
- The only thing remaining now is to take a note of the channelId for the channel we just created. We’ll need this to access our Content Delivery APIs below.
To get the Channel ID, we can use the Managed Content Delivery Channels API

Salesforce CMS Content Delivery APIs
The Content Delivery API enables you to retrieve content from Salesforce CMS and use it to build and deliver custom experiences. You can use the API to help build components in Lightning as well as reuse content from Salesforce CMS in Visualforce pages.
For our case, we’ll be using the API in a completely headless fashion, enabling our lightweight web app to use the Salesforce CMS content directly.
Prerequisites:
- Connected App: We’ll need to create a Connected App for the Springboot app hosted on Heroku to be able to access Salesforce CMS Delivery APIs.
API
The Content Delivery API is read-only with the following signature.
EndPoint
URL
URL parameters
| Param Name (New Only) | Required? | Values | Description | Since |
| managedContentType | YES | String | The developer name of the managed content type. | 48 |
| managedContentIds | NO | List<String> | List of Managed content ids with the max limit as 200 | 48 |
| page | NO | int | An integer specifying a page of items. The default value is 0, which returns the first page | 48 |
| pageSize | NO | int | Specifies the number of items per page. Valid values are from 1 through 250. The default value is 25 | 48 |
| language | NO | String | Specifies the language of the content. | 48 |
includeMetadata |
NO | Boolean | Specifies whether to include metadata in the response (true) or not (false). The default value is false. |
48 |
startDate |
NO | String | Publish start date in ISO 8601 format, for example, 2011-02-25T18:24:31.000Z. | 48 |
endDate |
NO | String | Publish end date in ISO 8601 format, for example, 2011-02-25T18:24:31.000Z | 48 |
You can find more details about the API here.
Note: The Content Delivery EndPoint is available from v48.0
Create your Spring Boot application
Spring Boot is a great framework to get a web application up and running fast! Here’s a quick tutorial to get you started if needed.
In addition to being light, fast and developer friendly, Spring Boot is also a great framework to be used with Heroku to deploy with ease.
Let’s get started on building out our application.
- Create your SpringBootApplication class
SalesforceCmsBlogApplication.java
- Add your Salesforce configuration parameters in the application.properties file.
We’ll be reading these properties into member variables in our Autowired service through the @Value annotation and using them to establish API access with our Salesforce org.
- Define your Blog POJO to encapsulate the CMS Content Type data that you need for your web application.
Blog.java
This is basically a simple encapsulation of the content item that we created in Salesforce CMS. We’ll be binding data in this POJO to our model for rendering in the UI.
- Create the Java service class that will invoke the Salesforce CMS Delivery API to fetch and parse the blog.
-
- Get the API Access Token
-
- Invoke the Salesforce CMS Content Delivery API to fetch the list of “blog” type articles
This is how CmsContentDeliveryService looks in all its “Springy“ glory:
- Write your Controller class to map incoming GET requests…
BlogHomeController.java
As you can see, once we get the blogs data from our contentService, we add that attribute to the model which will then be rendered by the Thymeleaf template engine using the HTML template that we specify.
- And finally, define the HTML template to display the articles…
index.html
We’ve not covered the styling information here as its not strictly of relevance to this blog post. For more details and the code, please check the link to the repository.
Deploying to Heroku
- Login to your Heroku account through the heroku CLI
- Create a new Heroku app
- Push the Spring Boot application to Heroku
Example Code Repo
Summary
This post has shown one of the many ways in which content created in Salesforce CMS can be surfaced in an external app deployed on a platform like Heroku using our Delivery APIs.
The headless nature of Salesforce CMS content makes it flexible to author once, and consume anywhere that meets your needs.
Resources
Previous posts in this series
- Use the CMS App to create content
- Deliver Beautiful and Contextualized Digital Experiences with Salesforce CMS
- Content Curation in Salesforce CMS
- Use Layouts to Unleash the Power of CMS
- Content Delivery API to Extend or Integrate Content
About the author
Ishan Shrivastava
Ishan is SMTS at Salesforce and is based out of Hyderabad, India. You can connect with Ishan at LinkedIn.