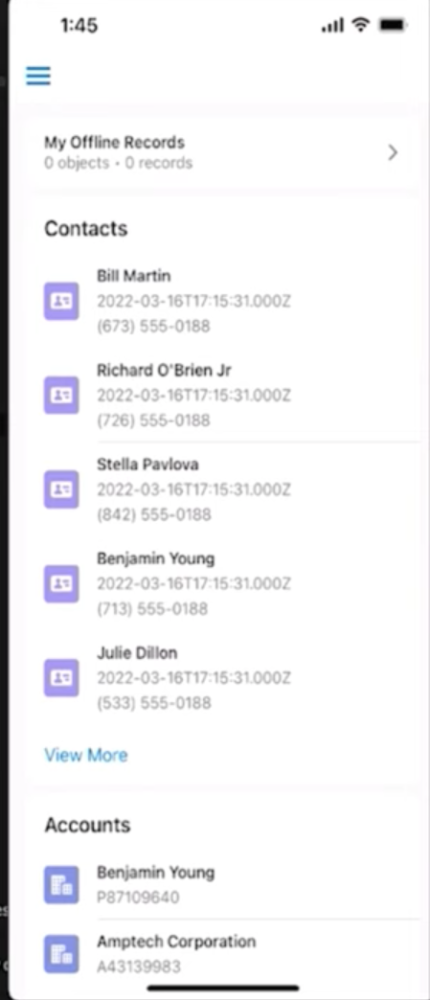
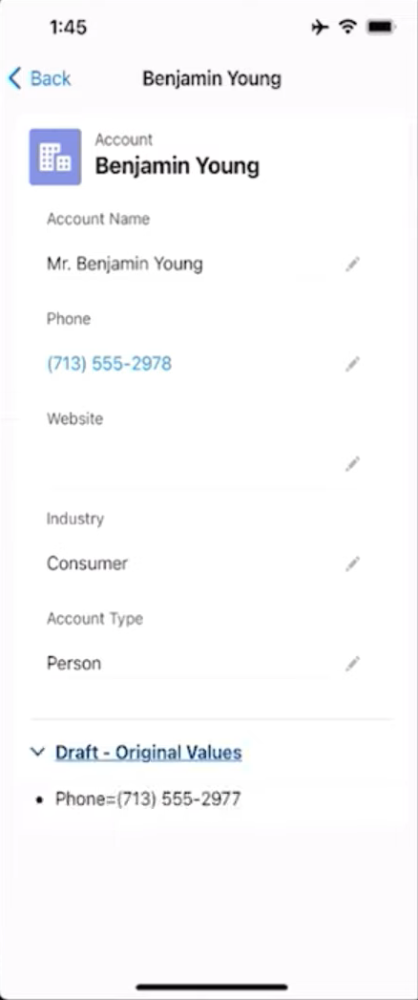
The ability to access your Salesforce records on the fly, regardless of network connectivity, has been a big ticket request for Salesforce Mobile. Say you’re on a train and you need to update your Salesforce records, but there is low or no network connectivity — what do you do? Get frustrated? Not anymore!
We’ve heard you all! In Summer ’23, we made our pro-code focused Salesforce Mobile Offline App generally available. The Offline App is a new, lightweight application built into the Salesforce Mobile App that allows users to access data offline. This is a pro-code offering, through which users can set up Briefcases, Mobile Customization Framework (MCF) landing pages, and Lightning Web Component (LWC) quick actions.
Take a look at the end result.


As a pro-code offering, we understand this requires a bit of configuration for developers to build out the most optimal Offline App user experiences. To help, we built a brand new Offline App Onboarding Wizard!
In this blog post, we discuss how to leverage the new Salesforce Mobile Offline App and corresponding Developer Tools, including the Offline App Onboarding Wizard and Starter Kit.
Let’s dive in!
How does the Onboarding Wizard work?
The Onboarding Wizard is part of an extension library titled Salesforce Mobile Extensions for Visual Studio Code, which is accessible through the Microsoft Visual Studio Code (VSCode) Marketplace. Once downloaded, developers have access to the Onboarding Wizard and can begin Offline App setup.
Let’s walk through how we can do that.
Accessing the Salesforce Mobile Offline App Starter Kit
The Onboarding Wizard is a tool that works alongside what we call the Offline App Developer Starter Kit. This Starter Kit is a GitHub repository that contains a series of components and quick actions already pre-configured for Mobile Offline. Plus, it includes the instructions to adapt and deploy them with the Salesforce CLI. The Starter Kit comes with the ability to conduct in-line debugging using Komaci Static Analysis tools, and real-time mobile previews in Visual Studio Code.
The good news is that this Starter Kit comes packaged with the Onboarding Wizard, so developers won’t have to download it separately or maintain separate directories. After you have downloaded the mobile extensions, simply query the Onboarding Wizard and clone the Starter Kit contents through it.
After this, you are now successfully running a local instance of the starter kit repo. Please do note that for any configurations from this point forward to take effect, you must first connect your Starter Kit instance with your Salesforce Admin UI. Refer to the instructions on how to do this.
Now that we’ve gone through some baseline config steps — let’s take it a notch deeper with a real-world example!
In this example, let’s look at GoodHeartHealth, a fictional healthcare company. They need to update the records of patient session information on the Account object, and the Offline App can help GoodHeartHealth with offline access in order to update these medical records.
This can be achieved in four simple steps!
Step 1: Create a Briefcase record
In order to use any Offline App features, we must first configure a Briefcase record within the Salesforce Setup UI. To do this, we will need a Briefcase record for the healthcare use case in GoodHeartHealth’s org.
Once we have connected our local Starter Kit with the Onboarding Wizard, Salesforce will sync our data behind the scenes. If we have not yet created a Briefcase record, the Onboarding Wizard UI provides us with instructional steps to create it, as seen in the images below.


Step 2: Configure MCF landing pages
Next, we want to configure our Mobile Customization Framework (MCF) landing pages. These landing pages are the first screen that an end user sees when they first access the app, and the experience is completely customizable. For GoodHeartHealth’s use case, we will need to configure a landing page to show Account records. The Onboarding Wizard allows for this!
Using JSON, we can configure the experiences to show object records on the interface that fit our business use case. At this step, the Wizard guides us to a default out-of-the-box file titled landing_page.json that can be customized (see a sample JSON view) via the Wizard.


Step 3: Generate LWC quick actions
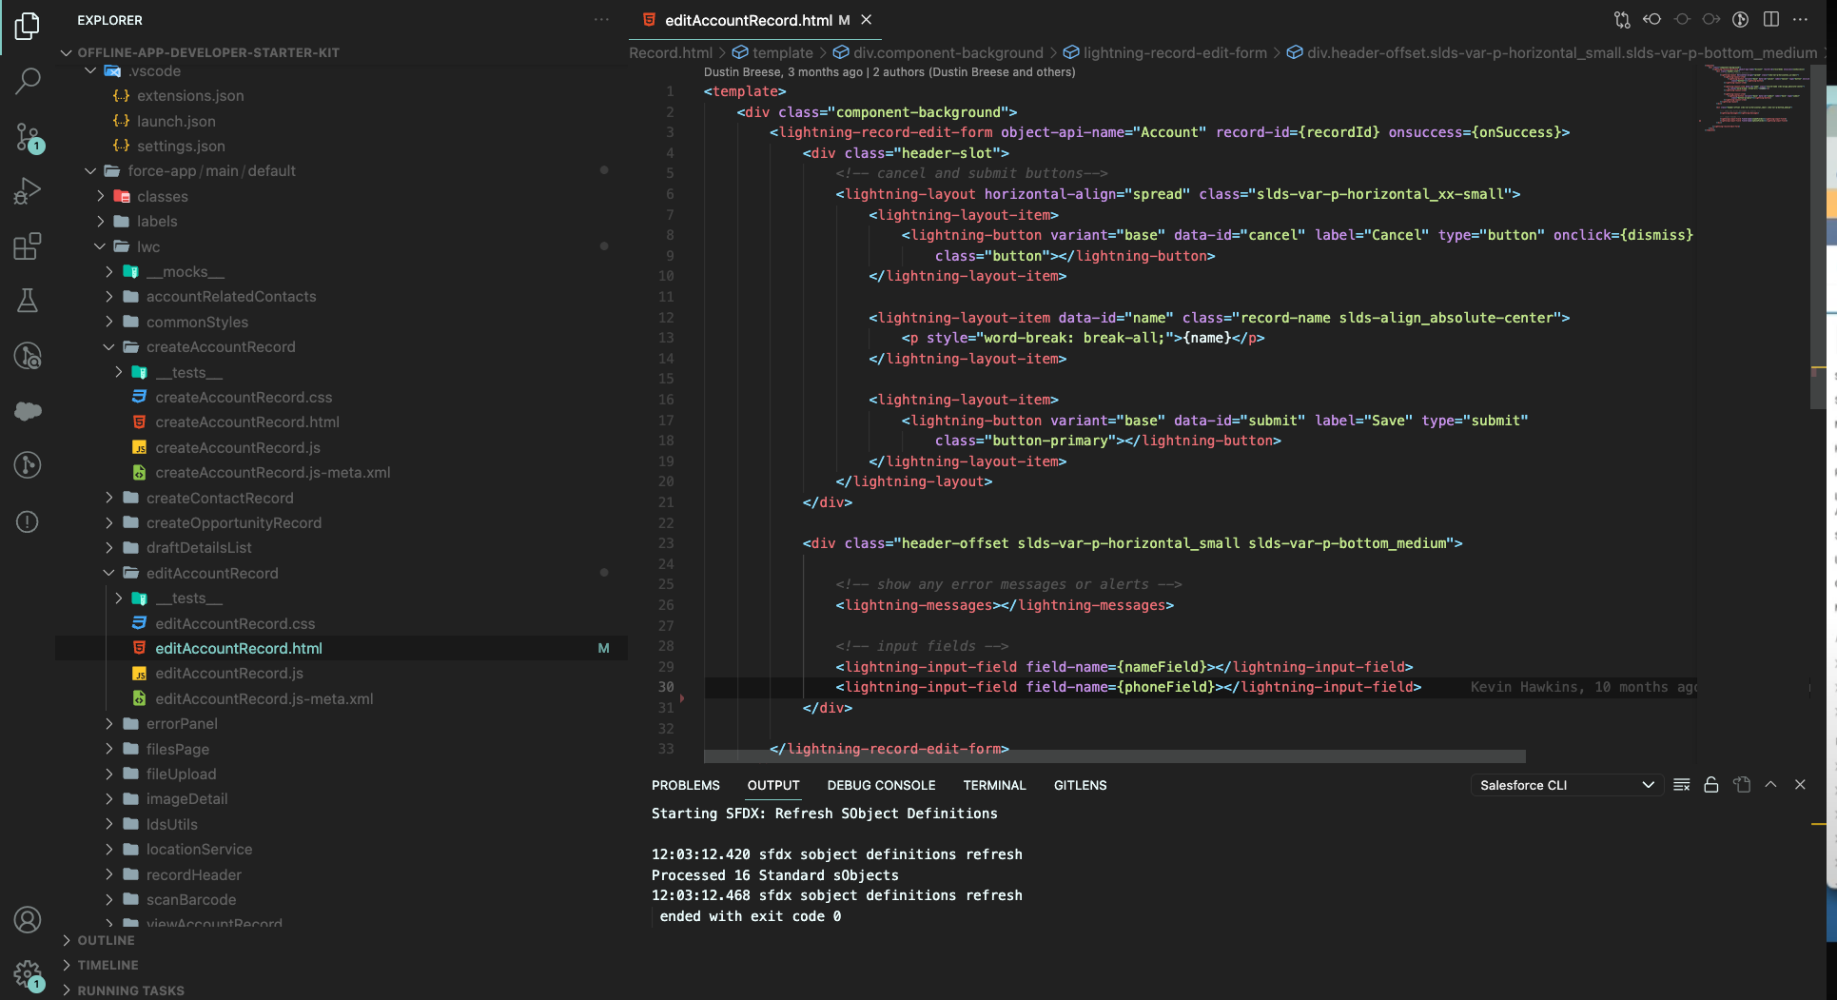
Next, we need to provide the GoodHeartHealth users with the ability to create or edit Account records. For our GoodHeartHealth example, the Account Name and Account Contact fields are the most important for the editAccountRecord LWC quick action. To do this, the Onboarding Wizard navigates us through the ability to customize the HTML, CSS, and JavaScript to show these fields.


Step 4: Deploy Configs to your Salesforce Admin Org
Now we are done! We can preview our changes using the command: SFDX: Preview Component to locally test our configs and then send them upstream. Once we finish our LWC quick action configurations and the changes look good to go, we will be prompted to deploy our configs via an Onboarding Wizard prompt as seen in the images below.
Once we click “Deploy” from the prompt, our configs will be packaged in totality and deployed to our Salesforce Admin Setup UI, where they can be referred to under the corresponding Briefcase record for use in the Offline App.


Validating configs through our Salesforce Offline Test Harness
The fun doesn’t just end there! You can also test your configurations using our Salesforce Mobile Offline Test Harness. This is a lightweight test app that we provide developers to give you the ability to debug your LWCs in an offline state after you have configured them to fit your needs.
The Test Harness app provides an interactive interface along with features, such as:
- Access to the Salesforce Debug Console to capture error, warning, and info based lightning logs
- The ability to attach Chrome and Safari web debuggers to the LWCs that developers have built to ensure that their code is working as expected
So, as a developer, let’s say you have an LWC quick action that you have created using the Onboarding Wizard, or you may be running into some issues with your configs that need debugging. Using the Test Harness, you can ensure that your LWC code is working as expected, and data points from those object records are accurately being presented, so they are ready for showtime in the Salesforce Mobile Offline App.

Conclusion
We hope that you’ve enjoyed this blog post and that you are looking forward to using the Onboarding Wizard capabilities on your LWC for Mobile. To get started:
- Enable Salesforce Mobile App Plus! If you or your team haven’t already done so, get in touch with our Account Executive Team to have the offering enabled in your org.
- Dive in! Check out our Salesforce Mobile Extensions for Visual Studio Code extension to see and test the Onboarding Wizard.
- Personalize it! Try building your Offline App experiences for your business needs.
- Reach out! If you have any questions, comments, or ideas, you can connect with us in the Salesforce Mobile Trailblazer Community.
The fun doesn’t just end there! Do take a look at our Salesforce Mobile Test Harness. This is a lightweight test app that we provide developers to be able to debug your LWCs in an Offline State after you have configured them to fit your needs. These provide
To learn more about our Salesforce Mobile capabilities, check out the following links:
- Salesforce Mobile App Plus (Help Article)
- Onboarding Wizard Developer Documentation (Developer Hub)
- Offline App Developer Starter Kit (GitHub)
About the author

Ashwin Nair is a Product Manager at Salesforce who focuses on Salesforce Mobile. He is currently working on Mobile Platform Experiences and has been in the web and mobile development space for over seven years. Follow him on LinkedIn.