


Force.com Platform Fundamentals
 j
j
No Results
Search Tips:
- Please consider misspellings
- Try different search keywords
Newer Version Available
Try It Out: Add a Metric Component
Finally, let's create a metric component that shows us the average number of days it takes all recruiters to fill a position.
- Click the Components tab.
- Drag a metric component onto the right column of your dashboard and drop it below the table we just created.
- Click the Data Sources tab and find and select the Avg Days to Hire With and Without Travel report.
- Drag the report and drop it onto the metric.
Because metric components consist of a single value, they don't need a title. Instead, we give them a label much like any other field that you see in the platform.
- In the label field, enter Average Days to Hire.
- Click
 on the metric to open the
component editor.
on the metric to open the
component editor. - Click the Component Data tab. Notice that the metric value is autopopulated with the column summary total used in the chart of the source matrix report.
Finally, let's add more conditional highlighting to showcase values.
- Click the Formatting tab and set the following fields.
- For Low Range Color, pick a shade of green.
- For Breakpoint 1, enter 45.
- For Middle Range Color, leave the shade of yellow selected.
- For Breakpoint 2, enter 75.
- For High Range Color, pick a shade of red.
- Click OK.
Beyond the Basics
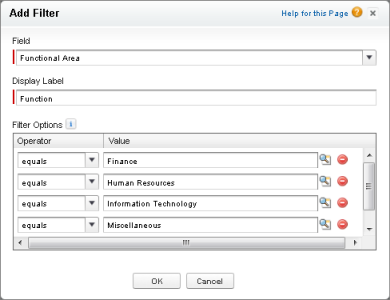
Did you know you can filter components across the dashboard for multiple views of data?
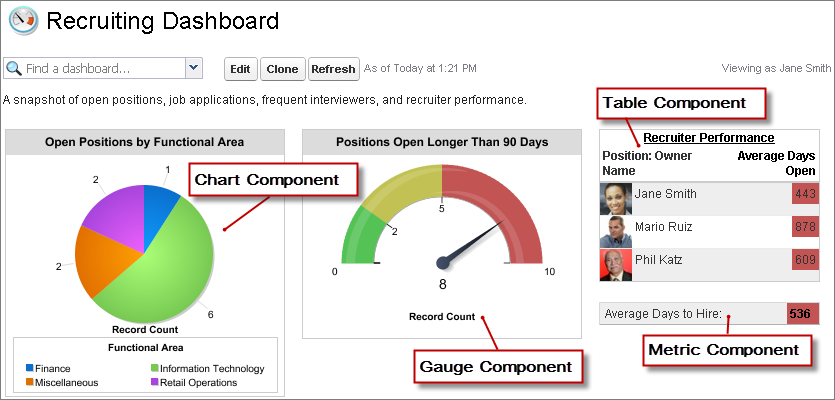
We've now got a simple, four-component dashboard for our Recruiting app! (Your dashboard might look slightly different.) Let's save our dashboard.
- Click Close, then click Save & Close. You can also click Save if you want to update the title or description, or change the folder.
If you click the Home tab, you can add the dashboard's first row to your home page. Be sure to add the dashboard section to your Home tab layout and then select the dashboard you want to appear in that section: the Recruiting Dashboard you just created.
- From Setup, click .
- Select Dashboard Snapshot, and click Next.
- Leave the component in their default order, and click Save.
- On the Home tab, click Customize Page in the upper right corner of the Dashboard component.
- Select Recruiting Dashboard from the Dashboard Snapshot drop-down list.
- Click Save.
And because we saved the dashboard in a public folder, any user can add it to his or her Home tab, too.
As you can see, once we created the reports for our Recruiting app, adding them to a dashboard was a piece of cake. It's so easy, that we'll leave the remainder of the components as an exercise for you to try on your own—see how close you can come to recreating A Sample Recruiting Dashboard.