Force.com Platform Fundamentals
 j
j
No Results
Search Tips:
- Please consider misspellings
- Try different search keywords
Newer Version Available
Try It Out: Define the Positions Tab
To create a custom tab for our Position object, we're going to use the New Custom Object Tab wizard that was so helpfully launched for us when we clicked Save after defining the object. However, in case you forgot to select the Launch New Custom Tab Wizard after saving this custom object option or if you're coming back to work that you previously saved, have no fear! There's another way to launch the wizard.
- From Setup, click .
- In the Custom Object tabs area, click New.
Easy. Now that we're all on the same page, let's get started working through the wizard.
- In the Object drop-down list, select Position.
If you launched the wizard directly after defining the custom object, the Position object is automatically selected for you.
- Click the Tab Style
 icon
to launch the Tab Style Selector as shown in the following screenshot.
icon
to launch the Tab Style Selector as shown in the following screenshot.
Every object that appears as a tab must have a unique color scheme and icon. This color scheme is what identifies the object, not only on its tab but also in different places in the user interface, such as in related lists and search results.
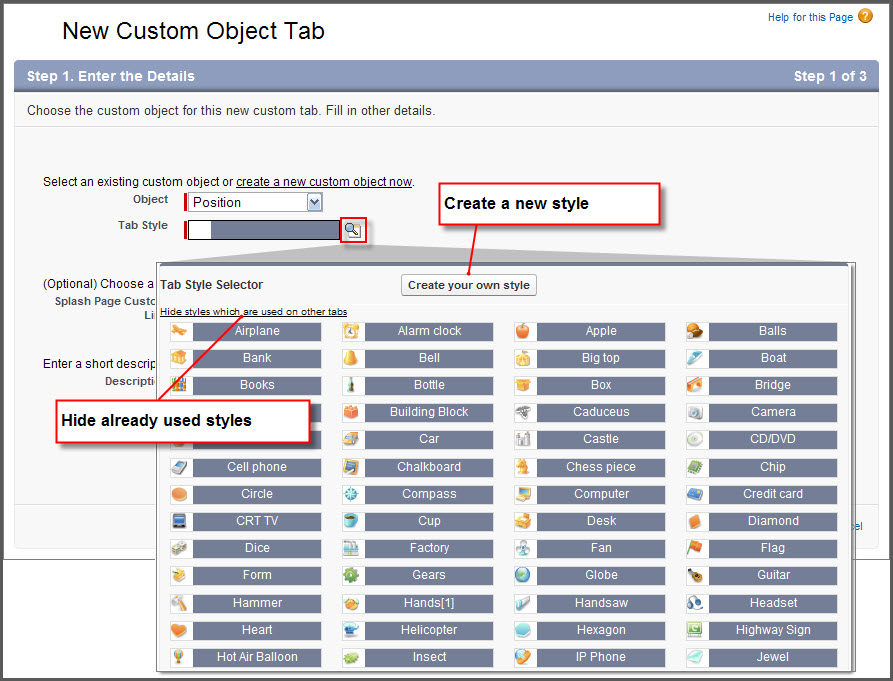
In the Tab Style Selector, you can choose a predefined color and icon or you can create your own. To keep things simple, we're going to select an existing style.
- Click the Hide values which are used on other tabs link to make sure you choose a unique style.
- Click any colored box to choose a color scheme and icon.
Leave the Splash Page Custom Link drop-down list set to --None--. We'll learn more about custom links in Moving Beyond Point-and-Click App Development.
- In the Description field, enter A tab and color scheme for the Position custom object.
- Click Next.
- Click Next again to accept the default user profile visibility.
Just as we controlled access to our Recruiting app by selecting user profiles in the New Custom App wizard, we can also control access to our Positions tab by selecting user profiles here. We'll learn more about user profiles and what they do in Securing and Sharing Data. For now, just know that accepting the defaults will make the tab visible to all users.
- Deselect all of the Include Tab checkboxes except the one for our Recruiting app.
In performing this step, we're providing access to the Positions tab only when someone has access to our Recruiting app. Unless an employee is interested in recruiting, he or she probably doesn't need to see this tab.
- Select the Append tab to users' existing personal customizations checkbox.
If you don't select this option, any users who have personalized their tab display will not immediately see the Positions tab. Also, if you've already created a new tab and didn't turn this option on, you have to first delete the existing tab and then recreate it with this option turned on to automatically push the tab to existing users. What a pain! Do yourself a favor and just always keep this option selected.
- Click Save.
You'll notice when the page refreshes that the Positions tab has automatically been added next to the Home tab at the top of the page.