


Force.com Platform Fundamentals
 j
j
No Results
Search Tips:
- Please consider misspellings
- Try different search keywords
Try It Out: Create a Recruiting Reports Folder
On the Reports tab, you see recently viewed reports and dashboards organized in report or dashboard folders. You can quickly browse the Folders pane or search what you’re looking for. To see all items, or only reports for example, you can filter the list view. Every organization, by default, has standard folders, some that contain report templates.
Unfiled Public Reports is a standard folder all users can access. As an administrator, you can store reports in that folder to share with everyone in your organization. You can make any other folder public, by sharing it with all users. Personal folders (also standard folders) such as Personal Custom Reports and Personal Dashboards are an exception. They contain reports or dashboards private to each user and can’t be accessed by others.
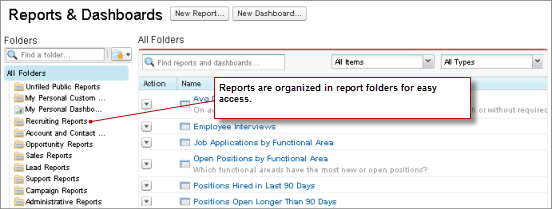
To let users access your reports, make the folder that stores the reports accessible to them. Let's create a folder to organize reports that your users can find easily.
- In the Reports tab, click
 next to the
Folders pane and choose New Report Folder.
next to the
Folders pane and choose New Report Folder. - In the Report Folder Label field, enter Recruiting Reports. Folder Unique Name autopopulates with Recruiting_Reports. Leave this default value.
- Click Save.
- Next to the Recruiting Reports folder, click
 and
select Share.
and
select Share.
You can share all of the contents of a report folder by selecting one of the options at the top of the dialog: Users, Roles, Roles and Subordinates, or Public Groups. We want everyone at Universal Containers to be able to see, but not change, the reports in this folder.
- Click Roles and Subordinates.
- Next to CEO, click Share.
- Make sure that the level selected in the Access column is Viewer. This allows all users in your company to view this folder and the reports in it, but allows only administrators to modify the reports inside the folder or add new reports to it.
- Click Done to save our settings, and then click Close.
Great—we're now ready to create our first report.