Visualforce Developer’s Guide
 j
j
No Results
Search Tips:
- Please consider misspellings
- Try different search keywords
Newer Version Available
Adding Markers to a Map
Use the <apex:mapMarker> component to create
location markers on a map that’s created by an <apex:map> component.
For each marker that you want to place on a map, add an <apex:mapMarker> component as a child of the associated <apex:map>. Each marker represents a specific location, which you set with the position attribute. You can optionally add a title to provide text to display when the pointer hovers over the marker.
You can add up to 100 markers to a map. Use an <apex:repeat> iteration component to add multiple markers from a collection or list.
The position attribute defines the point on the map to
place the marker. You can provide position values in
several formats.
- A string that represents an address. For example, "1 Market Street, San Francisco, CA". The address is automatically geocoded to determine its actual latitude and longitude.
- A string that represents a JSON object with latitude and longitude attributes that specify location coordinates. For example, "{latitude: 37.794, longitude: -122.395}".
- An Apex map object of type Map<String, Double>, with latitude and longitude keys to specify location coordinates.
Here’s a page that shows a list of contacts for an
account, centered on the account’s
address.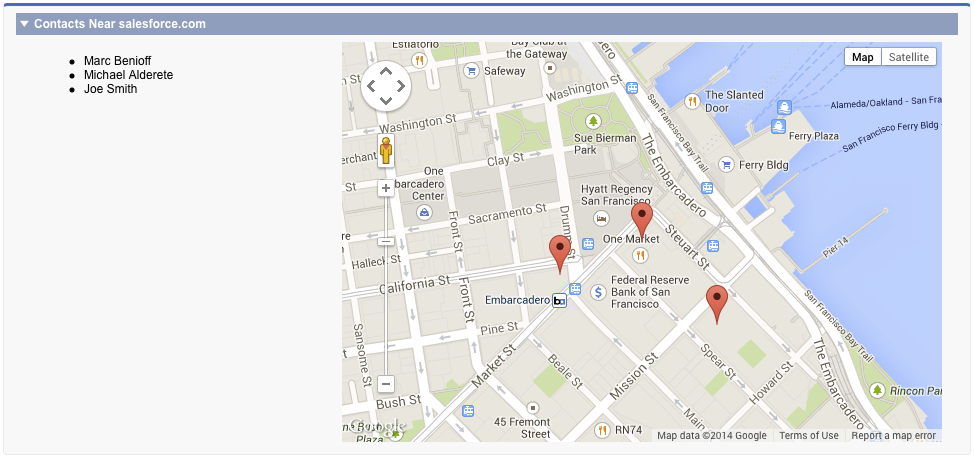
1<apex:page standardController="Account">
2
3  <!-- This page must be accessed with an Account Id in the URL. For example:
4       https://<salesforceInstance>/apex/NearbyContacts?id=001D000000JRBet -->
5
6  <apex:pageBlock >
7    <apex:pageBlockSection title="Contacts For {! Account.Name }">
8
9     <apex:dataList value="{! Account.Contacts }" var="contact">
10       <apex:outputText value="{! contact.Name }" />
11     </apex:dataList>
12
13  <apex:map width="600px" height="400px" mapType="roadmap"
14    center="{!Account.BillingStreet},{!Account.BillingCity},{!Account.BillingState}">
15
16    <apex:repeat value="{! Account.Contacts }" var="contact">
17    <apex:mapMarker title="{! contact.Name }"
18       position="{!contact.MailingStreet},{!contact.MailingCity},{!contact.MailingState}"
19    />
20    </apex:repeat>
21
22  </apex:map>
23
24    </apex:pageBlockSection>
25  </apex:pageBlock>
26
27</apex:page>You should notice several aspects of the preceding example.
- The center and position attributes are passed as a Visualforce expression that concatenates address elements to provide an address string that can be geocoded.
- Because this page uses geocoding for the addresses, it displays only the first nine contacts. (The center attribute of <apex:map> uses one geocoding lookup as part of the 10 allowed.)