Force.com IDE Developer Guide
 j
jQuickstart: Explore the Force.com IDE
- Create a project.
- Create an Apex class and trigger that populates the custom field with text.
- Add a unit test to test the method.
1. Create a Project
The following steps create an Eclipse project and connect it to the home org (the org associated with the project).
- Select .
- Enter the following information and click Next:
For details on these settings, see Project Properties.
Field Value Project Name Enter a name for your project. Username Enter the username you use to log in to the org associated with this project (home org). The username must have the “Modify All Data” permission. Password Enter the password for the specified username. Security Token If you are using a security token, enter the value here. Environment Choose the appropriate environment for your connection (Developer Edition or Sandbox). Do not change endpoint Leave this option unchecked. Timeout (sec) Set to a value between 3 and 600 seconds. Proxy Settings If you connect through a proxy, click the Proxy Settings link to open the Network Connections dialog. - On the Project Contents page, choose Apex and Visualforce.
- To create the project, click Finish, connect the project to the associated org, and copy components from the home org into the project in the appropriate folders.
Now that you have created a project, when you edit and save items in the project, the edits are saved to the server. (If the items fail to compile, they are not saved.)
2. Create Apex Components
The following steps create an Apex class and trigger to pre-populate a field on the Accounts tab.
Create a class that populates the Hello field on the Accounts tab with the word “World”:
- In Eclipse, right-click on the project you created in the Package Explorer, and select .
- Enter MyHelloWorld as the name for the class, leave the other settings as is, and click Finish.
- The source for the new MyHelloWorld.cls class
is displayed. Replace the auto-generated text with the following:
1public class MyHelloWorld {
2// This method updates the Description field for a list
3// of accounts to read "Hello World".
4public static void addHelloWorld(Account[] accs){
5	for (Account a:accs){
6		if (a.Description != 'Hello World')
7		a.Description = 'Hello World';
8		}
9	}
10}
Save your changes.
- If the IDE asks if you want to save the changes to the server, click Yes.
Next, create a trigger that calls MyHelloWorld.cls whenever a record is created.
- Right-click your project in the Package Explorer and select .
- Enter helloWorldAccountTrigger as the name of the trigger.
- Click the Object drop-down list and select Account.
- In the Apex Trigger Operations section, check the before insert checkbox.
- Click Finish.
- The source for the new helloWorldAccountTrigger.trigger file is displayed. Replace the
auto-generated text with the following:
1trigger helloWorldAccountTrigger on Account
2(before insert) {
3MyHelloWorld.addHelloWorld(Trigger.new);
4}
Save your changes.
To see your new Apex class and trigger working, log in to your Salesforce org in a browser and create an account. The Description field is pre-populated with the value “Hello World”.
You can edit the class or trigger in the project. When you save, the changes are also saved to the associated org, assuming that no conflicts exist. If you edit the class or trigger in the org itself, synchronize those changes to the project. For details, see Server Synchronization.
3. Add Tests
Unit tests are class methods that verify whether a particular piece of code is working properly. Unit test methods take no arguments, commit no data to the database, and are flagged with the testMethod keyword in the method definition. A rich set of unit tests gives you confidence that your code works correctly and can help you catch bugs when a code change suddenly causes a test to fail.
These steps create a simple unit test for the Hello World program.
- Open MyHelloWorld.cls and add these test
methods.
1public class MyHelloWorld { 2 // This method updates the Description field for a list 3 // of accounts to read "Hello World". 4 public static void addHelloWorld(Account[] accs){ 5 for (Account a:accs){ 6 if (a.Description != 'Hello World') 7 a.Description = 'Hello World'; 8 } 9 } 10} - Create another Apex class with the name MyHelloWorldTest.cls. Replace the auto-generated text with the following
test
class.
1@isTest 2private class MyHelloWorldTest { 3 // Simple test of the method 4 // MyHelloWorld.addHelloWorld(Account[]) 5 static testMethod void test_addHelloWorld() 6 { 7 // Set up test data set 8 Account testAcct1 = new Account(); 9 Account testAcct2 = new Account(Description = 'Foo'); 10 Account[] accts = new Account[] { testAcct1, testAcct2 }; 11 12 // Execute code with test data 13 MyHelloWorld.addHelloWorld(accts); // call 14 15 // Confirm results 16 System.assertEquals('Hello World', accts[0].Description); 17 System.assertEquals('Hello World', accts[1].Description); 18 } 19 20 // Simple test of the trigger helloWorldAccountTrigger 21 static testMethod void test_helloWorldAccountTrigger() 22 { 23 // Set up test data set 24 Account testAcct1 = new Account(Name='One'); 25 Account testAcct2 = new Account(Name='Two', Description = 'Foo'); 26 Account[] accts = new Account[] { testAcct1, testAcct2 }; 27 28 // Execute trigger with test data set 29 insert accts; 30 31 // Confirm results 32 Account[] acctQuery = [SELECT Description FROM Account WHERE Id = :accts[0].Id OR Id = :accts[1].Id]; 33 System.assertEquals('Hello World', acctQuery[0].Description); 34 System.assertEquals('Hello World', acctQuery[1].Description); 35 } 36} - Save your changes.
-
To execute Apex unit tests:
- Select (
 ).
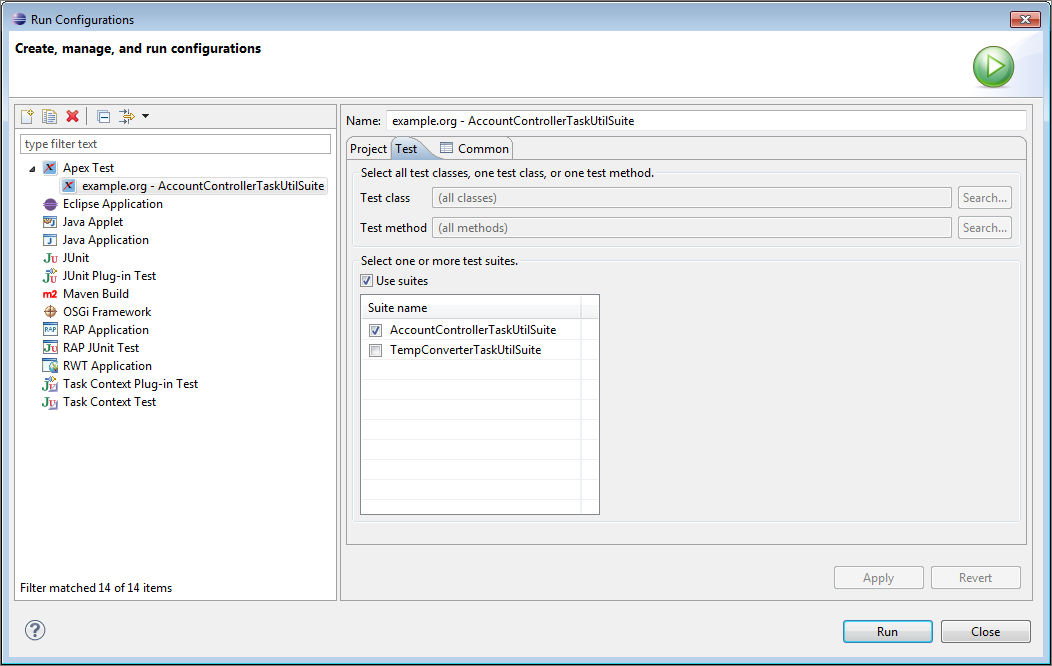
). - Select the Test tab.
- Add tests to your run configuration.
- To add a test class or test method, click one of the Search buttons. To select a method, first select the class that contains that method.
- To create a run of test suites:
- Select Use suites.
- Select one or more test suites.
- Click Apply.
- To execute the selected test run configuration, click Run.
- Select (
For detailed information on testing, see Test Code with the Force.com IDE.