LWR Sites for Experience Cloud
 j
jNewer Version Available
Set Up a Navigation Menu Using Apex
The Build Your Own (LWR) template doesn’t include a default Navigation Menu component.
To set up a navigation menu, we recommend that you create a custom Lightning web component with
an Apex controller to get the navigation items.
Step 1: Configure a Navigation Menu
To create a navigation menu in Experience Builder, go to , and click Add Navigation Menu. In the Menu Editor,
you can add navigation items targeting specific sites pages.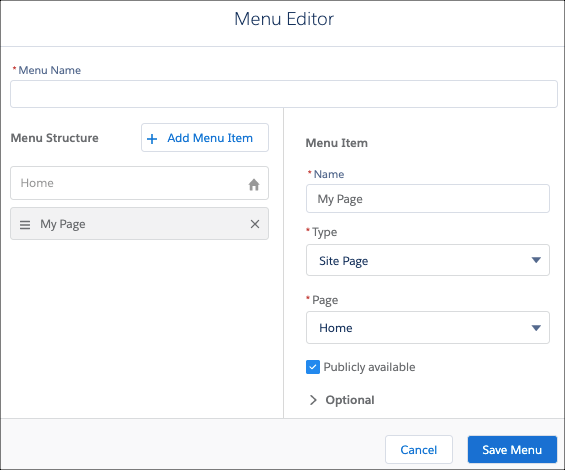
Adding navigation items creates the NavigationLinkSet object and its corresponding NavigationMenuItems.
Step 2: Implement the Apex Controller
To fetch the navigation menu for your component, you can implement an Apex controller with
SOQL to get the NavigationMenuItems for the NavigationLinkSet you created in the Menu
Editor.
In the example, we must pass the publishedState to get the correct NavigationMenuItems for a published site or for a site in draft mode.
Step 3: Implement the Navigation Menu Component
To implement your own Navigation Menu component, use the code samples provided.
Here are some pointers on how the sample component is set up.
- JavaScript: To get data into the Lightning web component, we must import the Apex controller using the wire annotation.
- JavaScript: To get the publishedState for the Apex controller, we can import the CurrentPageReference from lightning/navigation and check whether the menu is published.
- XML: We can expose the Navigation Menu Name through the property in the targetConfig of the js-meta.xml file.
- JavaScript: To navigate between pages, make sure to reference lightning/navigation and the various page types that are supported.