Visualforce Developer Guide
 j
jNewer Version Available
Quick Start: Get Started with Live Controller in Lightning Experience
Live controller refreshes your Visualforce page as soon as you update a record. This
example shows how to create a Visualforce page that includes live controller and how to
configure a Visualforce page to display in Lightning Experience. At the end, we update the Type
field on Account and see that the Visualforce page immediately reflects the change.
Create Your Visualforce Page for Lightning Experience
- From Setup > Home, enter Visualforce Pages in the Quick Find box.
- Click New to create a new page. Let's call our new page AccountPage. Under Label and Name fields, enter AccountPage.
- To activate the page, click the Edit button on the Page Edit screen, select the checkbox labeled Available for Lightning Experience, Experience Builder sites, and the mobile app.
- In the Visualforce Markup pane, replace any markup with the
following
code.
1<apex:page standardController="Account"> 2 <apex:liveController rerender="myPanel"/> 3 <apex:outputPanel id="myPanel" layout="block"> 4 <apex:detail subject="{!Account.Id}" title="false"/> 5 </apex:outputPanel> 6</apex:page> - Click Save.
This Visualforce page displays a panel with an account record. First, we define a standard controller for the Account object. Then, we create the live controller with the attribute rerender set to myPanel. This tells the live controller to listen for and refresh data changes on the outputPanel component with the ID myPanel. On the next line, we create the outputPanel component. The outputPanel component contains an <apex:detail> component. It creates a two-column page layout that displays all fields on a record.
Create a Custom Lightning Page
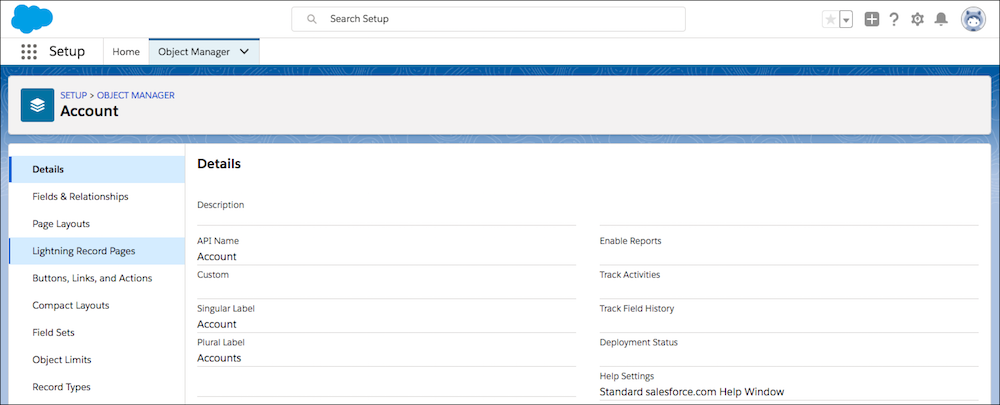
- From Setup > Object Manager, select Account from the left hand navigation.
- In the Account view, select Lightning Record
Pages from the left hand navigation.
Select New.
- On the Create a new Lightning page screen, choose
Record Page from the left hand navigation.

Click Next.
- Enter Live Controller Record Page as the Label.
- Select Account from the Object dropdown list. Click Next.
- On the following screen, select the CLONE DEFAULT SALESFORCE PAGE
tab.
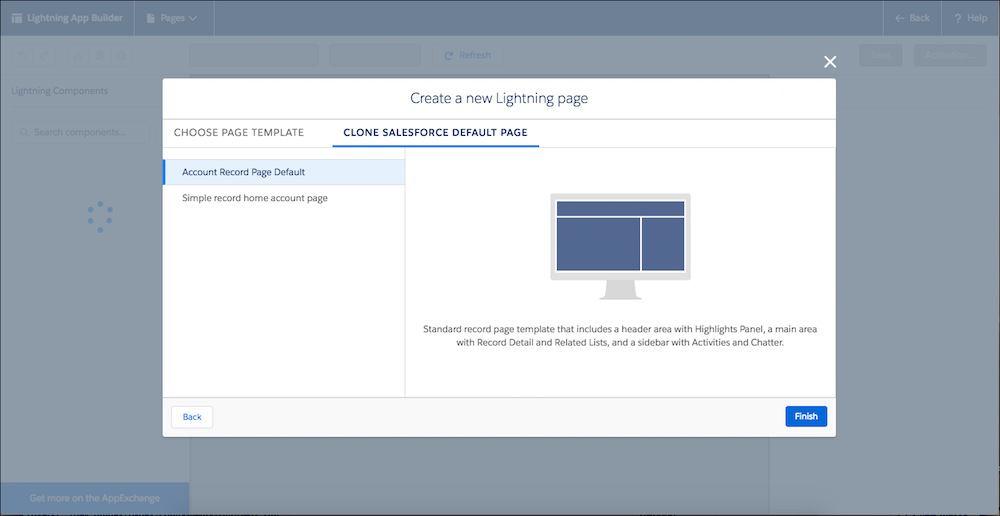
- Click Finish.
Add Your Live Controller Visualforce Page to Your Lightning Page
- In Lightning App Builder, from the list of Lightning
components on the left side of the screen, under the Standard heading, drag the
Visualforce icon to any spot on the Lightning page. In this example, we put it
above the Details tab.
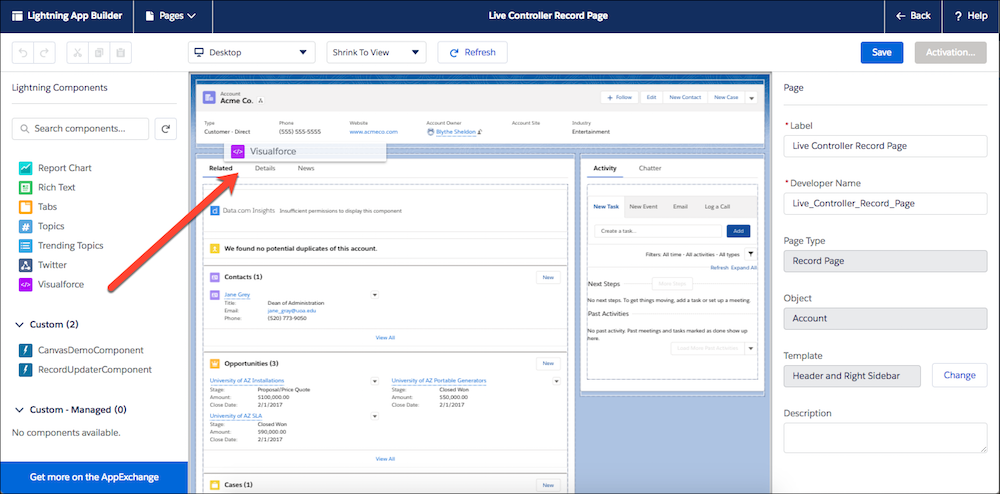
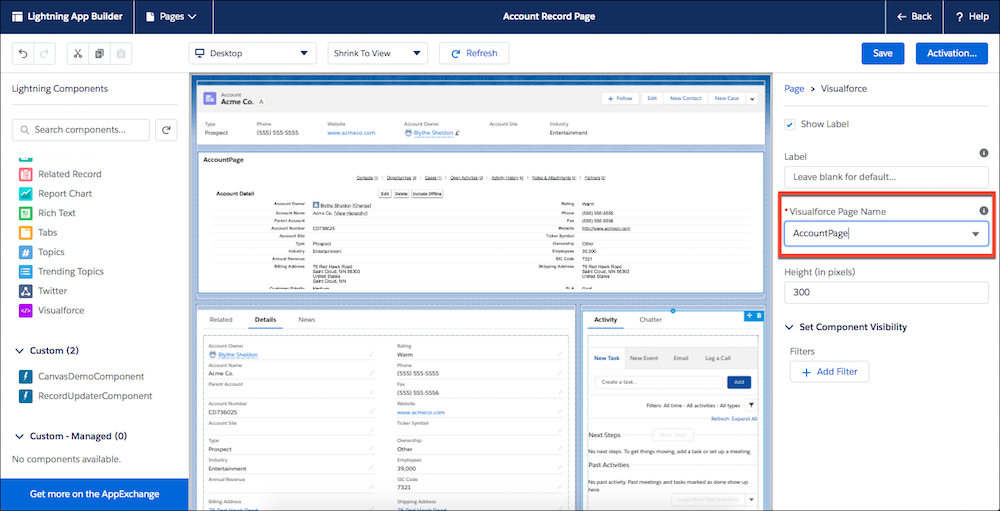
- On the Lightning page, you can now see your most recently created Visualforce page. If
this is not the Visualforce page you want to use on your Lightning page (in our
case, AccountPage), select another one from the Visualforce Page Name dropdown
on the right hand side.
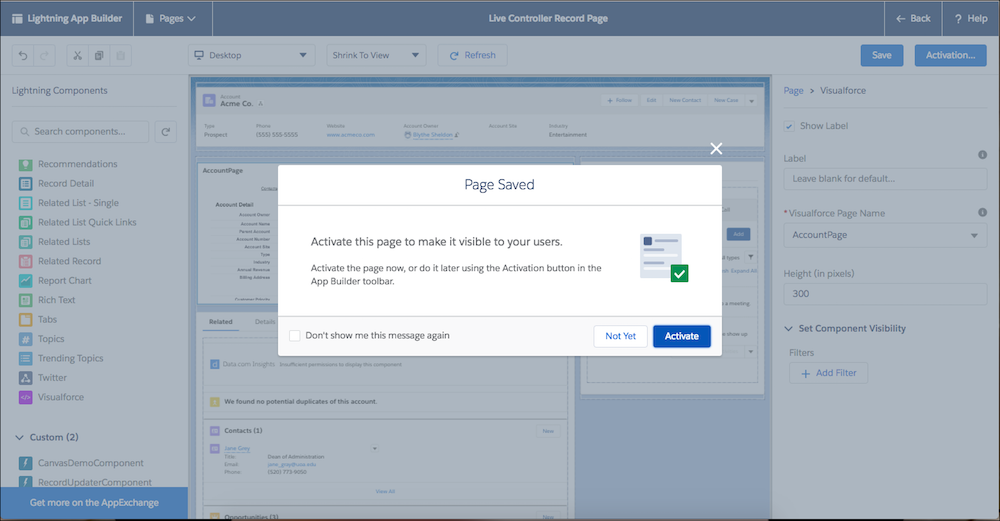
- Click Save.
- On the Page Saved modal, click
Activate.
- Click Assign as Org Default to activate it for your users. Click
Close.
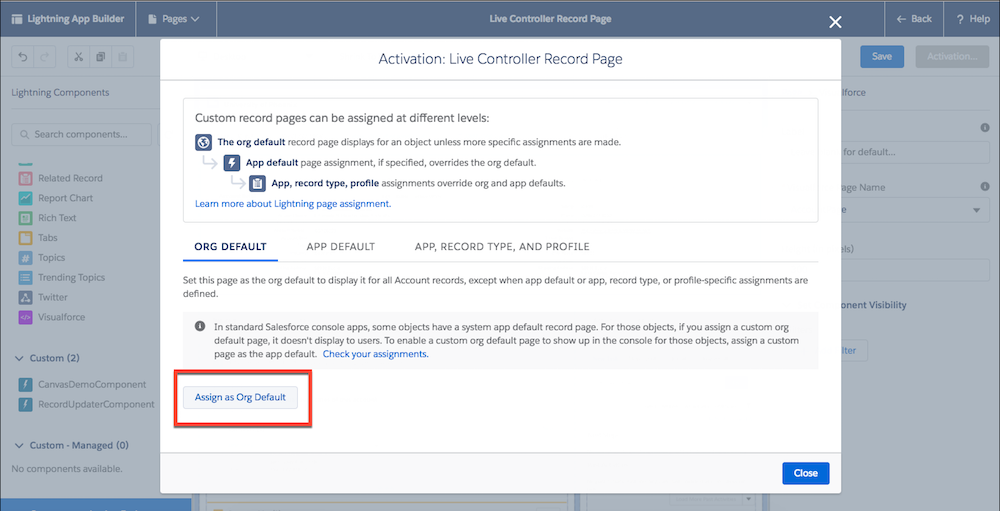
- On Review Assignment, click Save.
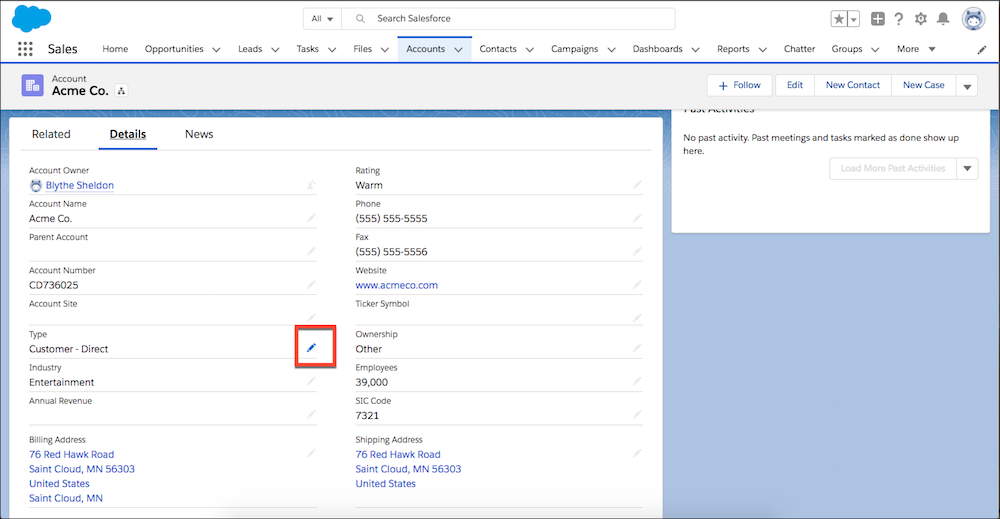
See Live Controller In Action
- From the Live Controller Record Page, click Back.
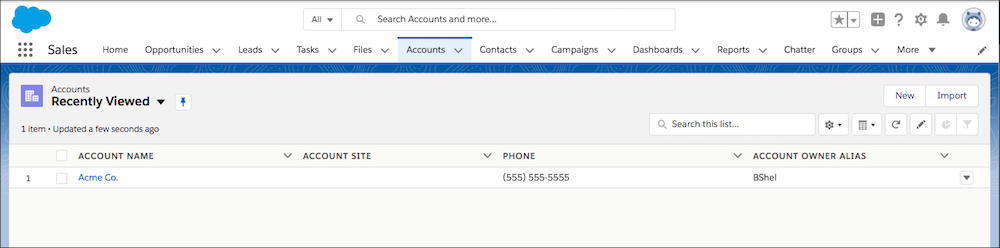
- From App Launcher, search for Accounts. Click the name of your Account.
- Click an account name in the Recently Viewed list view. If this
list view is empty, select another list view that shows your accounts. The
sample text in the example here is Acme Co. Your page should look something like
this.
- Click the Details tab. You can see that the Visualforce page we
created earlier is above it.
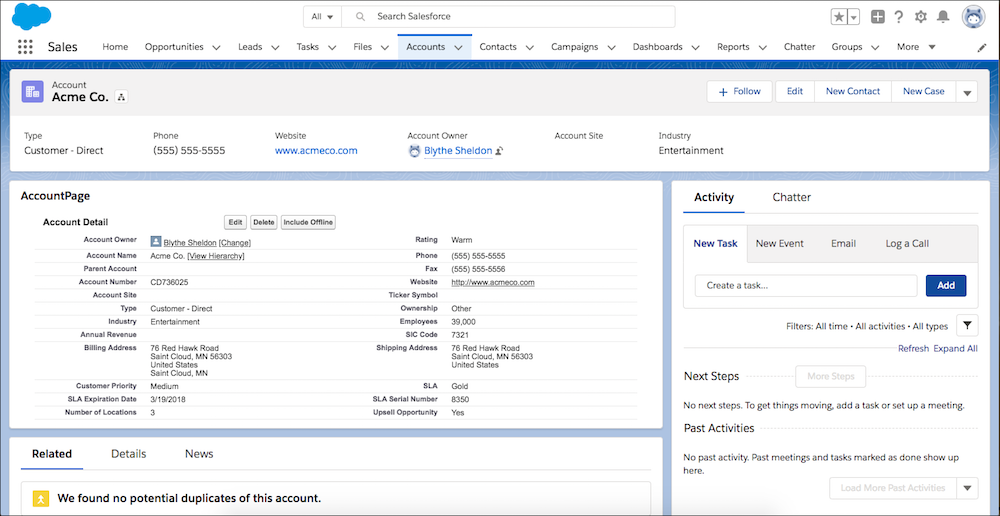
- Click the pencil icon to edit the Type. Let’s change
Type from Customer - Direct to
Prospect.
- Click Save.
- When the page saves, you can see the AccountPage Visualforce component with
Type updated.
