Lightning Aura Components Developer Guide
 j
jNewer Version Available
Create Aura Components Using Salesforce CLI
To develop Aura components, use Salesforce CLI to synchronize source code between
your Salesforce orgs and version control system. Alternatively, you can use the Developer
Console.
Your development environment includes:
- Salesforce CLI
- Visual Studio Code or another code editor
- Salesforce Extension Pack, if using Visual Studio Code
- A Developer Edition org
To install Salesforce CLI and verify the installation, follow the instructions at Salesforce CLI Setup Guide.
Use your favorite code editor with Salesforce CLI. We recommend using Visual Studio Code because its Salesforce Extension Pack provides powerful features for working with Salesforce CLI, the Lightning Component framework, Apex, and Visualforce.
If you choose to work with Visual Studio Code, install it and the Salesforce
Extension Pack.
- Visual Studio Code (VS Code)
- Salesforce Extension Pack for Visual Studio Code
To create and deploy an Aura Component to your org:
-
Create a Salesforce DX project.
- In Visual Studio code, open the Command Palette by pressing Ctrl+Shift+P on Windows or Cmd+Shift+P on macOS.
- Type SFDX and then select SFDX: Create Project.
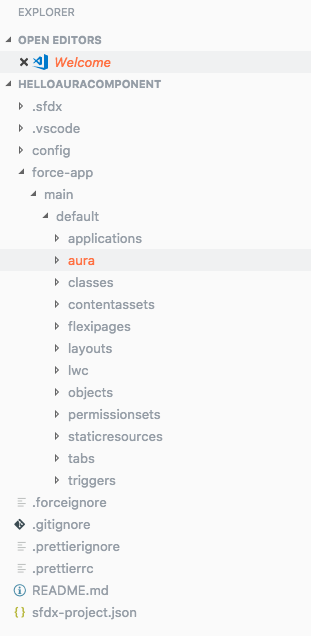
- Enter HelloAuraComponent and then press Enter. Select a folder to store the project.
-
Click Create Project. You should see something
like this in your Visual Studio Code workspace.
-
Create an Aura component.
- Open the Command Palette and select SFDX: Create Lightning Component.
- Enter a name for your component, such as myComponent. Press Enter.
-
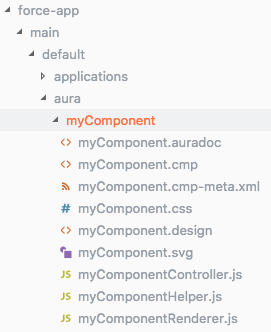
Enter the directory for your component or press
Enter to accept the default. The default
directory is force-app/main/default/aura. You
should see a similar directory like this.
-
Open myComponent.cmp and replace its
content.
1<aura:component>
2    Hello World!
3</aura:component>
-
Authenticate to your org. This step uses a Dev Hub org.
- Open the Command Palette and select SFDX: Authorize a Dev Hub Org. A browser window opens with a Salesforce login page.
-
Log in to your org. If prompted to allow access, click
Allow.
After you authenticate in the browser, the CLI remembers your credentials. The success message looks like this.
113:40:34.679 sfdx org:login:web --alias <alias> --set-default-dev-hub
2Successfully authorized username@my.org with org ID 00D1a0000000000000
313:41:48.720 sfdx org:login:web --alias <alias> --set-default-dev-hub ended with exit code 0
If the authentication fails, follow the troubleshooting guide at Salesforce CLI Setup Guide.
-
Deploy your files.
-
In the Visual Studio Code terminal, run this command.
1sf project deploy start --source-dir force-app --target-org username@my.orgThe success message looks like this.1Deployed Source 2============================================================================================================ 3| State Name Type Path 4| ─────── ─────────── ──────────────────── ────────────────────────────────────────────────────────────────── 5| Created myComponent AuraDefinitionBundle force-app/main/default/aura/myComponent/myComponent.auradoc 6| Created myComponent AuraDefinitionBundle force-app/main/default/aura/myComponent/myComponent.cmp 7| Created myComponent AuraDefinitionBundle force-app/main/default/aura/myComponent/myComponent.cmp-meta.xml 8| Created myComponent AuraDefinitionBundle force-app/main/default/aura/myComponent/myComponent.css 9| Created myComponent AuraDefinitionBundle force-app/main/default/aura/myComponent/myComponent.design 10| Created myComponent AuraDefinitionBundle force-app/main/default/aura/myComponent/myComponent.svg 11| Created myComponent AuraDefinitionBundle force-app/main/default/aura/myComponent/myComponentController.js 12| Created myComponent AuraDefinitionBundle force-app/main/default/aura/myComponent/myComponentHelper.js 13| Created myComponent AuraDefinitionBundle force-app/main/default/aura/myComponent/myComponentRenderer.js
-
In the Visual Studio Code terminal, run this command.
If you make changes to your component via the Developer Console in the Dev Hub org,
use the project retrieve start command to retrieve
your changes. The source you retrieve overwrites the corresponding source files in your
local
project.
1sf project retrieve start --source-dir force-app --target-org username@my.org