


Mobile and Offline Developer Guide
 j
jNote: This release is in preview. Features described here don’t become generally available until the latest general availability date that Salesforce announces for this release. Before then, and where features are noted as beta, pilot, or developer preview, we can’t guarantee general availability within any particular time frame or at all. Make your purchase decisions only on the basis of generally available products and features.
Set Up Android Studio
Install Android Studio
If you’ve already installed Android Studio, skip to “Verify Your Android Studio Setup.”
To install Android Studio, download and run the installer at developer.android.com/studio.
Android apps specify different API levels. According to the Android documentation:
- “Minimum API level” is the lowest API level with which your app is compatible
- “Target API level” is the highest API level against which you’ve designed and tested your app
We recommend installing the latest available API level. If the latest level doesn't work as expected, try the next API level below.
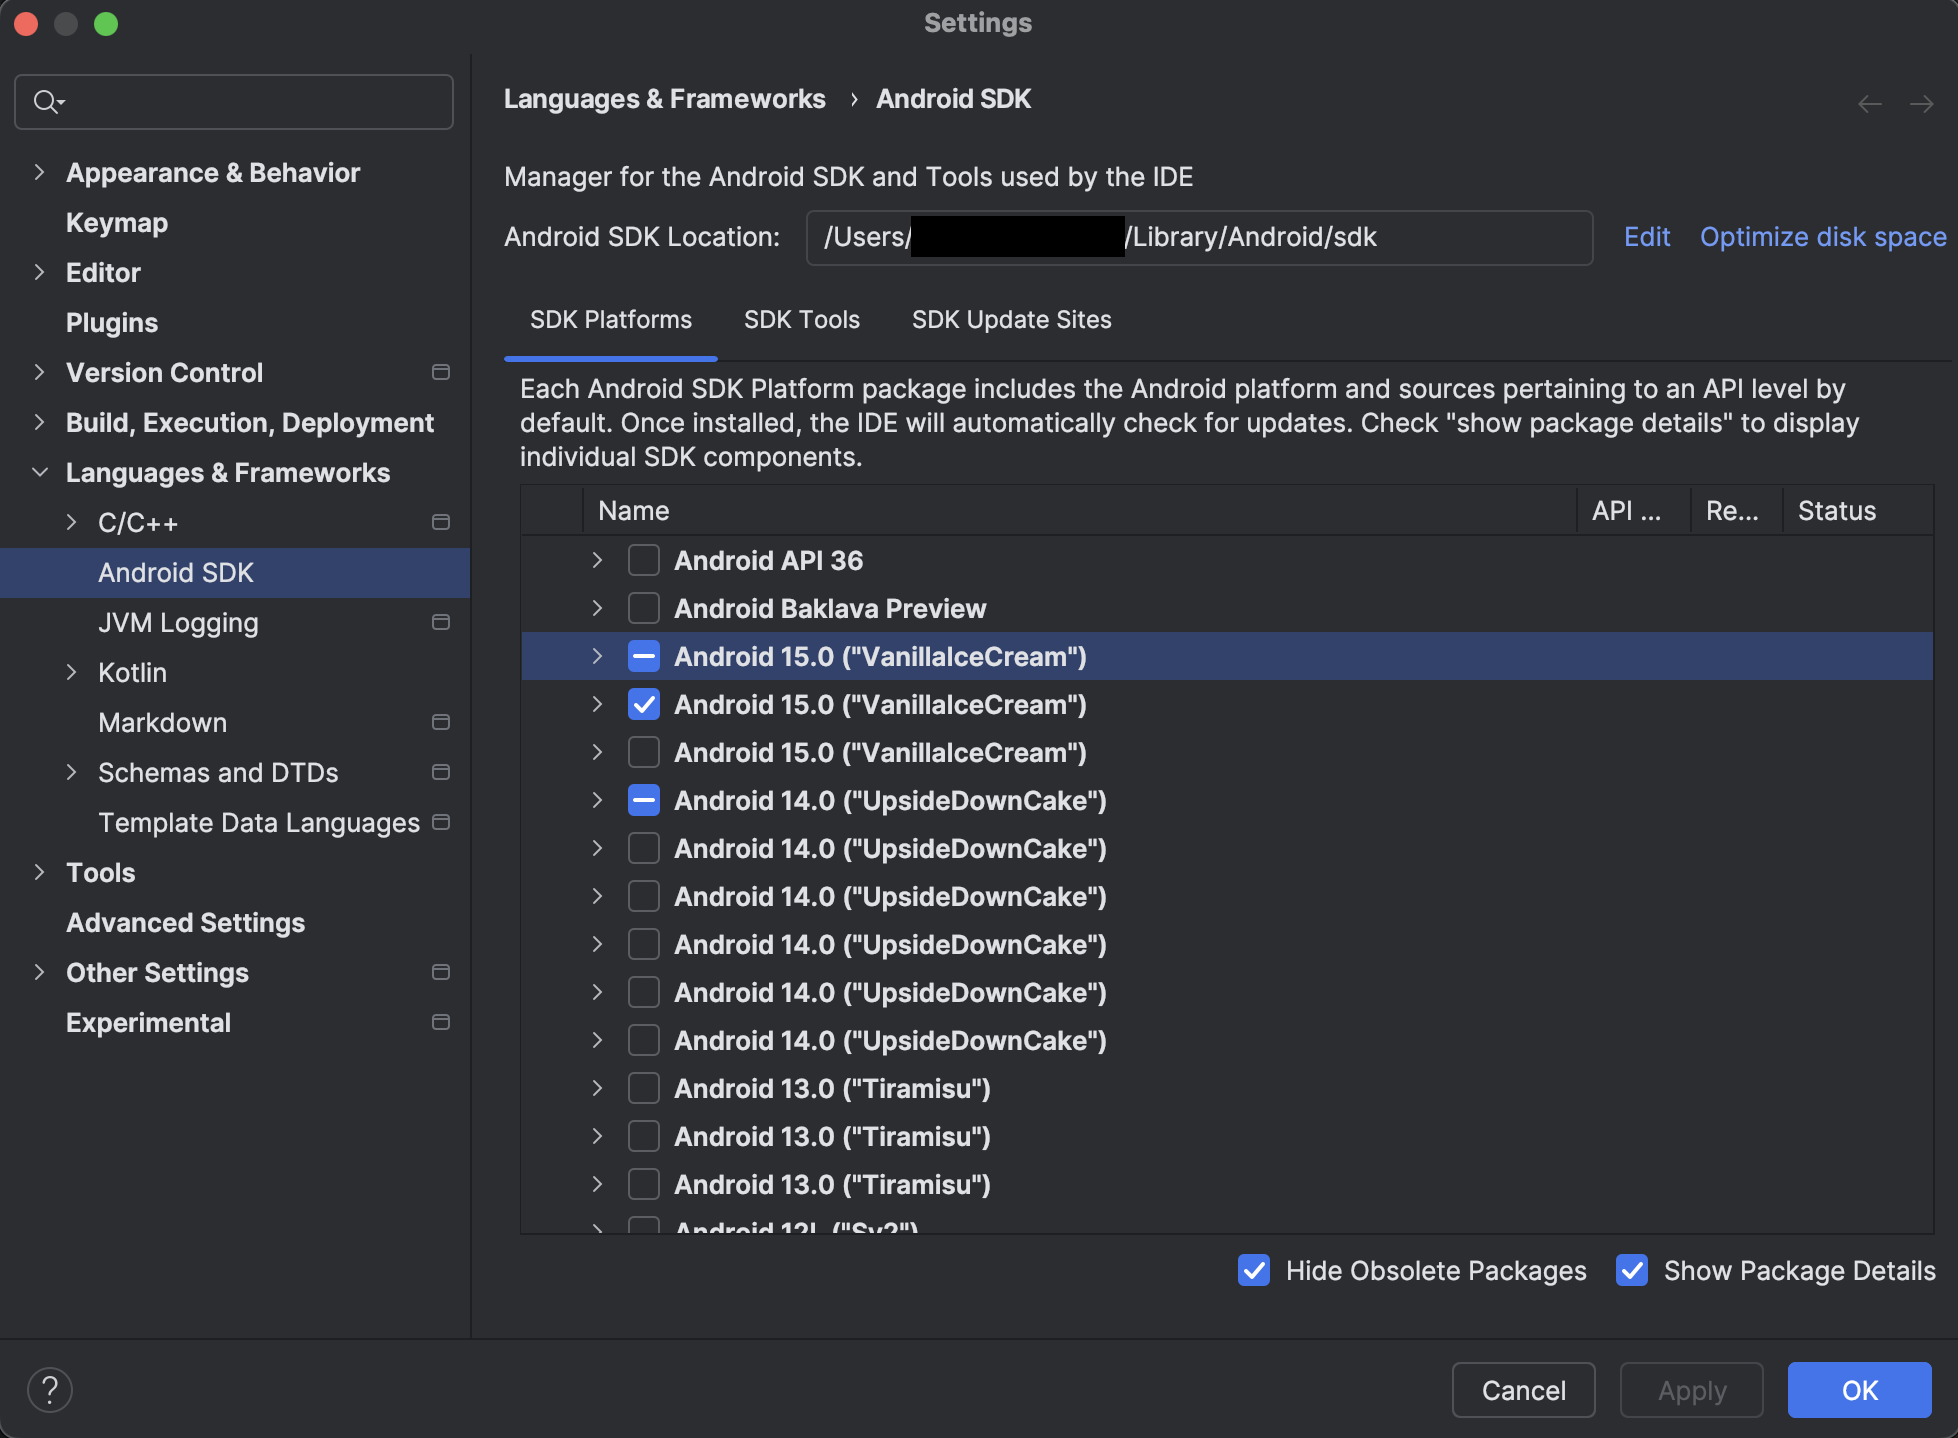
- In the Android Studio Welcome screen, click .
- If you require previewing with additional API levels, download one or more
SDK Platforms. We recommend the latest API level and one level
below. For each required level:
- Check the box next to its name.
- Click Apply. Downloading new API versions can take several minutes.
- If prompted, confirm each download, then accept the license agreement and click Next.
- Select SDK Tools.
- If the status of Android SDK Command-line Tools (latest) is “Not
installed”, select Android SDK Command-line Tools (latest), then
click Download.
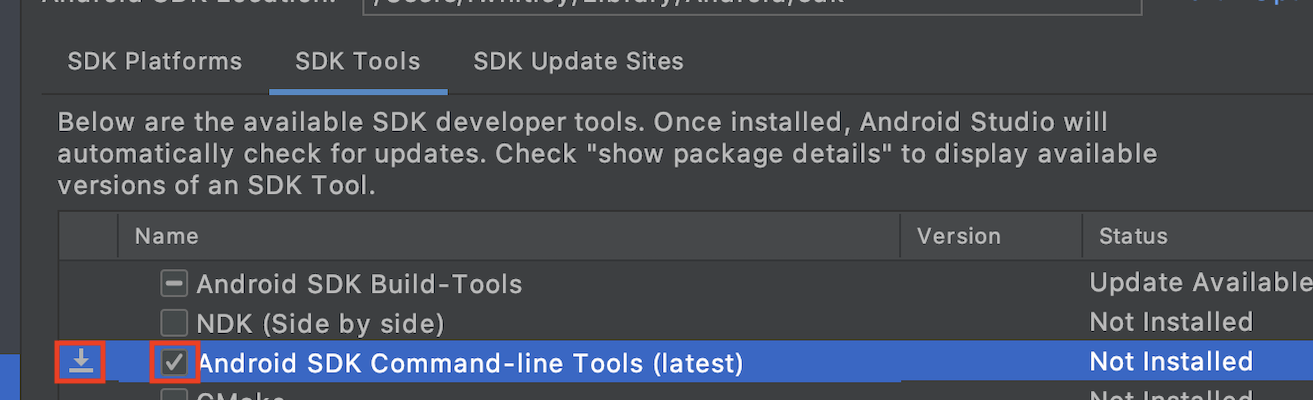
Although the latest version is recommended, any version of the command-line tools is expected to work.
- When the downloads are finished, click OK to dismiss the SDK Manager.
Create a Virtual Device
Now that you’ve installed the SDK, create an emulator for testing and debugging your apps. Let’s choose a system image that supports the latest API version and Google APIs.
- In the Android Studio Welcome screen, click .
- On the Your Virtual Devices page, click the plus symbol to Add a new device. Then, click Create Virtual Device.
- Select a device definition, and click Next.
- Under Select a System Image, select an image listing that supports the following
criteria.
- API Level: 34 or higher
- ABI: arm64-v8a
- Target: Any image that Android Studio makes available by default
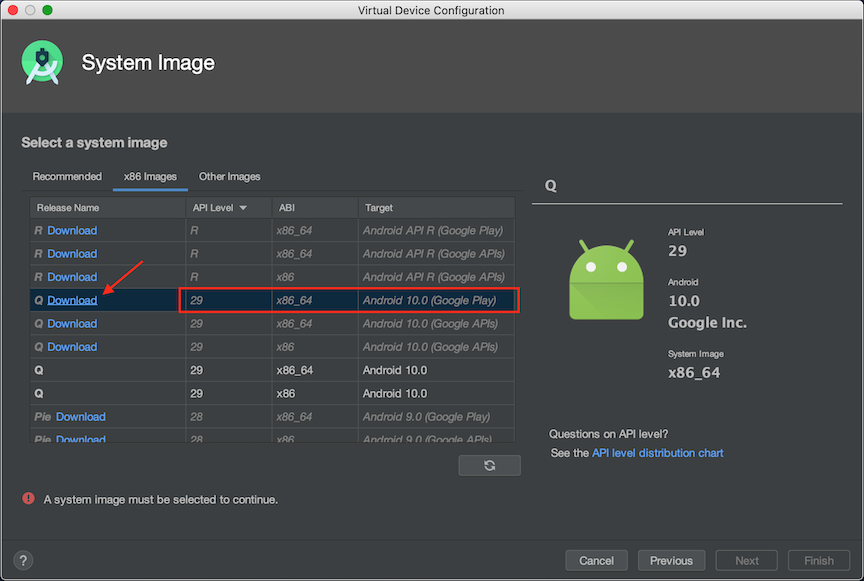
- Click the Download button next to the Release Name.
- After the download completes and you return to the System Image list, select the downloaded image and click Next.
- In Verify Configuration, you can change the AVD name to any value that helps you identify the configuration. For other settings, you can accept the default values.
- Click Finish to return to Your Virtual Devices.
- To launch the emulator, click the Play button in your emulator’s listing.
Verify Your Android Studio Setup
During installation, Android Studio configures your system environment with standard Android paths and locations. The Mobile Extensions setup command checks your settings and reports issues to the command-line console.
To verify that your environment is ready for Android previews, run the setup command:
1sf force:lightning:local:setup -p androidIf setup reports any issues, use the following guidelines to correct them.
The ANDROID_HOME variable is the starting point for all Android development operations. If this variable isn’t set or is incorrect, Mobile Extensions can’t use Android tools. You set ANDROID_HOME to point to the top-level directory of your Android SDK installation. On macOS, for example, this variable’s default value is /Users/<user_name>/Library/Android/sdk. If you’ve installed Android SDK in a custom directory, make sure that this path points to that location.
macOS X: You can make these settings persistent by adding them to the ~/.bash_profile or similar startup file for your command shell.
Configure ANDROID_HOME as follows.
1export ANDROID_HOME=/Users/<your_user_name>/Library/Android/sdkFor Android, the Mobile Extensions plug-in requires the Java Development Kit (JDK) version used by Android Studio. Currently, this version is JDK 17. Your plug-in commands might fail if a JAVA_HOME system variable exists on your machine and points to a different JDK version, or if other applications in your system path use a different JDK version. You can find the correct JDK version installed with Android Studio’s Java runtime engine embedded in the Android Studio app. For example:
1export JAVA_HOME="/Applications/Android Studio.app/Contents/jre/jdk/Contents/Home"See the Android Developer documentation.
Windows: In , add the following variable definitions to either System Environment Variables or User Environment Variables. (For help with finding System Properties, see www.imatest.com/docs/editing-system-environment-variables.)
Variable: ANDROID_HOME. Value: C:\Users\<user>\AppData\Local\Android\Sdk.
Variable: JAVA_HOME. Value: C:\Program Files\Android\Android Studio\jre.
For Android, the Mobile Extensions plug-in requires the Java Development Kit (JDK) version used by Android Studio. If you set JAVA_HOME to a custom path that points to a different JDK version, the plug-in commands might fail.
Linux: Set the following variable definitions in your ~/.profile file.
Variable: ANDROID_HOME. Value: ~/Android/Sdk.
Variable: JAVA_HOME. Value: /snap/android-studio/current/android-studio/jre.
For Android, the Mobile Extensions plug-in requires the Java Development Kit (JDK) version used by Android Studio. Currently, this version is JDK 17. If you set JAVA_HOME to a custom path that points to a different JDK version, the plug-in commands might fail.
Android SDK Version: One or more of: Android 9.0 (Pie), API Level 28, or higher.
Android Tools and Emulator: Verify that you’ve installed the latest version of Android Emulator, Android SDK Platform-Tools, and Android SDK Command-line Tools. Check these versions in the SDK Tools section of the Android SDK Manager. In addition to the version ranges listed here, later stable versions of these tools are also expected to work.
If you’ve changed any settings, rerun the setup command.