Visualforce 開発者ガイド
 j
jリモートオブジェクトのリモートメソッド上書きの使用例
このサンプルコードでは、リモートオブジェクト操作のリモートメソッド上書きを作成する方法を示します。この例では、並び替えられた取引先責任者のリストと、新規取引先責任者を入力するための簡易フォームを表示します。新規取引先責任者アクションが、組み込みのリモートオブジェクト create() 操作を上書きします。また、サンプルでは、リモートオブジェクトを複数の Web 開発ライブラリと組み合わせ、モバイルで使用しやすいユーザインターフェイスを表示します。
次の例では、jQuery、ブートストラップ、および Mustache ツールキットを、外部のコンテンツ配信ネットワーク (CDN) から読み込んで使用します。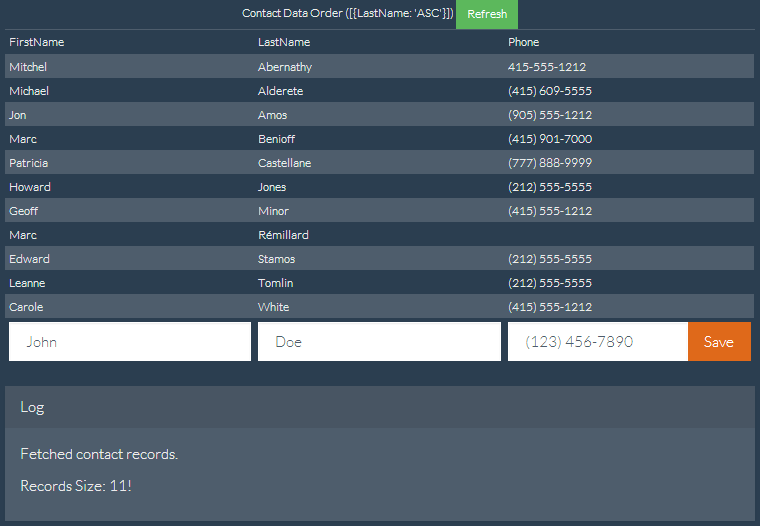
Visualforce ページは次のようになります。リモートオブジェクト上書き宣言は太字で示されています。
1<apex:page showHeader="false" standardStylesheets="false" docType="html-5.0"
2    title="Contacts—RemoteObjects Style" controller="RemoteObjectContactOverride">
3
4    <!-- Include in some mobile web libraries -->
5    <apex:stylesheet value="//netdna.bootstrapcdn.com/bootswatch/3.1.1/superhero/bootstrap.min.css"/>
6    <apex:includeScript value="//ajax.googleapis.com/ajax/libs/jquery/1.11.0/jquery.min.js"/>
7    <apex:includeScript value="//cdnjs.cloudflare.com/ajax/libs/mustache.js/0.7.2/mustache.min.js"/>
8
9    <!-- Set up Remote Objects, with an override for create() method -->
10    <apex:remoteObjects jsNamespace="$M">
11        <apex:remoteObjectModel name="Contact" fields="FirstName,LastName,Phone"
12            create="{!$RemoteAction.RemoteObjectContactOverride.create}"/>
13    </apex:remoteObjects>
14
15    <!-- Page markup -->
16    <div class="container">
17        <div class="row">
18            <div class="col-md-2"></div>
19            <div class="col-md-8">
20                <table id="myTable"
21                    class="table table-bordered table-striped table-condensed">
22                    <colgroup>
23                        <col class="col-md-3" />
24                        <col class="col-md-3" />
25                        <col class="col-md-3" />
26                    </colgroup>
27                    <caption>
28                        Contact Data Order ([ {LastName: 'ASC'}, {FirstName: 'DESC'} ])
29                        <button id="bRefresh" class="btn btn-success btn-sm"
30                            type="button">Refresh</button>
31                    </caption>
32                    <caption id="msgBox" class="alert alert-danger hidden"></caption>
33                    <thead>
34                        <tr><td>FirstName</td><td>LastName</td><td>Phone</td></tr>
35                    </thead>
36                    <tbody></tbody>
37                    <tfoot>
38                        <tr>
39                        <td><input type="text" name="FirstName" id="iFirstName"
40                            placeholder="John" class="form-control" /></td>
41                        <td><input type="text" name="LastName" id="iLastName"
42                            placeholder="Doe" class="form-control" /></td>
43                        <td>
44                            <div class="input-group">
45                              <input type="text" name="Phone" id="iPhone"
46                                placeholder="(123) 456-7890" class="form-control" />
47                              <span class="input-group-btn">
48                                <button id="bAdd" class="btn btn-primary"
49                                    type="button">Save</button>
50                              </span>
51                            </div>
52                        </td>
53                        </tr>
54                    </tfoot>
55                </table>
56                <div class="panel panel-default">
57                  <div class="panel-heading">Log</div>
58                  <div class="panel-body" id="log">
59                  </div>
60                </div>
61            </div>
62            <div class="col-md-2"></div>
63        </div>
64    </div>
65
66    <!-- Results template (table rows of Contacts) -->
67    <script id="tmpl" type="x-tmpl-mustache">
68        <tr><td>{{FirstName}}</td><td>{{LastName}}</td><td>{{Phone}}</td></tr>
69    </script>
70
71    <!-- Page functionality -->
72    <script>
73        var table = $('#myTable tbody');
74        var template = $('#tmpl').html();
75        Mustache.parse(template);
76
77        // Retrieve all contacts and add to results table on page
78        var fetchContacts = function() {
79            (new $M.Contact()).retrieve({
80                orderby: [ {LastName: 'ASC'}, {FirstName: 'DESC'} ],
81            }, function(err, records) {
82                if (!err) {
83                    // Add some status messages to the log panel
84                    $('#log')
85                    .append('<p>Fetched contact records.</p>')
86                    .append('<p>Records Size: '+ records.length + '!</p>');
87
88                    // Update the table of contacts with fresh results
89                    table.empty();
90                    records.forEach(function(rec) {
91                        table.append(Mustache.render(template, rec._props));
92                    });
93                } else {
94                    $('#msgBox').text(err.message).removeClass('hidden');
95                }
96            });
97        };
98
99        var addContact = function() {
100            // Create a new Remote Object from form values
101            (new $M.Contact({
102                FirstName: $('#iFirstName').val(),
103                LastName: $('#iLastName').val(),
104                Phone: $('#iPhone').val()
105            })).create(function(err, record, event) {
106                // New record created...
107                if (!err) {
108                    // Reset the New Record form fields, for the next create
109                    $('input').each(function() {
110                        $(this).val('');
111                    });
112
113                    // Add some status messages to the log panel
114                    $('#log')
115                    .append('<p>Contact created!</p>')
116                    // Custom data added to event.result by override function
117                    .append('<p>Got custom data: ' + event.result.custom + '</p>');
118
119                    // Redraw the results list with current contacts
120                    fetchContacts();
121                } else {
122                    $('#msgBox').text(err.message).removeClass('hidden');
123                }
124            });
125        };
126
127        // Bind application functions to UI events
128        $('#bRefresh').click(fetchContacts);
129        $('#bAdd').click(addContact);
130
131        // Initial load of the contacts list
132        fetchContacts();
133    </script>
134</apex:page>
前のサンプルで重要なコード行は、リモートオブジェクトアクセス定義内にあります。1 つの属性を取引先責任者リモートオブジェクト定義に追加すると、次のように上書きが設定されます。
1create="{!$RemoteAction.RemoteObjectContactOverride.create}"この場合、参照されたメソッドは、ページのコントローラである Apex クラスです。上書きメソッドのコードは簡単です。
1public class with sharing RemoteObjectContactOverride {
2
3    @RemoteAction
4    public static Map<String, Object> create(String type, Map<String, Object> fields) {
5        System.debug(LoggingLevel.INFO, 'Before calling create on: ' + type);
6
7        // Invoke the standard create action
8        // For when you want mostly-normal behavior, with a little something different
9        Map<String, Object> result = RemoteObjectController.create(type, fields);
10
11        System.debug(LoggingLevel.INFO, 'After calling create on: ' + type);
12        System.debug(LoggingLevel.INFO, 'Result: ' + result);
13
14        // Here's the little something different, adding extra data to the result
15        Map<String, Object> customResult =
16            new Map<String, Object> {'custom' => 'my custom data' };
17        customResult.putAll(result);
18
19        return customResult;
20    }
21}このメソッドは、@RemoteAction コールをログに記録し、標準の RemoteObjectController.create() コールを使用して create を実行します。また、データ操作言語 (DML) コマンドを実行して、組み込みバージョンの場合と同じレコードを作成します。これは組み込みバージョンを使用しているためです。create の実行後、メソッドはさらにログ出力を行います。最後に、いくつかの別のデータをリターンペイロードに追加します。このペイロードは Visualforce ページの JavaScript コールバック関数によって受信されます。
興味深いのは、別のデータが追加される点です。これは組み込みメソッドの上書きが有益である理由です。上記のコントローラで追加された別のデータは、説明のみを目的とした簡単なものです。実際の上書きには、計算やその他のメソッドコールの結果など、より複雑なロジックを含めることができます。新しいカスタム上書きメソッドでは、追加の処理を自動的に実行できるため、別のデータを返すことができますが、組み込みバージョンではできないことを理解しておくことが重要です。