Email Verification for Storefront Next
Storefront Next supports email verification to confirm shopper identity using a one-time passcode (OTP). A Business Manager site preference controls email verification. When enabled, the site preference activates these features.
- Passwordless registration and login as default — Shoppers create accounts and log in using an OTP instead of a password.
- Email verification — Shoppers verify their email address during registration and on the Account Details page.
- Email update support — Shoppers have the option to change their email address in account details. If they don’t have a password, OTP-based identity confirmation is required before the system applies the change. OTP verification isn’t required for shoppers who do have a password.
- Configure a Shopper Login and API Access Service (SLAS) private client with passwordless login enabled. For instructions, see Configure a SLAS Private Client in the B2C Commerce API Developer Guide.
- In
config.server.ts, setcommerce.api.privateKeyEnabledtotrue. Iffalse, passwordless login is disabled at run time. - Enable Enable Loginid Updates for SCAPI. With this setting, shoppers can update their login email via SCAPI. Contact support to enable this feature.
- In Merchant Tools > Site Preferences > Storefront Login Preferences, turn on Enable Email Verification. This preference enables passwordless registration, post-registration email verification, and the email change flow in account details.
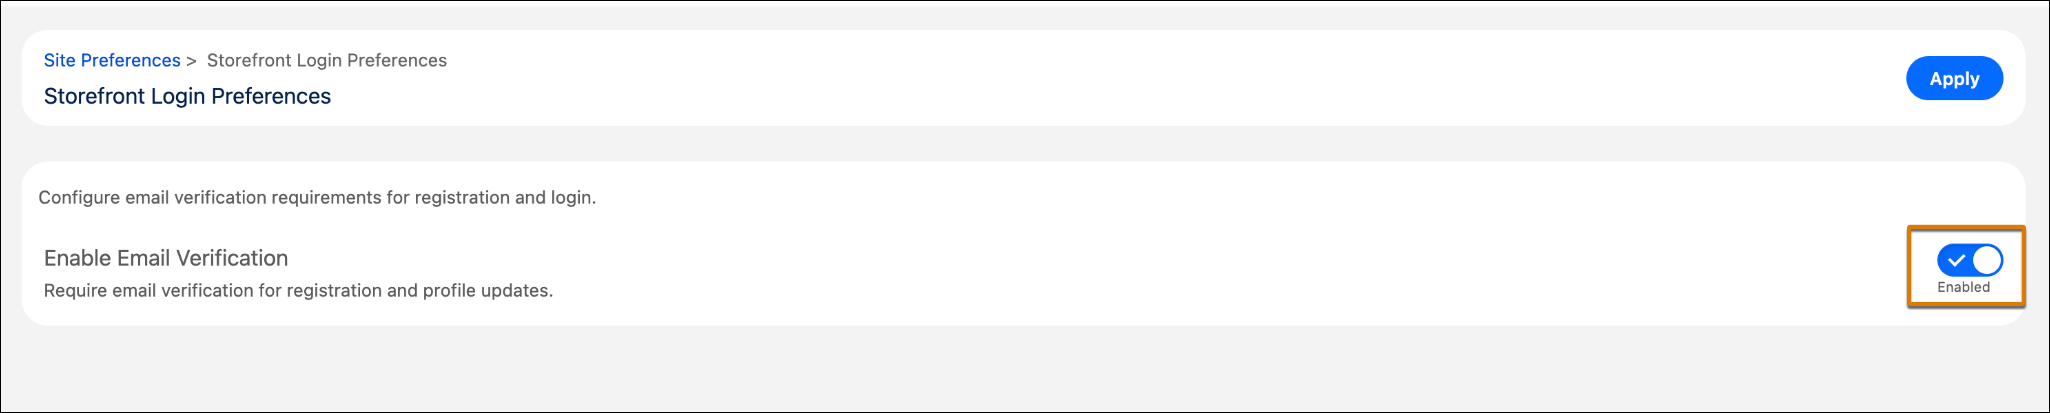
Changes to site preferences can take up to 5 minutes to reflect on a deployed storefront.
To control OTP settings, update auth and features.otpRequest in config.server.ts.
otpLength: The length of the OTP code. Valid values are6or8. Defaults to6. Make sure that this value matches the OTP length configured in your SLAS client. See Configure a SLAS Private Client in the B2C Commerce API Developer Guide.mode: The mode used to deliver the OTP to the shopper (emailorcallback). Defaults toemail. Thecallbackmode doesn’t support email verification.
To override configuration options, use Managed Runtime (MRT) environment variables with the PUBLIC__ prefix.
Passwordless login supports both email and callback modes, but only the email mode supports email verification. When mode is set to email, SLAS sends the OTP directly to the shopper’s email without third-party integration. This mode doesn’t require a callback URI.
- Configure SLAS for passwordless login with email. See Passwordless Login with Email in the B2C Commerce API Developer Guide.
- In
config.server.ts, set the OTP mode toemail.
This diagram shows the complete registration flow. When Enable Email Verification is turned off, accounts are created without verification. When it’s turned on, shoppers can use passwordless mode (the default) or create a password to register. The numbered callouts in the diagram correspond to the steps described in each registration method (Passwordless and Password-Based with Email Verification).
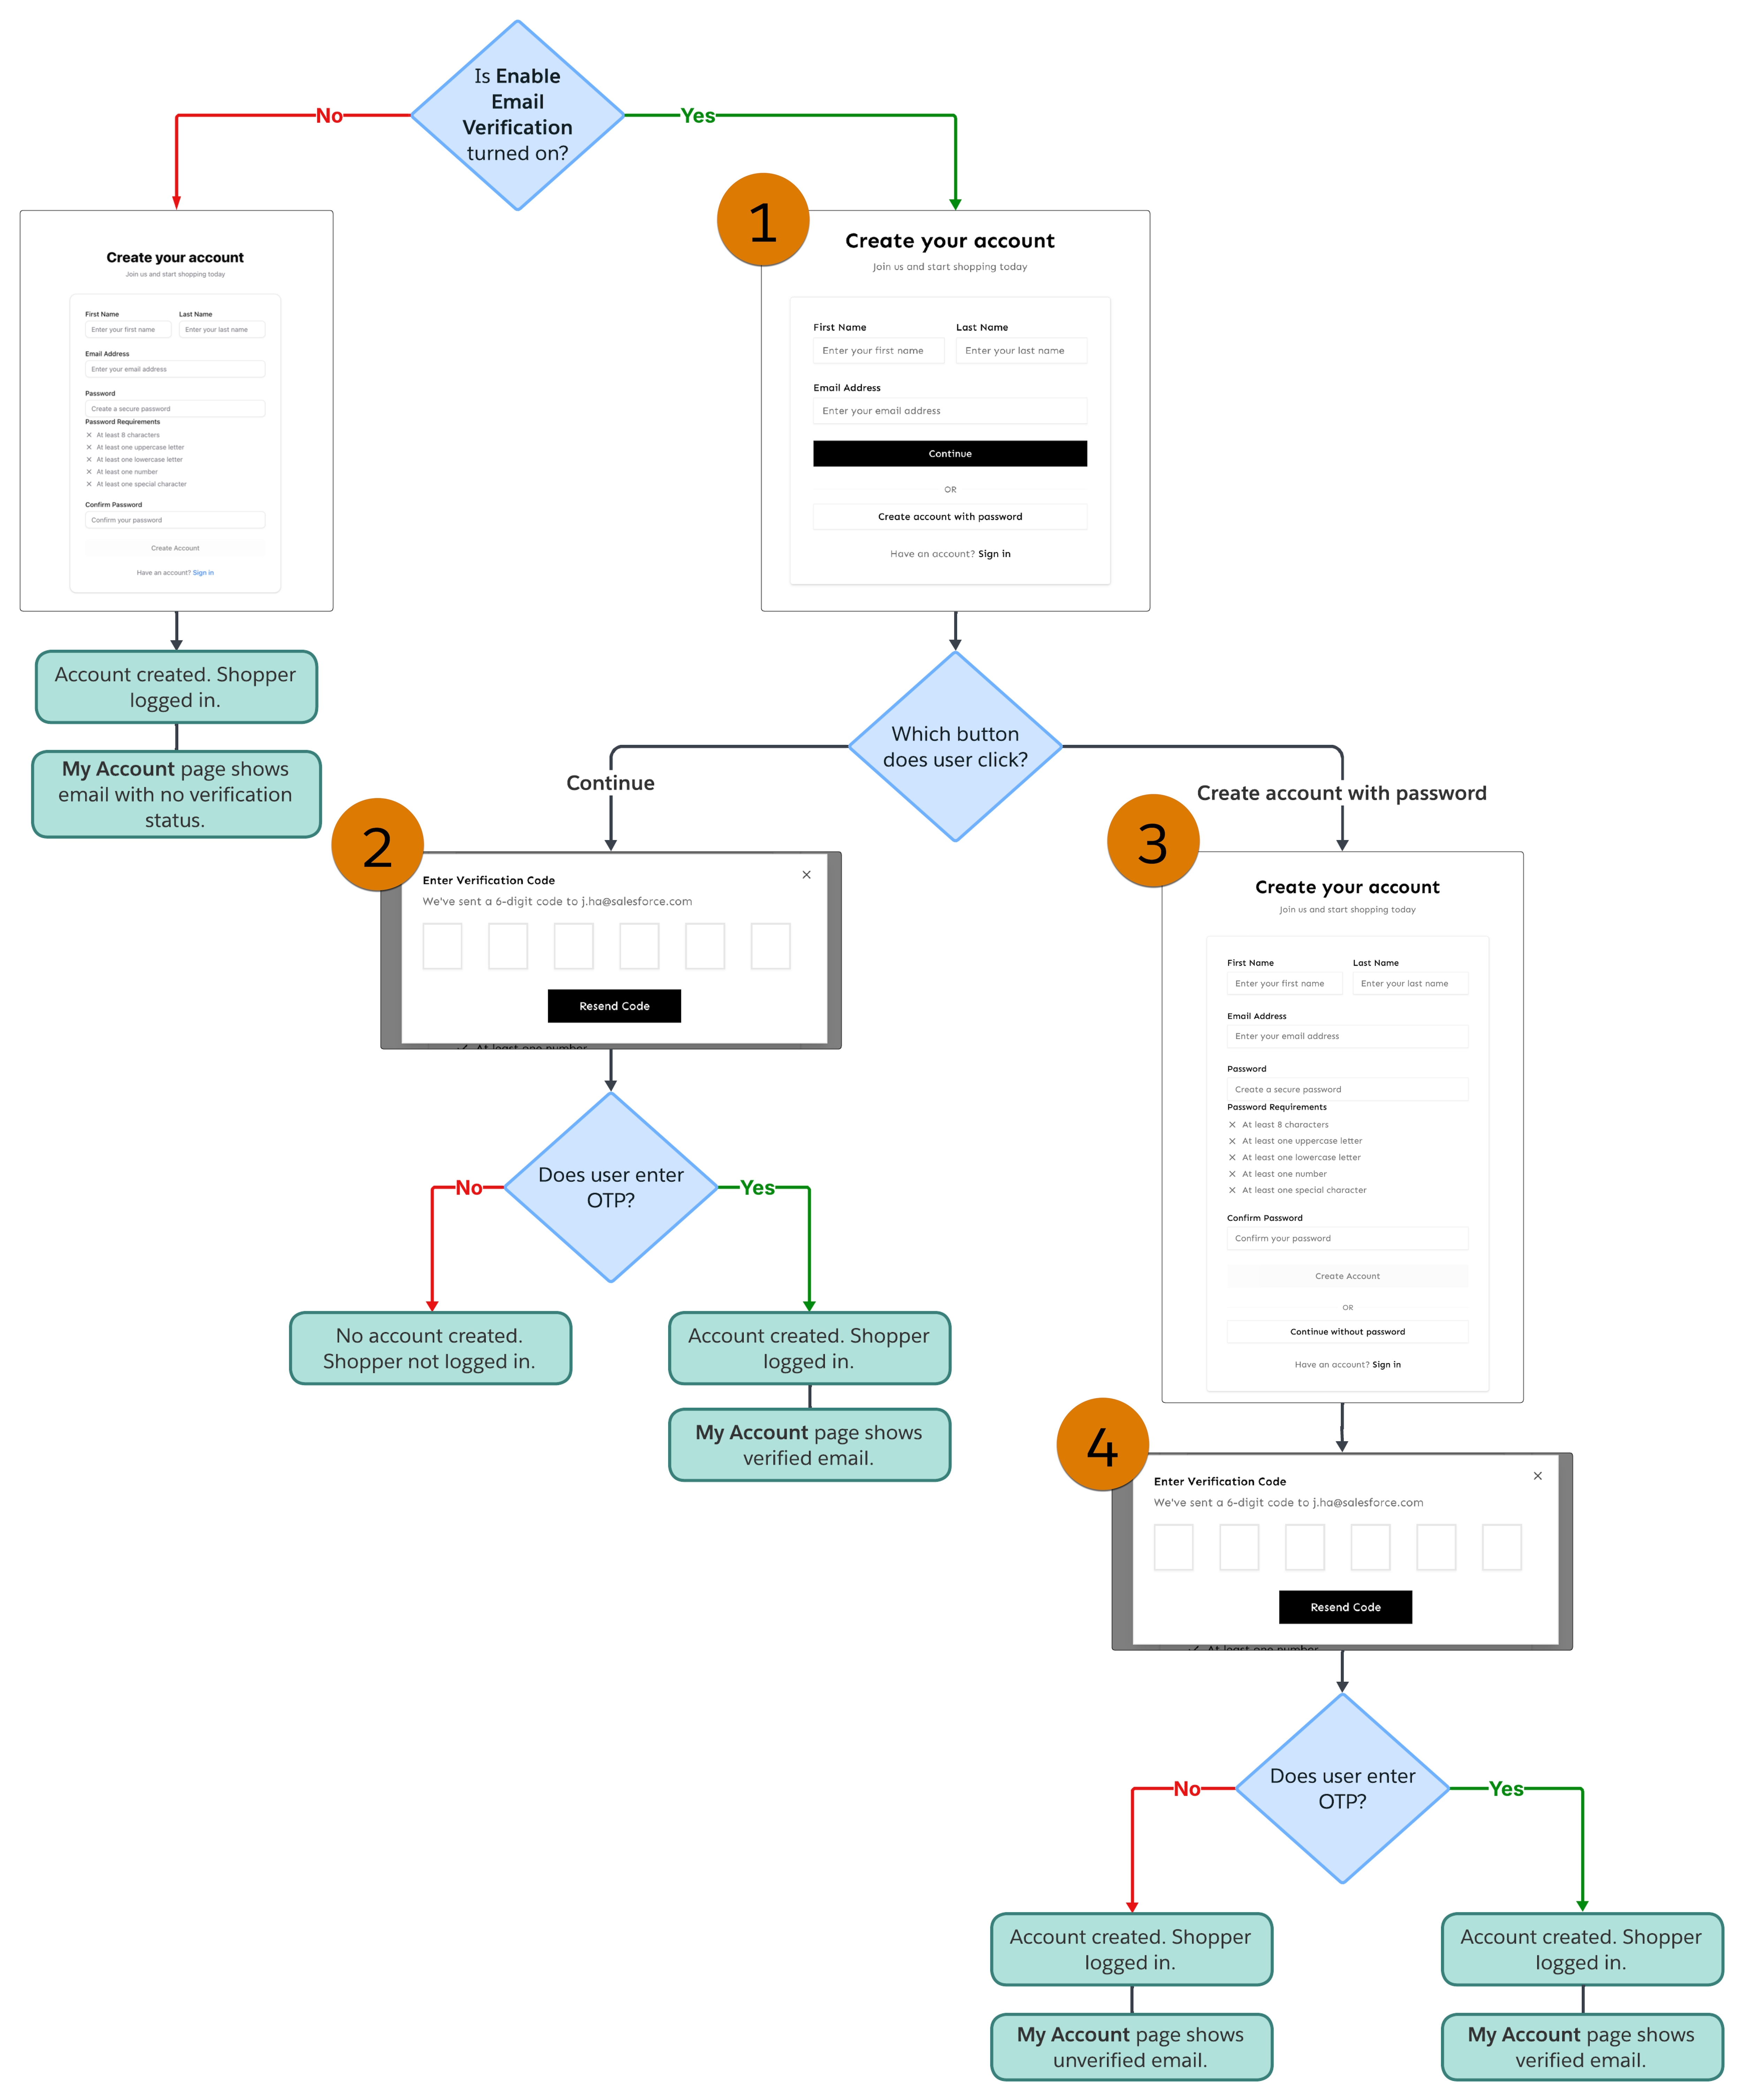
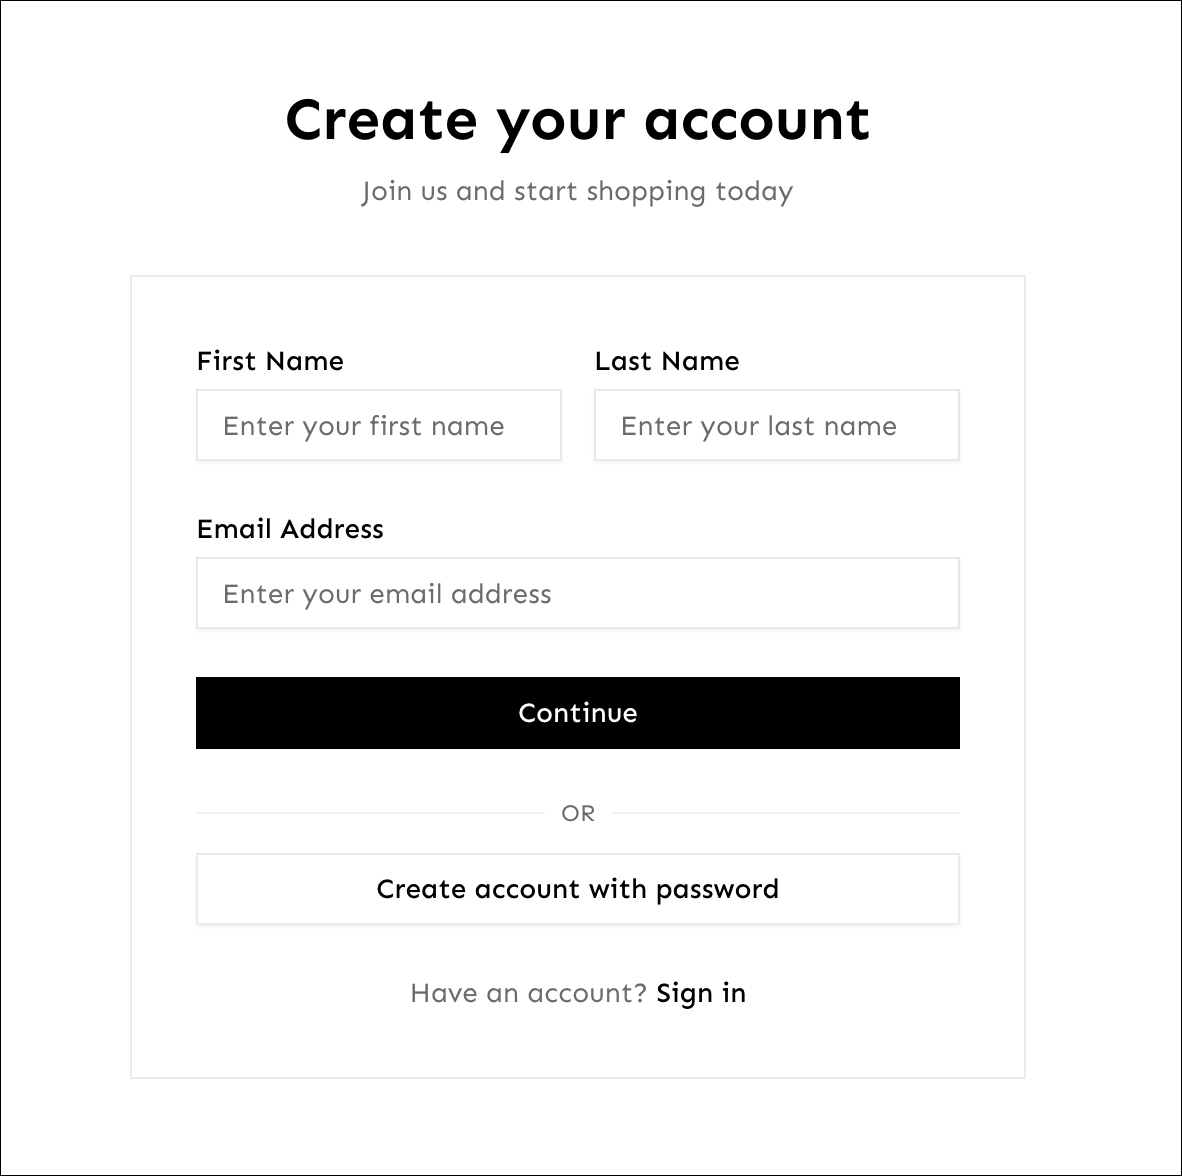
If a site has Enable Email Verification turned on, the registration page defaults to passwordless mode. To create an account, shoppers enter their name and email and complete OTP verification.
- The shopper submits their name and email (1).
- The storefront calls the SLAS passwordless login endpoint, which creates the account and sends an OTP to the shopper’s email.
- The shopper enters the OTP in the verification modal to complete registration (2).
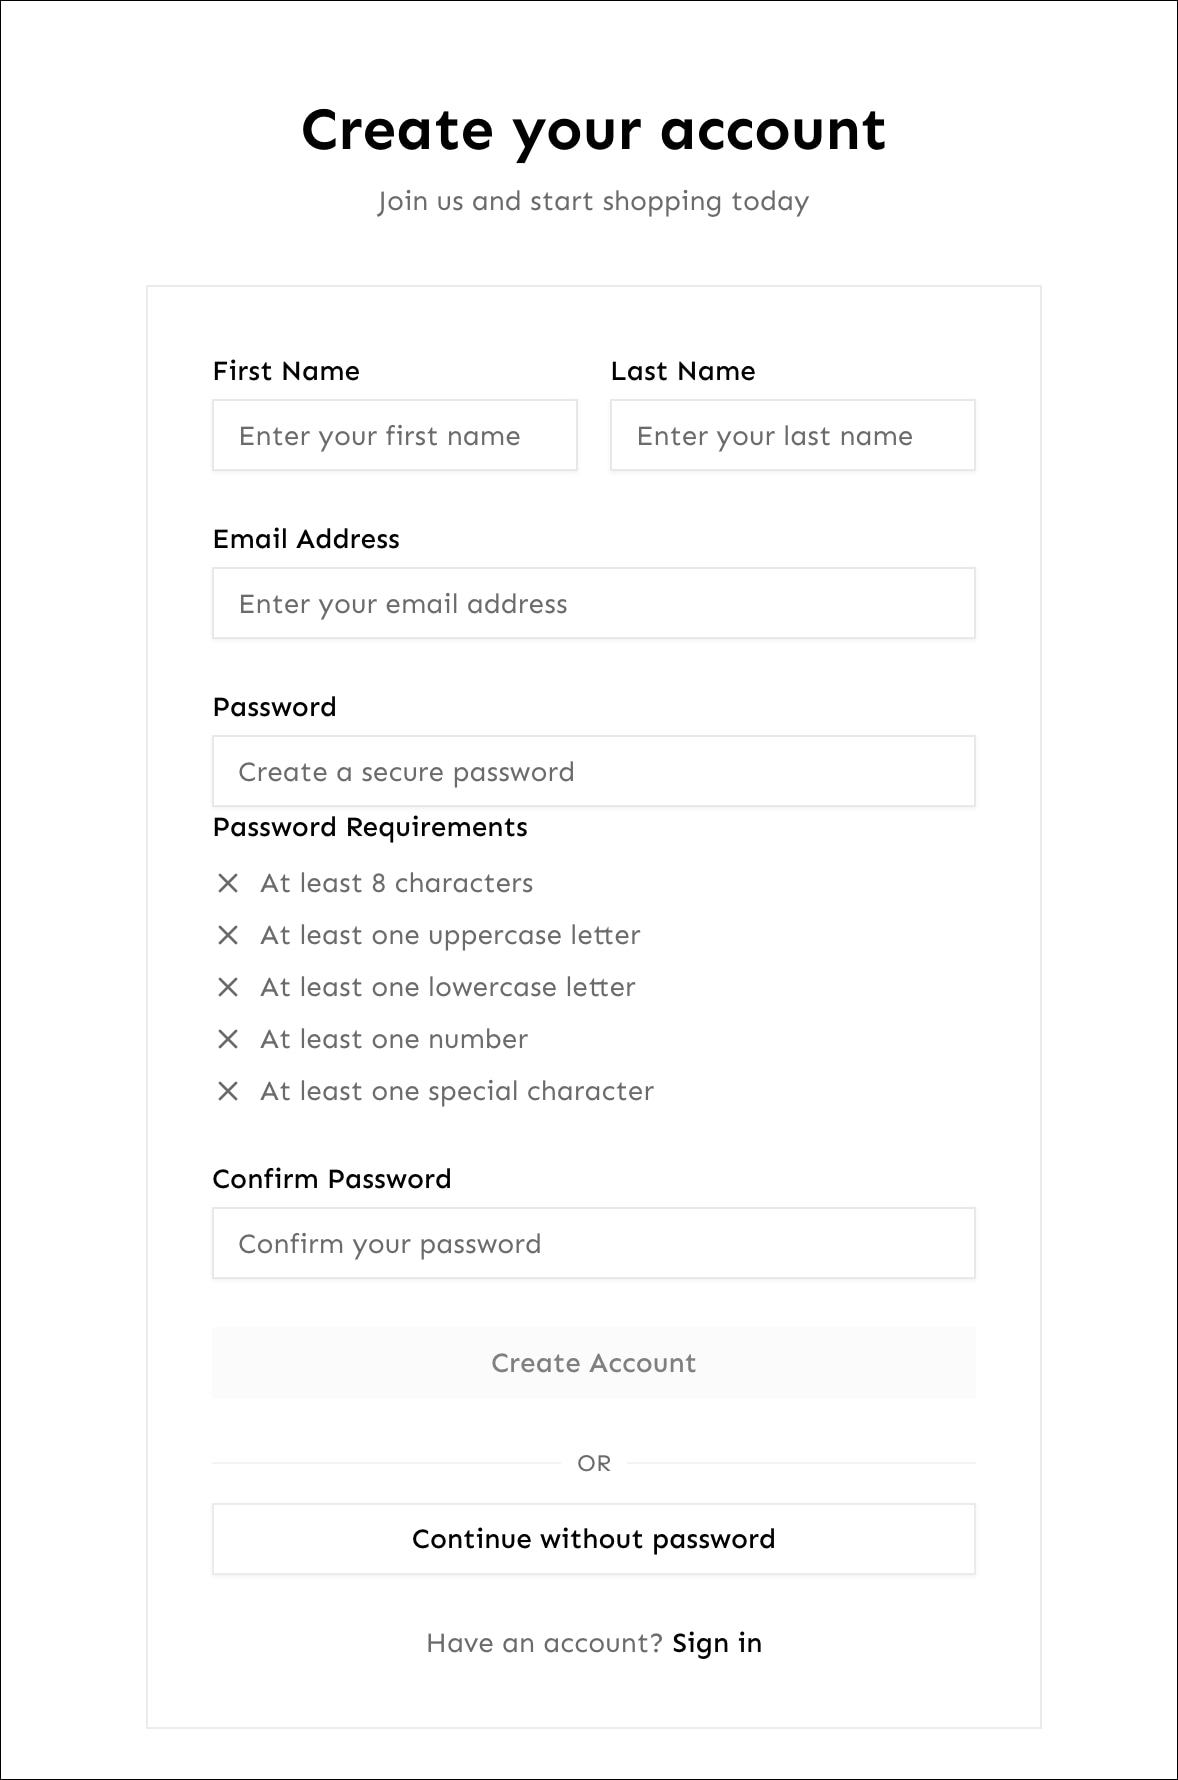
Shoppers who register with a password also verify their email after account creation.
- The shopper submits their name, email, and password (3).
- The storefront creates the account and immediately requests an OTP for the registered email.
- The shopper enters the OTP in the verification modal (4). If the OTP request fails, the account is still created and the shopper is redirected without requiring verification. The shopper can verify their email on the Account Details page at a later time.
If a site has Enable Email Verification turned on, the login page defaults to passwordless mode. To log in, shoppers enter their email and complete OTP verification.
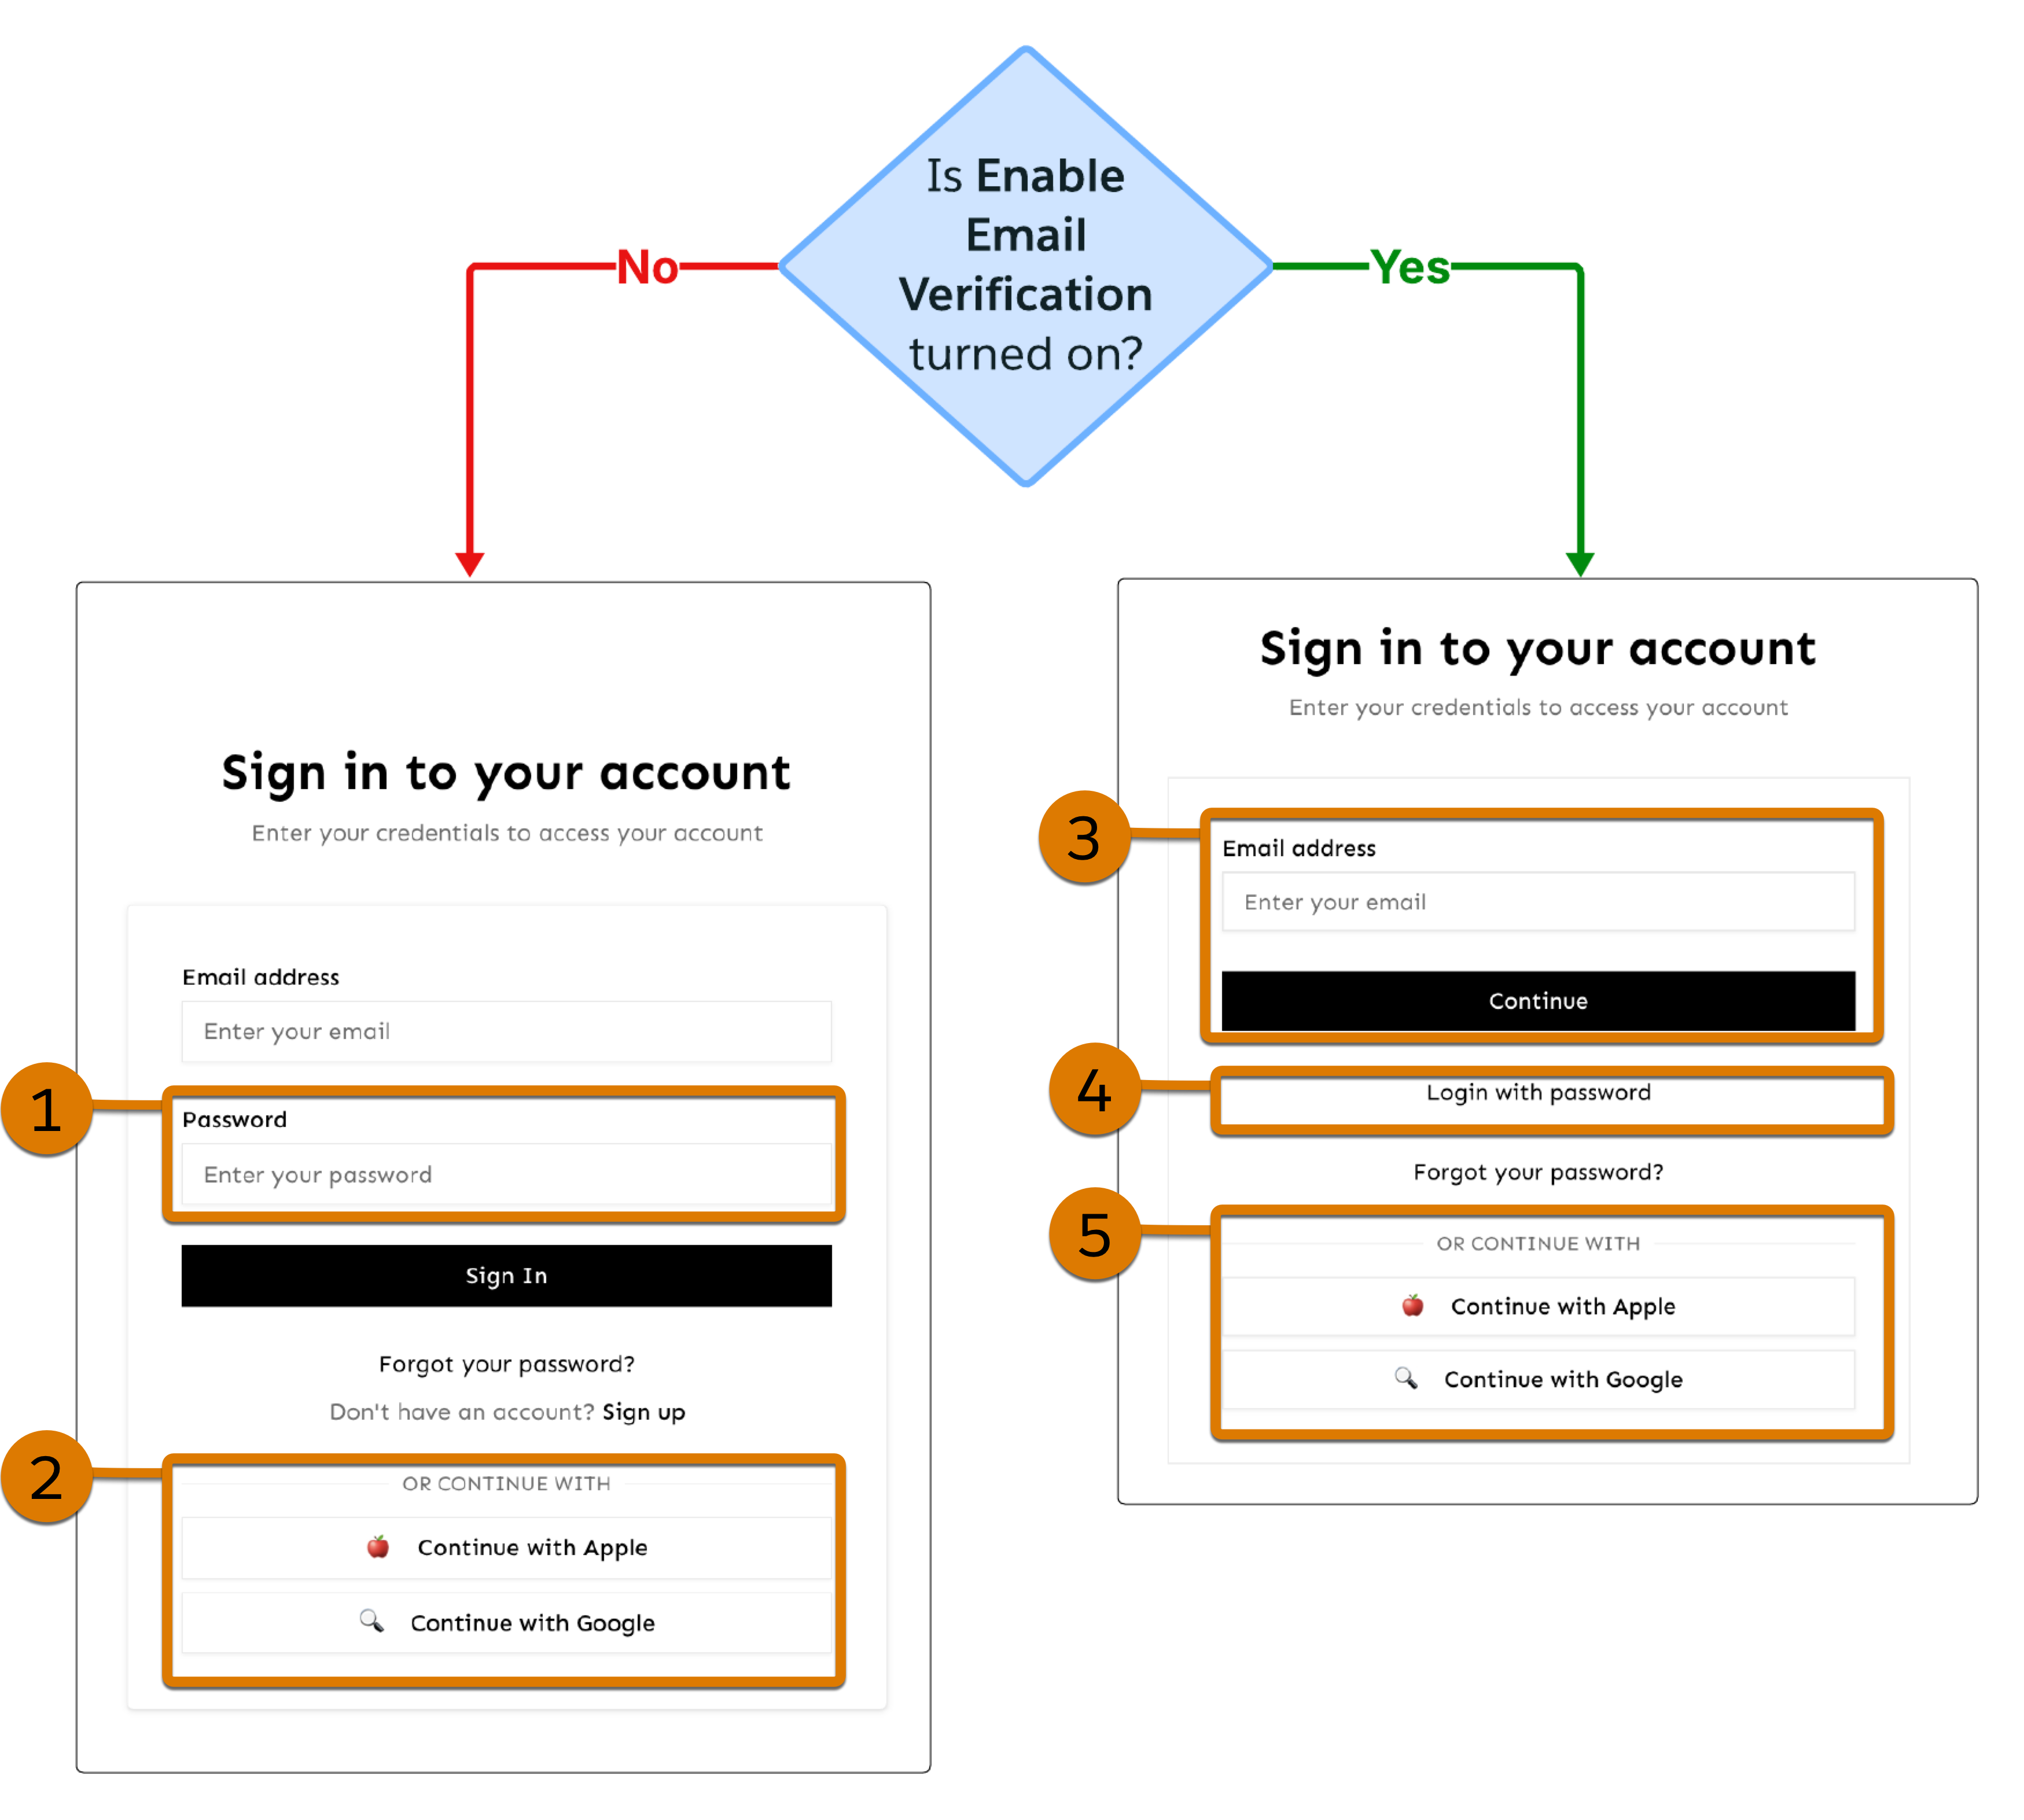
If Enable Email Verification is turned off, the login page supports password (1) or social login (2), if configured.
If Enable Email Verification is turned on, the login page supports passwordless (3), password (4), and social login (5), if configured. Both login pages in this example also include Forgot your password? buttons.
If a site uses email verification, the Account Details page shows a Verified or Unverified badge next to the shopper’s email address.


The Account Details page only shows the Change Email button if the site has email verification turned on. The identity confirmation method depends on whether the shopper has a password.
- Accounts without a password — The shopper verifies their identity with an OTP sent to their current email address before they can change their email.
- Accounts with a password — The shopper verifies their identity with their current password.
- The shopper clicks Change Email.
- The shopper confirms their identity using their password.
- The shopper enters their new email address and submits the change.
For passwordless accounts (accounts without a password), the password card shows a Reset Password button instead of Change Password, so shoppers can set a password if they choose.

- Implement rate limiting to prevent abuse of password reset. For example, if you use embedded CDN (eCDN), apply [eCDN Rate Limiting Rules](https://developer.salesforce.com/docs/commerce/commerce-api/guide/cdn-rate-limiting-rules.html).
- Use robust security measures to protect shopper accounts. For example, if you use a third-party content delivery network (CDN) such as Cloudflare, [Block requests by Threat Score](https://developers.cloudflare.com/waf/custom-rules/use-cases/block-ip-reputation/).
- Track shopper usage of authentication options and diagnose issues efficiently. For example, use [Log Center](https://help.salesforce.com/s/articleView?id=cc.b2c\_log\_center.htm\&type=5) to access logs from Managed Runtime (MRT) and your B2C Commerce instance.
For common troubleshooting scenarios, see [Troubleshoot Passwordless Login](https://developer.salesforce.com/docs/commerce/commerce-api/guide/slas-passwordless-login-troubleshoot.html) in the B2C Commerce API Developer Guide.