Managed Runtime Administration
Manage your organizations, projects, environments, and bundles associated with your Storefront Next storefront with various tools, including the Runtime Admin console, Business Manager, and Account Manager.
Alternatively, perform the administration tasks with the Managed Runtime API.
- For Runtime Admin access, contact your B2C Commerce administrator and ask them to add one of these roles to your account in Account Manager: Managed Runtime User or Managed Runtime Admin.
Organization admins can manage user access and permissions at the organization level, which affects user access across all projects within the organization.
To add a user at the organization level:
- Log in to Account Manager.
- Find the users in your organization who need access.
- Add the Managed Runtime Admin or Managed Runtime User role and save. Users can now log in to Runtime Admin for your organization.
Users added at the organization level also need specific project roles to access individual projects.
To modify a user’s organization-level permissions:
- Navigate to Organization Users.
- Click Edit next to the user’s name.
- Modify the permissions as needed.
- Certificates: Allows the user to view, request, manage, and renew TLS certificates.
- View All Projects: Allows read-only access to all projects within the organization.
- Click Save.
To remove a user from the organization:
- Log in to Account Manager.
- Find the users in your organization who need access.
- Remove the Managed Runtime Admin or Managed Runtime User role and save.
Removing a user from Managed Runtime revokes their access to all projects within the organization.
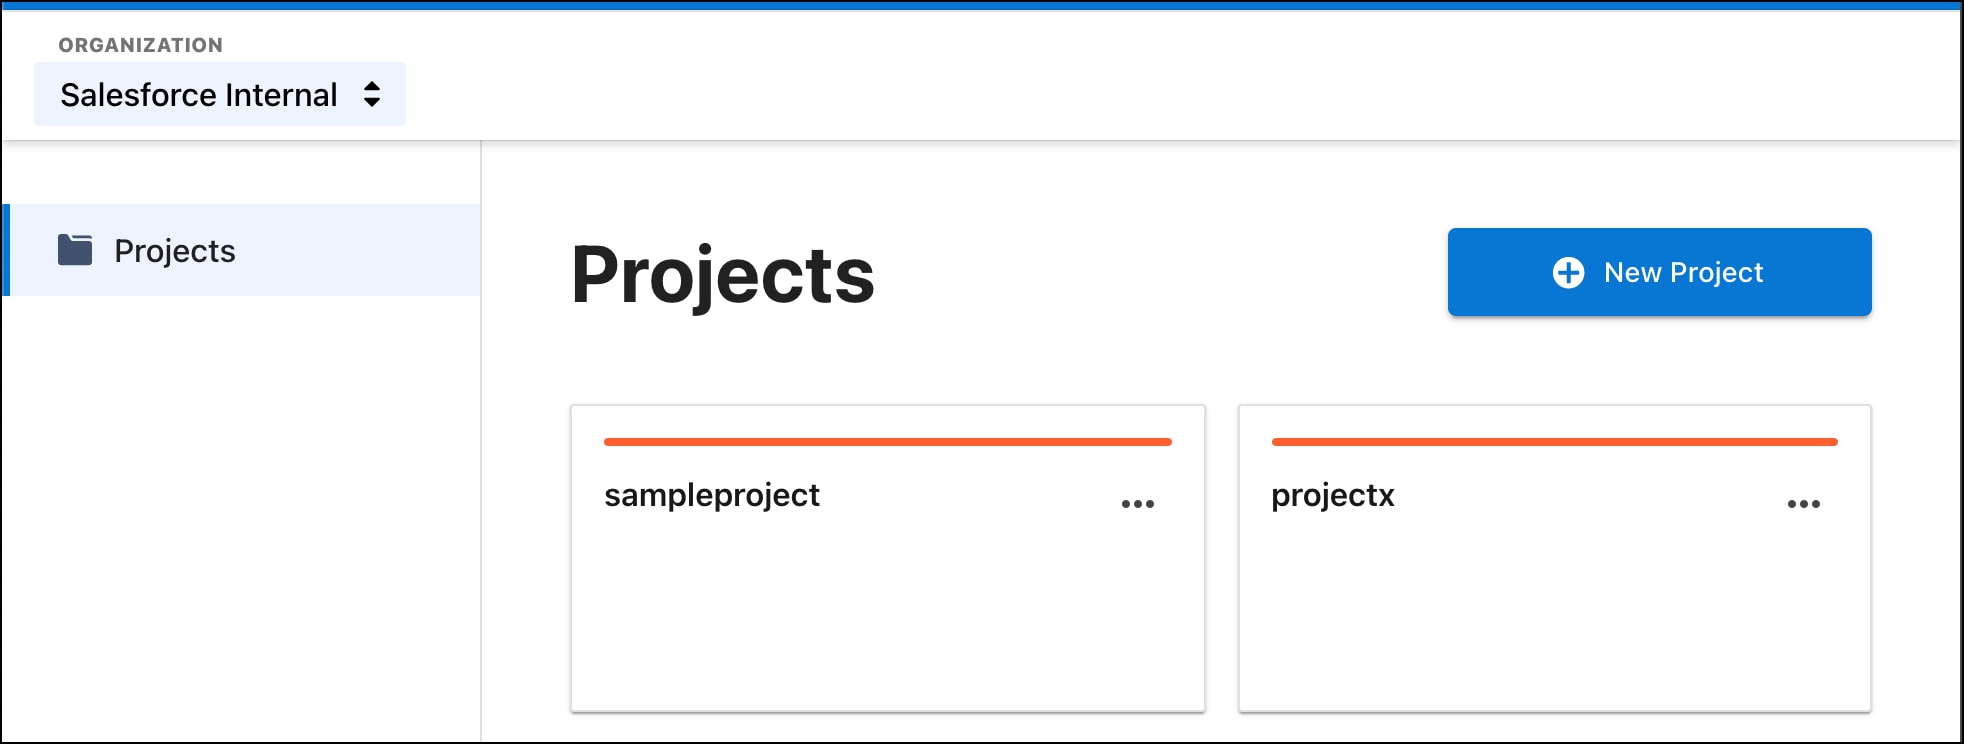
Projects help you manage multiple environments within an organization. Every Storefront Next project has a corresponding project within Managed Runtime for deploying and hosting the storefront code on Salesforce public cloud infrastructure. The storefront setup in Business Manager automatically creates a project for the storefront.
To find a project via the UI, start in Business Manager or Runtime Admin. To view the project, you must be assigned one of the project roles described in Prerequisites.
If you created your storefront in Business Manager, access your environment variables from the storefront page.
-
In Business Manager, click App Launcher
 and then select Administration > Sites > Storefronts, and then click your storefront.
 -
In the storefront detail page, click the environment, and then click Manage next to Deployments. You’re redirected to the Deployments page in Managed Runtime in a new tab.
-
Click the project name in the header.
To find an existing project in Managed Runtime:
- Log in to Runtime Admin.
- Select an organization from the organization menu (top left), if necessary.
- Click the name of the project.
To quickly switch between projects, use the project menu at the top of the page.
From the Project Settings page:
- Look up the project ID and ensure that it matches a Storefront Next configuration.
- Edit the project ID.
- View and edit the project’s name and URL.
- Delete the project.
- Manage deployment notifications. (See next section.)
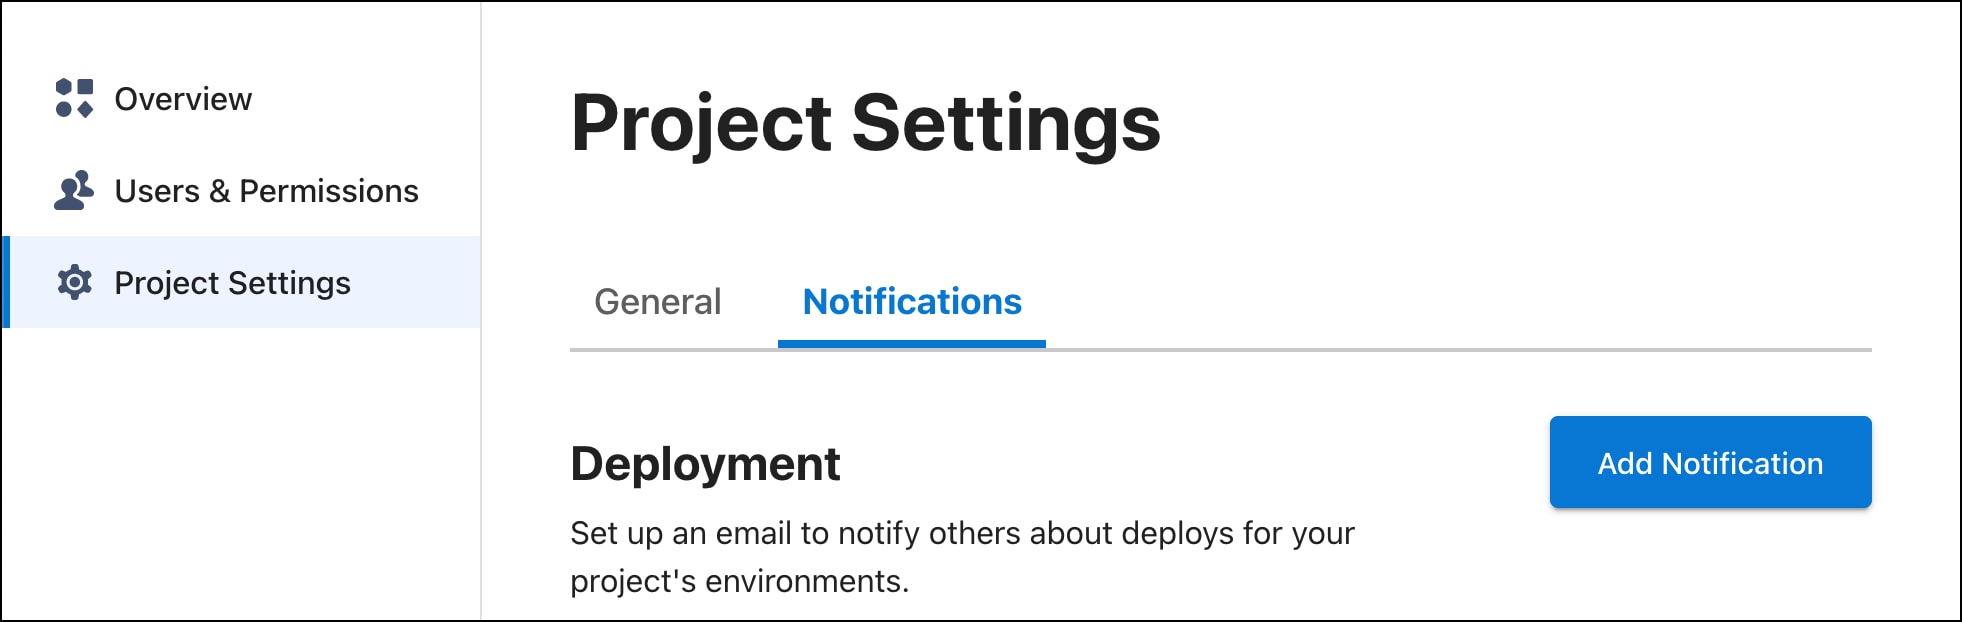
To access the Project Settings page:
- Go to a project’s Overview page.
- Click Project Settings from the left navigation.
To edit the settings, click Edit, make your edits, and click Update. To discard your edits, click Cancel.
To delete a project, click Delete, enter the project name to confirm, and click Yes, Delete. To keep the project, click No, Keep.
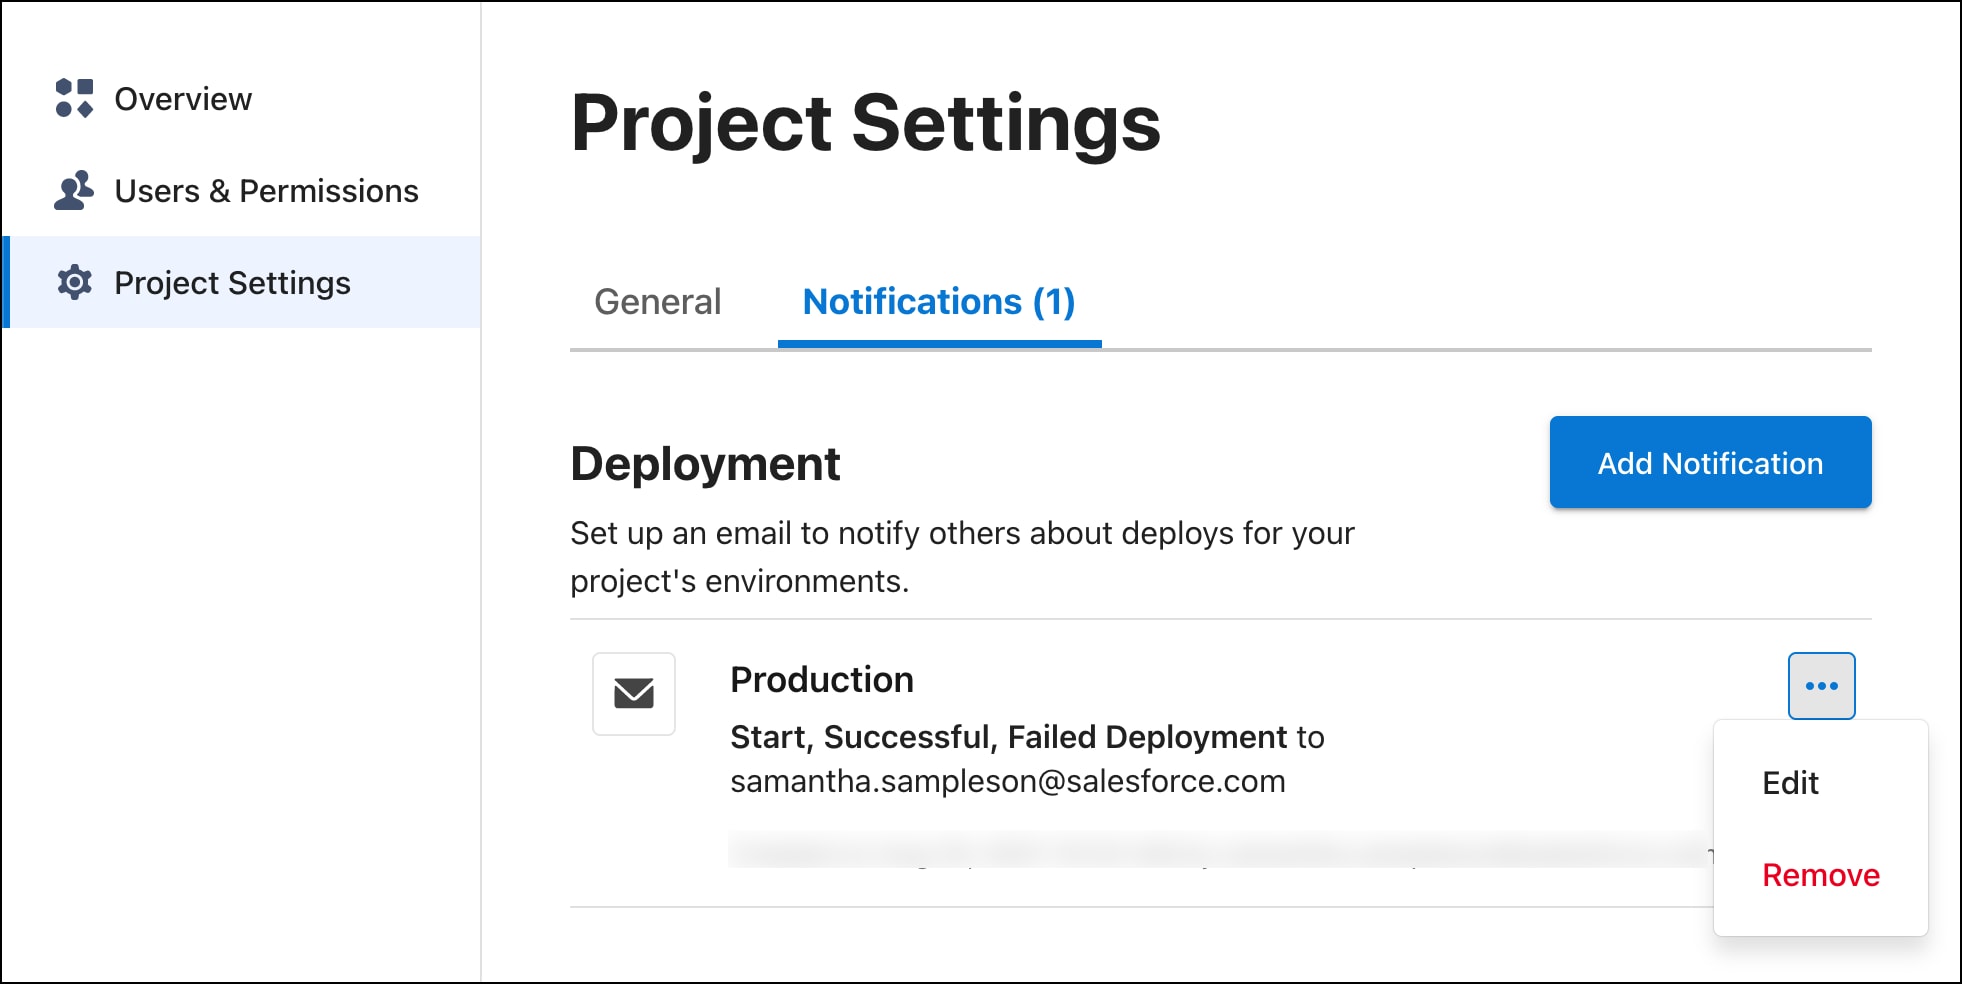
Receive email notifications for any of these deployment events:
- Start Deployment
- Successful Deployment
- Failed Deployment
To add a notification:
- Go to a project’s Overview page.
- Click Project Settings from the left navigation.
- Click Add Notification.
- Select one or more environments to be notified about.
- Select one or more deployment events.
- Enter email addresses for all notification recipients.
- Click Add Notification.
To edit a notification:
- Go to a project’s Overview page.
- Click Project Settings from the left navigation.
- Click the … button next to the notification.
- Click Edit.
- Change any of the notification settings.
- Click Update Notification.
To remove a notification:
- Go to a project’s Overview page.
- Click Project Settings from the left navigation.
- Click the … button next to the notification.
- Click Remove.
- Click Yes, Remove.
Create and manage environments in Business Manager, in the storefront’s page. When you create a storefront in Business Manager, it is preconfigured with the embedded content delivery network (eCDN) and a default domain. The default domain maps the domain to the MRT backend site.
To learn more about environments and other related concepts, see the Managed Runtime Overview.
- Business Administrator role in Account Manager or a role for the Business Manager Module and Organization context with read-write access to storefronts. See Create a Role in B2C Commerce in Salesforce Help.
See Create an Environment in Business Manager.
All supported regions have a paired backup region for failovers. Make sure that your application runs correctly in the selected primary and backup regions:
| Primary Region | Backup Region |
|---|---|
us-east-1 - US East (N. Virginia) |
us-east-2 - US East (Ohio) |
us-east-2 - US East (Ohio) |
us-east-1 - US East (N. Virginia) |
us-west-1 - US West (N. California) |
us-west-2 - US West (Oregon) |
us-west-2 - US West (Oregon) |
us-west-1 - US West (N. California) |
ca-central-1 - Canada (Central) |
us-east-2 - US East (Ohio) |
sa-east-1 - South America (São Paulo) |
us-east-1 - US East (Northern Virginia) |
ap-south-1 - Asia Pacific (Mumbai) |
ap-south-2 - Asia Pacific (Hyderabad) |
ap-south-2 - Asia Pacific (Hyderabad) |
ap-south-1 - Asia Pacific (Mumbai) |
ap-southeast-1 - Asia Pacific (Singapore) |
ap-northeast-2 - Asia Pacific (Seoul) |
ap-southeast-2 - Asia Pacific (Sydney) |
ap-southeast-1 - Asia Pacific (Singapore) |
ap-southeast-3 - Asia Pacific (Jakarta) |
ap-southeast-1 - Asia Pacific (Singapore) |
ap-northeast-2 - Asia Pacific (Seoul) |
ap-southeast-1 - Asia Pacific (Singapore) |
ap-northeast-1 - Asia Pacific (Tokyo) |
ap-northeast-3 - Asia Pacific (Osaka) |
ap-northeast-3 - Asia Pacific (Osaka) |
ap-northeast-1 - Asia Pacific (Tokyo) |
eu-west-1 - EU (Ireland) |
eu-west-3 - EU (Paris) |
eu-west-2 - EU (London) |
eu-west-1 - EU (Ireland) |
eu-west-3 - EU (Paris) |
eu-central-1 - EU (Frankfurt) |
eu-central-1 - EU (Frankfurt) |
eu-west-3 - EU (Paris) |
eu-central-2 - EU (Zurich) |
eu-central-1 - EU (Frankfurt) |
eu-south-1 - EU (Milan) |
eu-central-1 - EU (Frankfurt) |
me-central-1 - Middle East (United Arab Emirates) |
eu-west-2 - EU (London) |
il-central-1 - Israel (Tel Aviv) |
eu-west-2 - EU (London) |
For any site that uses Storefront Next and Managed Runtime, designate only one bundle at a time as deployed per environment.
- Go to a project’s overview page.
- Click the name of the environment you want to deploy to. For example: production.
- Under Bundles, click Deploy next to the bundle you want to deploy.
- Click Confirm Deploy.
- Wait until the deployment is complete.
When the deployment has successfully completed, the bundle appears underneath the heading Deployed Bundle. (For your first deployment to a new environment, the process can take up to an hour to complete.)
For any site that uses Storefront Next and Managed Runtime, you can delete only non-deployed bundles from a project.
- In the project’s overview page, click an environment.
- Select one or more bundles that aren’t currently deployed.
- Click Delete.
- When asked to confirm, click Delete.
- Wait until the deletion is completed.
Deletions are handled asynchronously and can take time to process.
Access the environment settings in one of these ways:
- If you created the environment in Business Manager, go to Administration > Sites > Storefronts, click your storefront, and then next to the environment, click the caret dropdown and click Edit. Log in to Runtime Admin opens in a new tab and access Environment Settings.
- Otherwise, log in to Runtime Admin. From your project, click the environment, and then click Environment Settings.
From the Environment Settings page, do these administration tasks:
- Rename an environment or environment ID.
- Change the deployment region.
- Enable or disable Source Maps.
- Add, edit, or remove site IDs associated with an environment.
Cookies are always enabled for Storefront Next and can’t be disabled. See Storage and Sessions.
To access the Environment Settings page for a storefront created in Business Manager:
- In Business Manager, click App Launcher and then select Administration > Sites > Storefronts, and then click your storefront.
- In the storefront detail page, click the dropdown next to the environment, and then click Edit. You’re redirected to the Environment Settings page in Managed Runtime.
To access the Environment Settings page in Runtime Admin:
- Go to a project’s Overview page.
- Click the name of the environment whose settings you want to edit.
- Click Environment Settings from the left navigation.
To make edits, click the Edit button next to either the General settings or the Advanced settings. After making your edits, click Update to save your changes or click Cancel to discard your changes.
Managed Runtime supports the ARM processor architecture for Server-Side Rendering (SSR) for Storefront Next. The ARM architecture represents the underlying compute infrastructure used to render your storefront.
ARM processors offer several advantages.
- Enhanced Performance: ARM architecture provides efficient processing capabilities optimized for modern web workloads.
- Modern Infrastructure: Built on the latest cloud computing technologies.
Use a redirect to forward a request from one URL to another. Redirects can help avoid disruptions to the user experience caused by changes to your storefront. For example, consider a seasonal campaign page for spring. When the spring campaign ends and is replaced with a summer campaign, you can redirect from the spring URL to the summer URL.
Redirects is a powerful feature that can have significant security consequences on your storefront, including redirecting to malicious URLs or assets. Be careful when assigning roles to users that give them Redirect access.
Before creating a redirect in a production environment, we recommend that you create it in a staging environment first.
Also create redirects using the projects_target_redirect_create API endpoint.
To create a redirect using Runtime Admin:
- Go to a project’s Overview page.
- Click the name of the environment where you want to create the redirect.
- Click URL Redirects from the left navigation.
- Click Create Redirect.
- In the Redirect From field, enter a relative URL path. For example, to redirect visitors from the URL
www.example.com/winter, enter/winter. - In the Redirect To field, enter a relative URL path.
- If needed, enable forwarding of query parameters and the wildcard path. (For more information, see Forwarding Query Parameters.)
- From the Redirect Type dropdown menu, select a redirect type based on the HTTP status code. (For more information, see HTTP Status Codes.)
- Click Create Redirect.
These sections describe each redirect option in detail.
The value that you enter in the Redirect From field must always be a relative path. The Redirect To field can be either a relative path or a full URL. For example, to redirect visitors from www.example.com/spring to www.example.com/summer, set Redirect From to /spring. The Redirect To field can be either /summer or www.example.com/summer.
Add an asterisk (*) to the end of the Redirect From URL to indicate a wildcard. A wildcard matches any (0 or more) characters in the URL. For example, a redirect from /a/* would match /a/, /a/b, and /a/b/c.
A wildcard character can only be used at the end of the Redirect From URL.
Standard redirects are processed first by Managed Runtime, followed by redirects with wildcards.
Most redirects use the Permanent 301 status code, but you can also select Temporary 302. If you’re unsure which HTTP status code to use, consult this status code explainer from MOZ.com.
Some requests contain query string parameters that you also want to include in the redirected request. For example, the relative path /spring-landing-page can be appended with a query string for analytics tracking, such as /spring-landing-page?gclid=123.
To enable query parameter forwarding, go to the Forward section of the form and select Query Parameters. Otherwise, query string parameters from the source URL aren’t included in the redirect URL.
When both the Redirect From and Redirect To URLs have query strings and forwarding is enabled, the redirect URL combines both query strings. The query parameters from the Redirect To URL are appended to the query string in the request. For example, imagine your application receives a request for the relative path /spring?year=2019. If you’ve chosen to redirect /spring to /summer?year=2020, the redirect URL is /summer?year=2019&year=2020 when forwarding is enabled.
You can automatically include any path that comes after the wildcard portion of the Redirect From URL in the Redirect To URL. For example: if /a/* matches /a/b/c in the Redirect From URL, and the Redirect To URL is /z/, the redirect URL is /z/b/c.
To enable wildcard path forwarding, go to the Forward section of the form and select Wildcard Path.
Always create redirects in a staging environment and clone them into production after testing.
Copy all the redirects from one environment to another using the clone redirects feature.
Also clone redirects using the projects_target_redirect_clone_create API endpoint.
To clone redirects using Runtime Admin:
- Go to a project’s Overview page.
- Click the name of the environment that contains the redirects that you want to clone.
- Click URL Redirects from the left navigation.
- Click Clone Redirects. The Clone Redirects form appears. The current environment is listed under From Environment (the source).
- Under To Environment, select the environment that you want to clone the redirects into (the destination).
- Click Clone n Redirects. (Where n is the number of redirects to be cloned.)
When you clone redirects, you’re replacing all the redirects in the destination environment with all the redirects from the source environment.
Also edit a redirect using the projects_target_redirect_partial_update API endpoint.
To edit the settings for an existing redirect using Runtime Admin:
- Go to a project’s Overview page.
- Click the name of the environment that contains the redirect that you want to edit.
- Click URL Redirects from the left navigation.
- Click the ellipsis button (…) next to the redirect.
- Click Edit.
- Update the settings.
- Click Update Redirect.
Delete a redirect using the projects_target_redirect_destroy API endpoint.
To delete a redirect using Runtime Admin:
- Go to a project’s Overview page.
- Click the name of the environment that contains the redirect that you want to delete.
- Click URL Redirects from the left navigation.
- Click the ellipsis button (…) next to the redirect.
- Click Delete.
- Click Yes, Delete Redirect.
If a redirect isn’t working as expected, try these troubleshooting steps:
- Clear your browser cache because redirects are cached.
- Verify that you’re viewing the settings for the correct environment.
- Edit the redirect and verify that the correct values are entered in the Redirect From and Redirect To fields.
Redirects have the following technical limitations:
- Each environment can have a maximum of 10,000 redirects.
- Each environment has its own set of redirects. Keep them in sync using cloning.
- The redirects feature supports simple redirects from one path to another. For complex redirects with conditionals, use Express.js’ redirects support in
ssr.js. - Redirects created with the Runtime Admin tool or the Managed Runtime API don’t run on local development environments.
- Redirects aren’t triggered by page transitions in the Storefront Next app. They can only be triggered by an HTTP request.
- To load a redirect in the context of a storefront, use the managed endpoint
/mobify/redirect/$path.
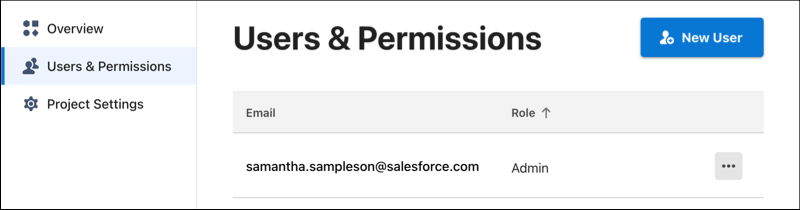
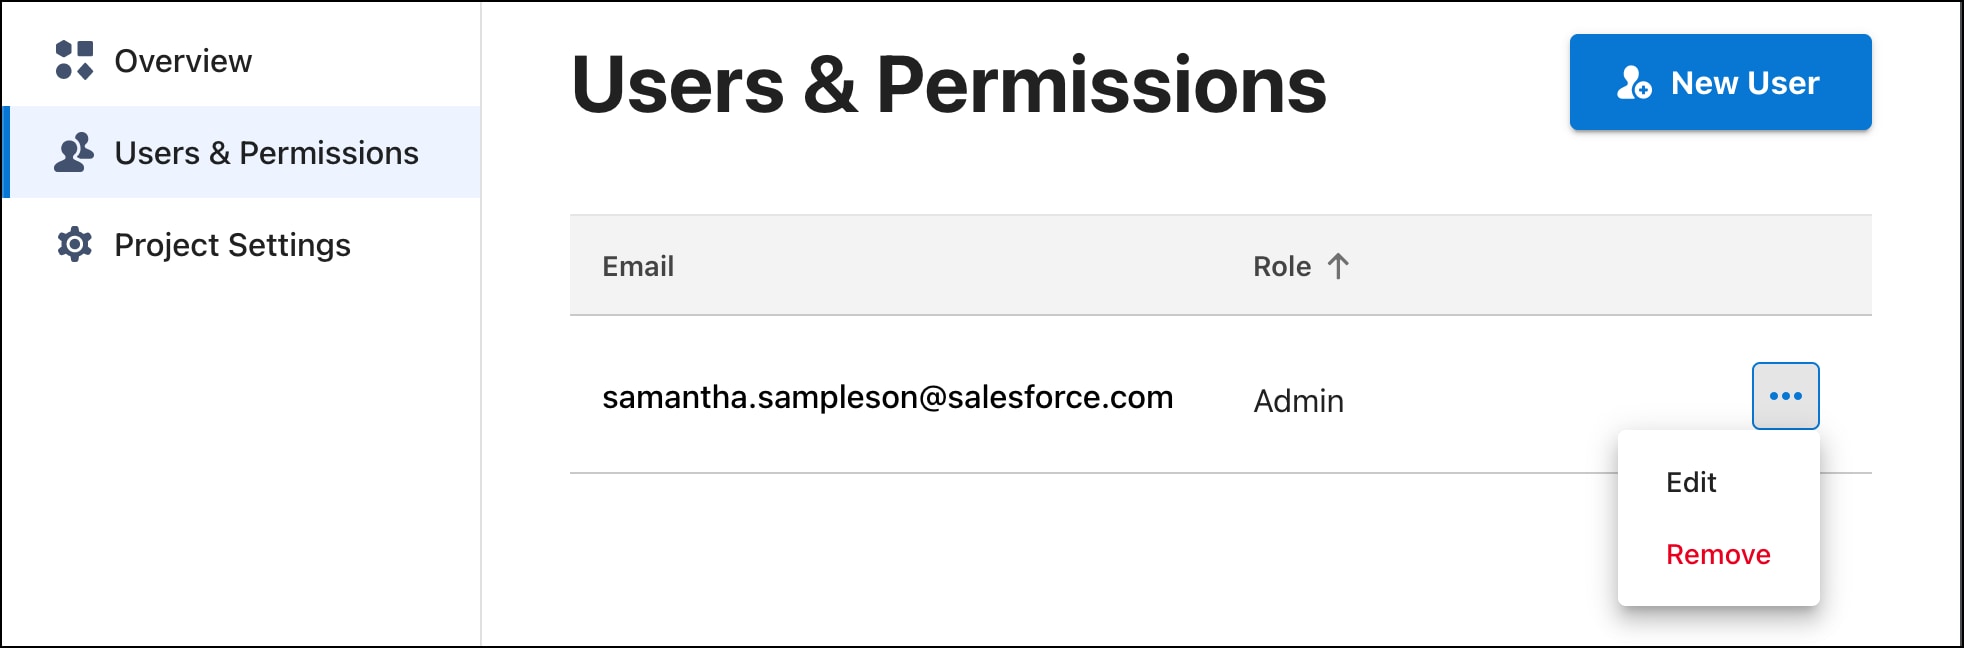
To add a user to a project:
- Go to a project’s Overview page.
- Click Users & Permissions from the left navigation.
- Click New User.
- Enter the user’s email address. (Make sure that the user is part of your organization and has one of the following roles in Account Manager: Managed Runtime User or Managed Runtime Admin.)
- Select a role.
- Click Add User.
To change a user’s role:
- Go to a project’s Overview page.
- Click Users & Permissions from the left navigation.
- Click the … button next to the user’s name.
- Click Edit.
- Select a role.
- Click the popup menu that appears.
- Select a new role.
- Click Save.
For a list of user abilities associated with each role, see the Managed Runtime Overview.
To remove a user from a project:
- Go to a project’s Overview page.
- Click Users & Permissions from the left navigation.
- Click the … button next to the user’s name.
- Click Remove.
- Click Yes, Remove User.