Create a Custom Recommendations Component for B2C Stores Using Commerce Einstein APIs
Creating a custom B2C Commerce Einstein recommendations component includes implementing the Activity Tracking API and connecting the component to the Product Recommendation API.
For B2C storefronts, you connect the component to the Product Recommendation API through a wire adapter. Your component must incorporate calls to the Activity Tracking API. When configuring the Activity Tracking API, keep these considerations in mind.
- Implement both the viewReco and clickReco activities.
- If you build custom components that show product details without including the Product Detail Purchase Options component, make sure to implement the viewProduct activity.
- If you add custom add-to-cart functionality, also implement the addToCart activity.
You can also introduce custom JavaScript, HTML, and CSS to make front-end modifications. For more information, see the Lightning Web Components Dev Guide.
This example shows a custom similar-products Commerce Einstein recommendation component using the PRODUCT anchor type. All steps refer to files created for a sample Lightning web component. For more information, see Create a Sample Lightning Web Component.
-
In the component’s JavaScript file, define a custom component class (for example,
RecommendationsSample). Implement the ProductRecommendationsAdapter to return Einstein product recommendations.For example, in
force-app/main/default/<Component Name>.js, import this wire adapter from therecommendationsApimodule within the commerce namespace (commerce/recommendationsApi). Declare its required parameters with the@wiredecorator. -
Update the component’s HTML file (for example,
force-app/main/default/<Component Name>.html). -
Update the metadata in the component’s XML file (for example,
force-app/main/default/<Component Name>.js-meta.xml).Ensure that the
<apiVersion>tag references the latest API version. -
In your lwc directory, create a CSS file with the same name as your project. In this example, the CSS file is named
recommendationsSample.css.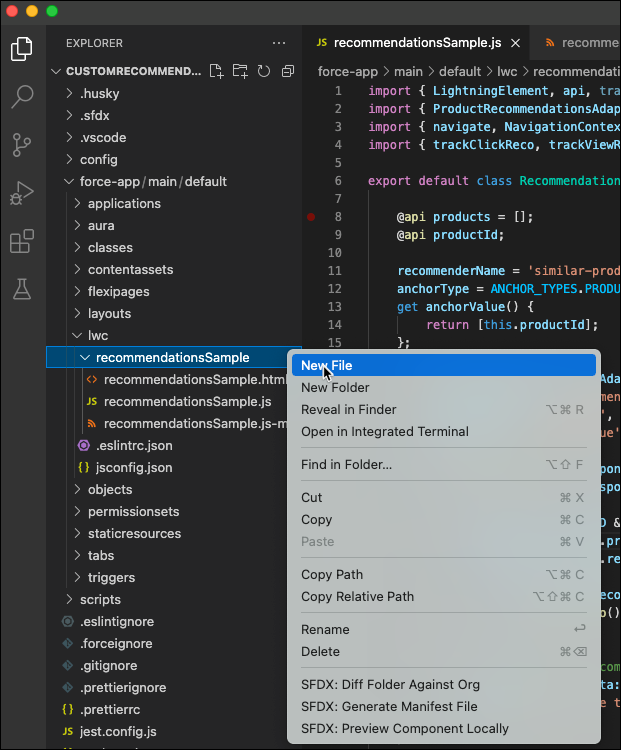
-
In the CSS file, add custom CSS to style your component. The sample code provided includes modifications to the component’s image size and headings.
-
After you create the custom Einstein Recommendations component, deploy the component from Visual Studio Code and place it in your store with Experience Builder.
-
Before publishing your site from Experience Builder, click Preview to see how the custom component looks in a desktop browser window or on a mobile device.
See Also