Troubleshoot Your Push Implementation
Before proceeding to more specific troubleshooting, first review the basic MobilePush SDK troubleshooting information for Android and iOS implementations to identify any fundamental issues.
While troubleshooting, consider these questions when testing and validating push notifications:
- Is the device registered in Marketing Cloud Next or Marketing Cloud Engagement with a valid device token?
- Is the device opted-in to receive push notifications?
- If you use the SDK with Marketing Cloud Engagement, is the contact or device in the refreshed audience list or data extension that you sent the message to?
- If you use the SDK with Marketing Cloud Next, is the contact and their corresponding device in the segment that you sent the message to?
- Does Marketing Cloud show that the send job is complete?
If you answered Yes to all of these questions, but the device didn’t receive the notification, there’s likely an issue with the implementation. If you answered No to all of these questions, your implementation probably has an issue with registration or setting up your audience. In either case, review these troubleshooting steps to identify and resolve the issue.
Contacts fail to receive push notifications for several reasons:
- The contact is associated with an invalid device token
- The contact is opted out for one of these reasons:
- Invalid or malformed registrations
- Feedback from the push notification service (Apple or Google)
- Mismatched credentials (Sender ID, p12 Certificate, or p8 Auth Key)
- Contact opted out on the device
- The contact wasn’t in the audience list, data extension, or segment for the push notification
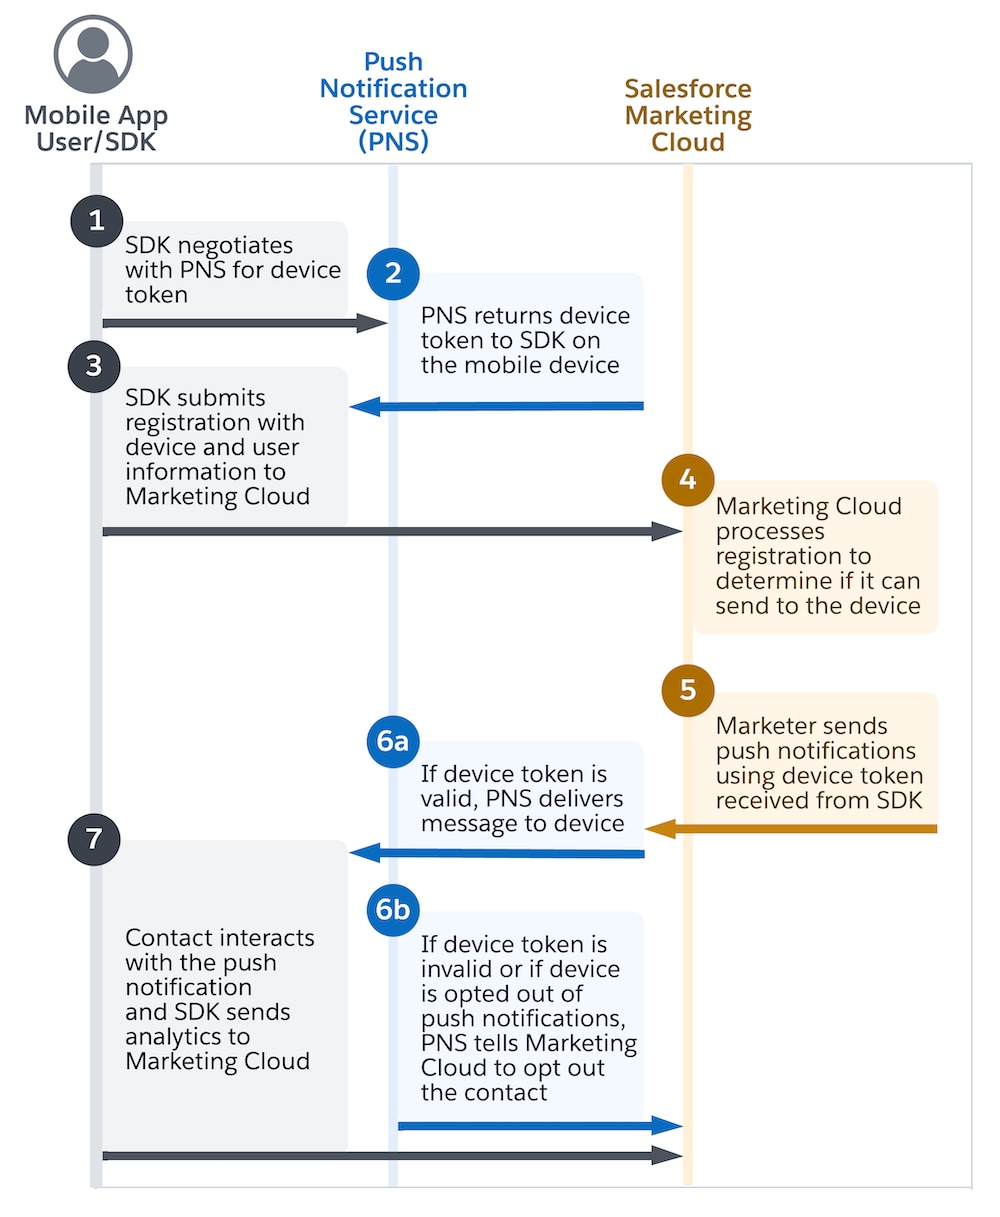
The process of retrieving device tokens varies across platforms. For iOS, the app retrieves the device token and then forwards it to the SDK. For Android, the SDK typically manages the retrieval and registration of the device token automatically on behalf of the app. For more information, refer to steps 1–3 in this diagram.
Some Android implementations interfere with the process of retrieving the device token, which requires the app to forward the device token to the SDK, similar to iOS. In this situation, make sure that the app forwards an unmodified token to the SDK. Altering the device token risks creating a malformed, invalid, or delayed device token. In some cases, the app can fail to forward the device token to the SDK and Marketing Cloud entirely.
First, review the registration and the device token by the SDK by following the steps to troubleshoot registrations. Also review the logs and the SDK state output.
To review the device token and other details stored in Marketing Cloud Engagement, follow these steps.
-
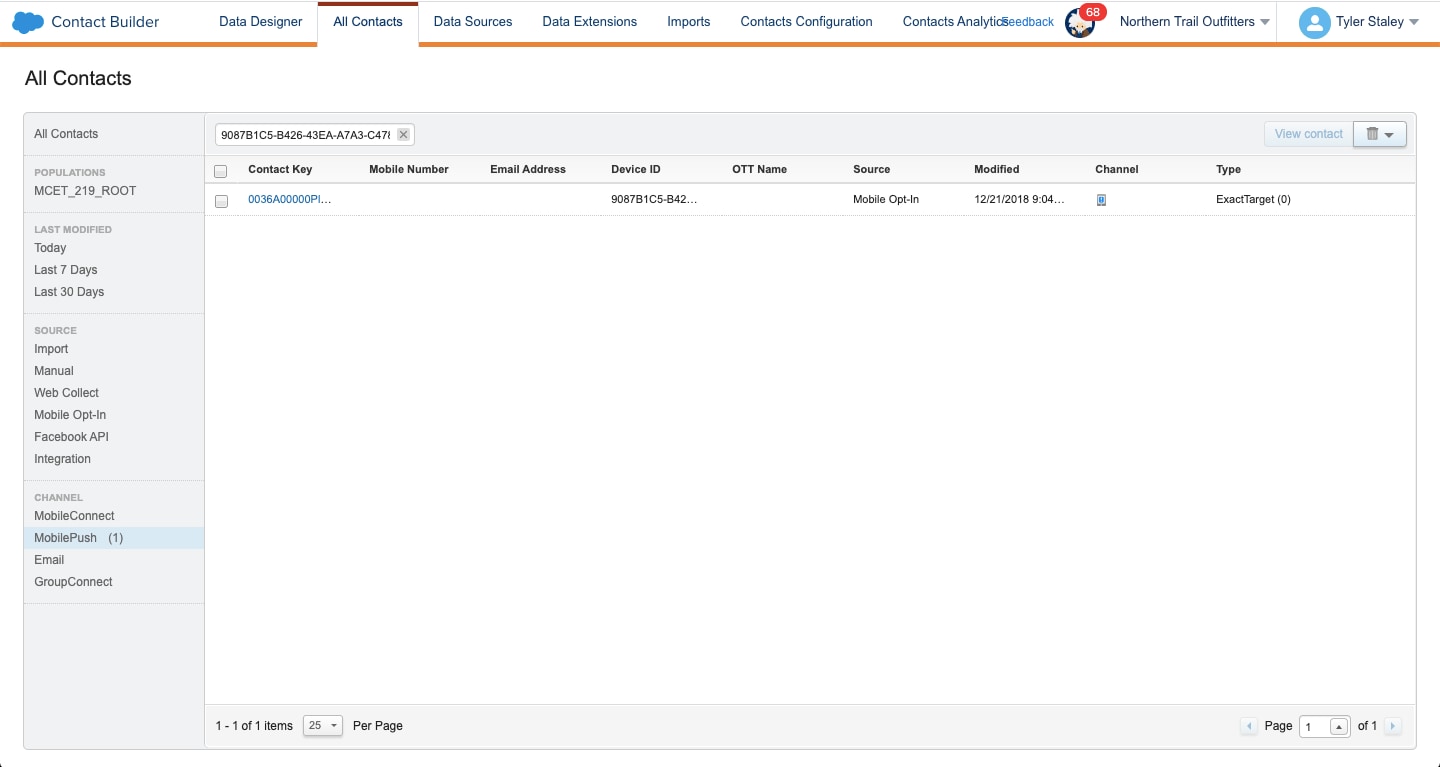
In Audience Builder, go to Contact Builder > All Contacts > MobilePush.
-
Search for and select the contact key or device ID for the user that you’re troubleshooting.
-
On the Attributes tab for the contact, in the MobilePush Data section, review the details for the contact.
Confirm that the device token, which is labeled System Token in the UI, is well-formed and that the Status is active.
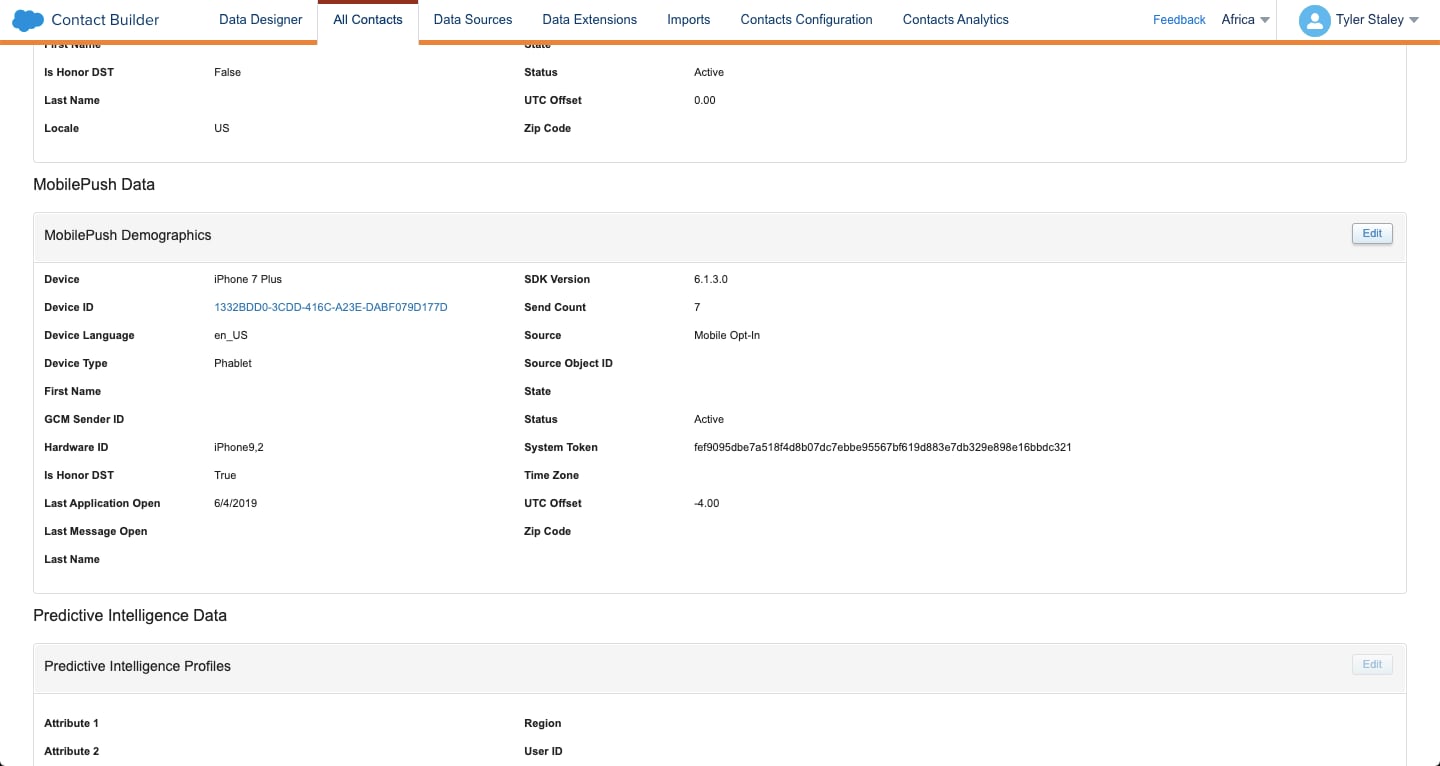
Make sure that the contact isn’t opted out because of an invalid registration. Confirm that the SDK is initialized and is configured to register a valid device token. Verify that the value of the push_Enabled field is true. If either of these values is missing from the registration payload, Marketing Cloud sets the contact as opted out.
Review the registration and the device token by following the steps to troubleshoot registrations. Also review the logs and the SDK state output.
To review opted out information in Marketing Cloud Engagement, follow these steps.
- In Audience Builder, go to Contact Builder > All Contacts.
- Select the Mobile channel.
- Search for and select the contact key or device ID for the user that you’re troubleshooting.
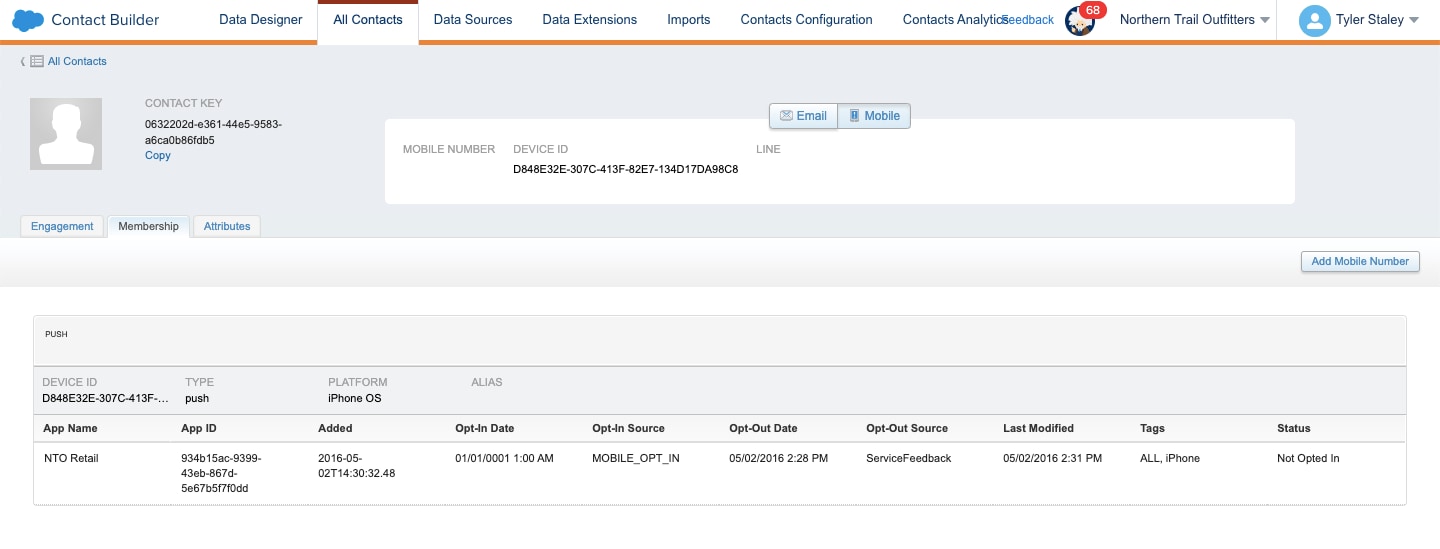
- On the Membership tab, review the contact’s opt-out information. If the status is Not Opted In, the contact has opted not to receive push notifications.
Every time Marketing Cloud sends a push notification to the push notification service, it receives feedback on whether the send succeeded or failed.
Some failure states are due to invalid or malformed tokens. The causes of this issue are noted under Review Invalid Device Tokens.
Other failure states occur when the contact opts out of receiving push notifications. In this case, Marketing Cloud reacts to the feedback from the push notification service by updating the contact record to opt that contact out.
To review the time and reason that a user was opted out in Marketing Cloud Engagement, follow these steps.
- In Audience Builder, go to Contact Builder > All Contacts.
- Select the Mobile channel.
- On the MobilePush tab, search for and select the contact key or device ID for the user that you’re troubleshooting.
- On the Membership tab, review the opt-out information.
The push notification services give feedback on a best effort basis. The services don’t always inform Marketing Cloud immediately after a contact opts out. For example, aggressive testing scenarios can cause delays with the push notification service. As a result, the service might not give accurate opt-out feedback for several send attempts.
Check whether your Android and iOS credentials, server key, and .p8 authentication key that you uploaded in Marketing Cloud are correct. Mismatched credentials cause your sends to fail. To ensure that your credentials are uploaded correctly, see Salesforce Help: Add Provisioning Info to Your App.
To send a message, Engagement requires a contact key. For MobilePush, Engagement uses the contact key to look up the corresponding device information for that audience, and then sends the message to their device or devices.
Before sending a test push notification, verify that the filtered list, filtered data extension, or standard data extension contains the correct contact keys for the recipients. To ensure that the contact keys are correct, refresh your audience before you send.
- In Engagement, navigate to Mobile Studio > MobilePush > Overview tab.
- Create a message.
- On the Select Audience step, select the list.
- Select Auto-refresh before send before clicking Next.
- Finish creating your test message and send.
Depending on the automations set up within your account, added or modified audience records may not automatically be reflected in the filtered lists or filtered data extensions that you’re trying to send with. To ensure the contact key record is populated in the list or data extension you’re testing with, refresh the filtered list or filtered data extension. Standard data extensions don’t require a refresh.
Ensure that you correctly configure any overrides or customizations to push notification handling, such as supporting rich image notifications or saving notifications locally in the app or inbox. Review information about customized notifications in the platform-specific push notification guides for Android and iOS.
Silent push notifications are notifications that your app receives in the background. They’re designed for processing without displaying on the device. To enable your app to handle silent push notifications, use the SilentPushListener method in Android. For iOS, see Silent Push Notifications.
After a contact opens a notification on the device, the SDK records the analytic event. The SDK submits analytics to Engagement after the application goes into the background or comes into the foreground. If a user forces the app to close, the analytic event is stored and submitted to Engagement after the next app open. It can take up to five minutes for Engagement servers to process and make the analytics available.
The three most common reasons for why engagement analytics don’t show up in Engagement are tied to initialization of the SDK.
- Failed or delayed initialization can lead to delayed, duplicate, or missing analytics data. Ensure that the MobilePush SDK is successful in initializing.
- The SDK records and submits analytic events only if
etanalyticsis configured. As part of initialization, ensure that the builder is configured withetanalyticsenabled. - Android requires a callback for analytics.
If you use push SDKs from multiple providers in your app, see the Android and iOS troubleshooting guides.