Salesforce Skills in Claude Code generate production-grade Apex, Lightning web components (LWCs), and test classes from natural language prompts. The code automatically passes Salesforce Code Analyzer and achieves 75%+ test coverage. This means you can describe what you need in plain English, and Claude generates deployment-ready code that follows Salesforce best practices.
In this post, we’ll walk through building a complete account creation form with LWC, Apex controller, and test classes. Then we’ll explain how the skill system works under the hood, and explore advanced patterns like batch jobs, service layers, and debugging workflows.
Understanding Salesforce Skills
Salesforce Skills are specialized AI capabilities that understand Salesforce architecture, governor limits, security patterns, and deployment requirements. Think of them as expert developers embedded directly into your development workflow.
When you ask Claude Code to “Create an account creation form,” it doesn’t just generate generic code. Behind the scenes, the generating-apex skill discovers your project conventions and generates production-grade code with proper error handling and governor-safe queries. It enforces guardrails like preventing SOQL in loops and validates bulkification patterns. The skill then creates test classes with 75%+ coverage using TestDataFactory patterns. Before marking the task complete, it runs Salesforce Code Analyzer and executes your test suites automatically.

How skills work under the hood
When you make a request to Claude Code, the system follows a four-stage workflow. First, Claude analyzes your prompt and matches it to the appropriate skills. Keywords like “Lightning Web Component” activate generating-lwc-components, while “Apex class” triggers generating-apex, and “test class” activates generating-apex-test.
Once matched, each skill executes its workflow. The generating-apex skill discovers your project conventions, including naming patterns and existing classes. It chooses the correct pattern, i.e., Service, Controller, Batch, or another architecture, and reviews templates from its assets directory. The skill then generates your class with built-in guardrails that enforce sharing keywords and prevent SOQL in loops. Next, it calls the generating-apex-test skill to create comprehensive test coverage.
Throughout this process, Skills enforce guardrails automatically. They reject code with queries inside loops, force the sharing keyword on all classes, and won’t complete without generating test classes. For Lightning web components, they validate pattern formatting on both client and server sides. Every skill generates the required metadata files like .cls-meta.xml automatically.
Finally, before reporting success, Skills validate the generated code. They run sf code-analyzer to catch security violations, execute sf apex run test to verify functionality, and ensure 75%+ coverage. This means you get production-ready code, not just boilerplate.
Tutorial: Building an account creation form
Let’s build a real-world feature: a Lightning web component form that creates Account records with full validation, error handling, and test coverage.
Overview
We’ll create a complete solution with three components: a Lightning web component with Account Name and Phone fields, an Apex Controller with an @AuraEnabled method and error handling, and a test class with 75%+ coverage and bulk testing for 251+ records. The form will include inline validation, toast notifications, and will be ready for deployment to App Builder and Home pages.
Prerequisites
Before we dive in, make sure you have Claude Code installed (free for individual developers), Node.js for installing skills, and the Salesforce CLI authenticated to your org. You’ll need a Developer Edition org, sandbox, or scratch org. Run sf org login web to authenticate if you haven’t done so already.
Installing Salesforce Skills
Setting up Salesforce Skills takes just one command. Navigate to your Salesforce project directory and run:
1npx skills add forcedotcom/sf-skillsThis pulls the official Salesforce Skills library from GitHub.
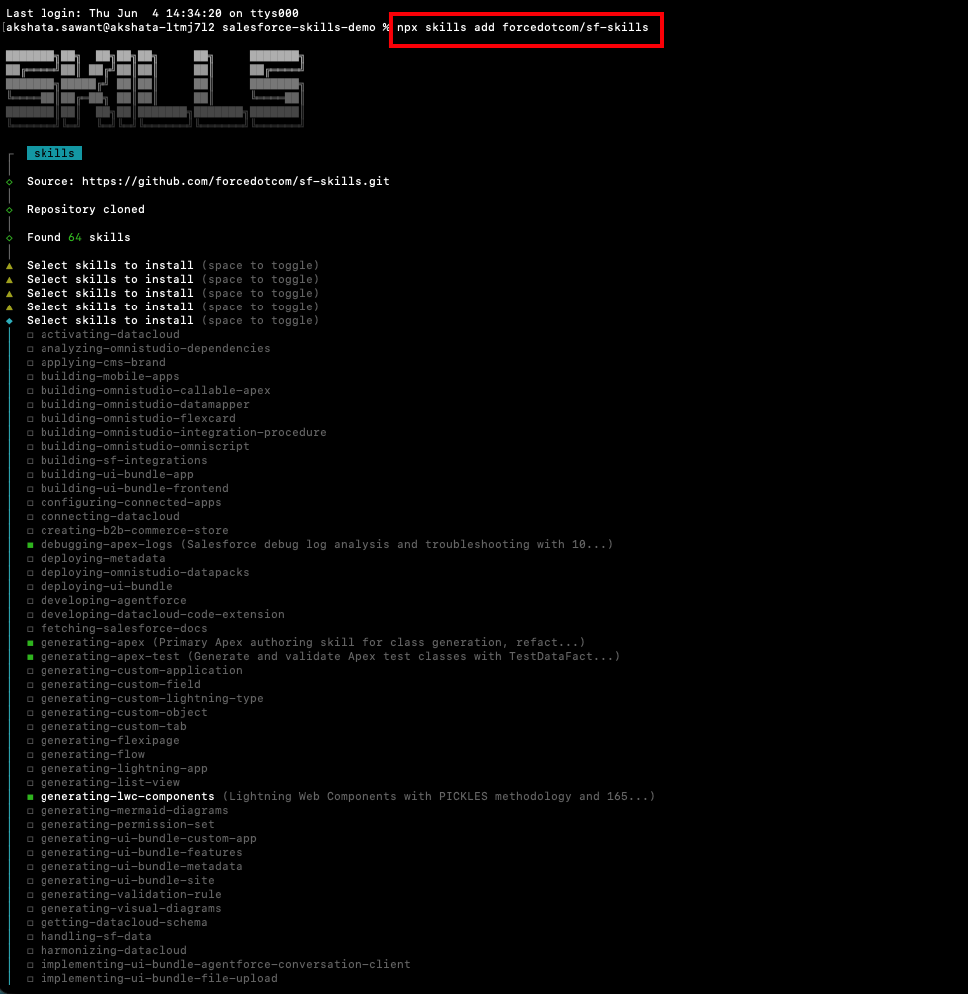
Use the spacebar to select the skills you want. For this tutorial, select:
generating-apex: For Apex class generationgenerating-apex-test: For Apex test class generationgenerating-lwc-components: For Lightning web component generationdebugging-apex-logs: To debug your Apex classes
Press Enter to install.
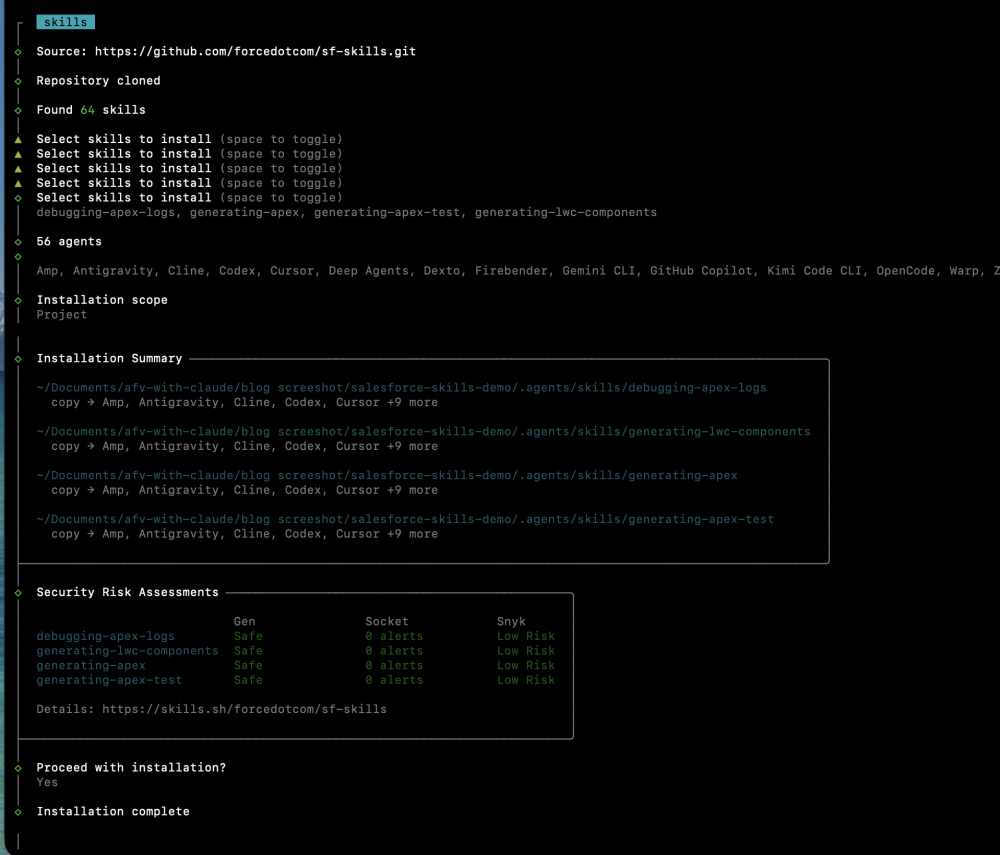
You can select the installation scope:
- Project: Install in current directory (committed with you projects)
- Global: Install in home directory (available for all your projects)
The skills are now available in your Salesforce Project under your-salesforce-project/skills-lock.json.
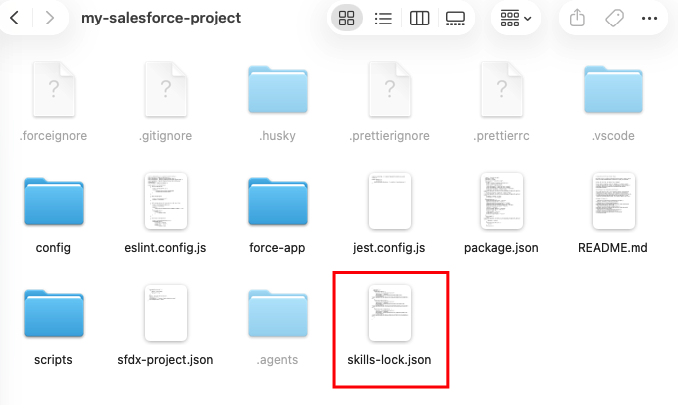
You can also take a look at all the skills in the skills-lock.json file to view your installed skills.
Currently, the forcedotcom/sf-skills library includes 60 + skills — and they’re growing. View the full list at the official sf-skills repository.
To install all available skills, add the --all flag
1npx skills add forcedotcom/sf-skills --allNote: Salesforce skills are NOT packaged as a npm package. We also do not own the “skills” npm package. We use it as a convenient way to install our skills from our GitHub repo.
Step 1: Start Claude Code
Launch Claude Code in your project directory.
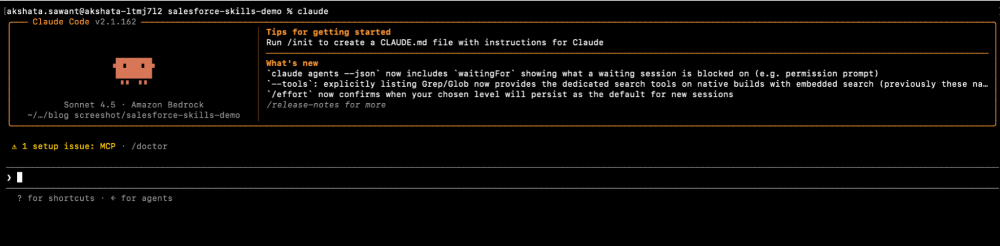
1claudeYou’ll see the Claude Code interactive prompt. This is where the magic happens.
Step 2: Make your request
Type or paste the following prompt.
1Create a complete Salesforce solution with the following components:
2
31. Lightning Web Component (LWC)
4Build a form component named accountCreationForm with two input fields:
5- Account Name (required)
6- Phone (required, 10-15 digits)
7- Include a Save button disabled until both fields are valid
8- Display inline validation error messages
9- Show success toast on save, error toast on failure
10- Handle loading state with spinner
11
122. Apex Controller
13- Create AccountCreationController class
14- Method: @AuraEnabled(cacheable=false) saveAccount(String accountName, String phone)
15- Use standard Phone field (Account has no standard Email field)
16- Proper error handling with AuraHandledException
17- Test class with ≥85% coverage
18
193. App Builder Integration
20- Configure *.js-meta.xml for App Page and Home Page
21- Provide deployment instructions
22
23Constraints:
24- Use imperative Apex (not @wire) since this is DML
25- Follow Salesforce LWC best practices
26- Standard objects and fields only
Here’s what the complete prompt for creating an Account Creation form, including all the requirements listed, looks like in the terminal.
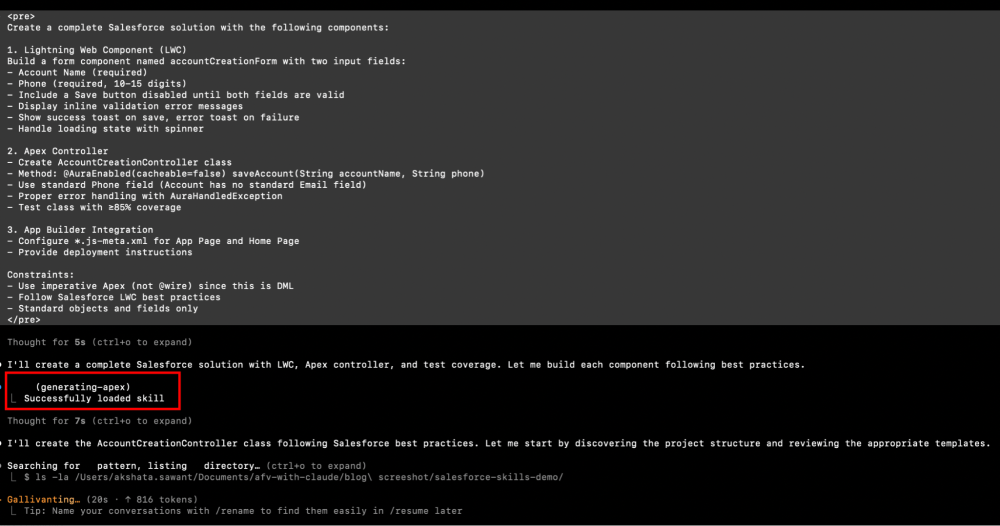
Step 3: Watch Skills in action
After you submit the prompt, Claude Code automatically activates the right skills: generating-lwc-components for the UI, generating-apex for the controller, and generating-apex-test for tests.
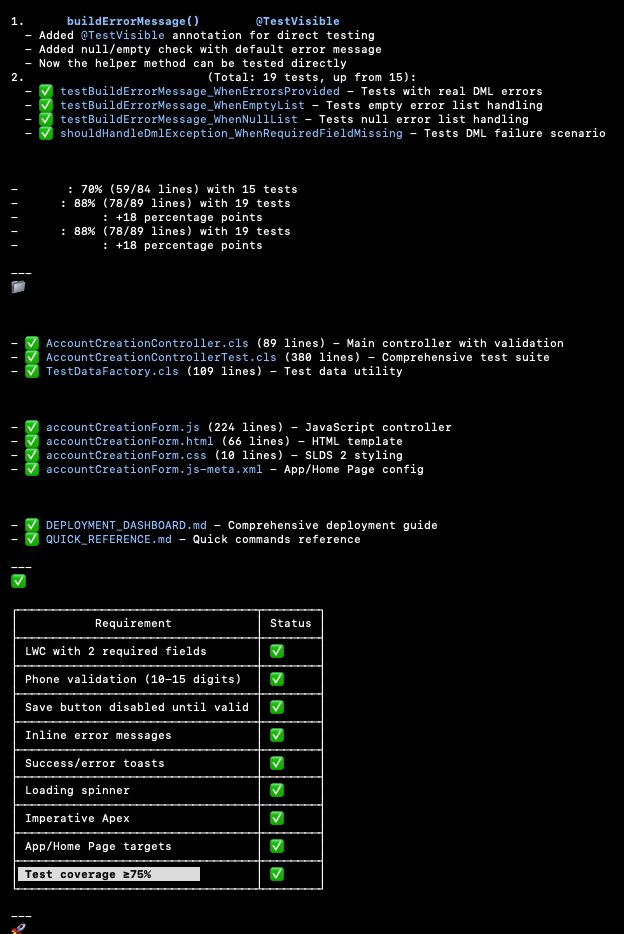
It discovers your project patterns, including existing naming conventions and architectural layers. Then it generates all required files:
accountCreationForm.html:Lightning Web Component templateaccountCreationForm.js:Component logic with imperative Apex callsaccountCreationForm.js-meta.xml: Metadata for App/Home page exposureAccountCreationController.cls:Apex controller with error handlingAccountCreationController.cls-meta.xml:AccountCreationControllerTest.cls:Test class with test methodsAccountCreationControllerTest.cls-meta.xml:Test metadata file
Step 4: Review the generated code and test classes
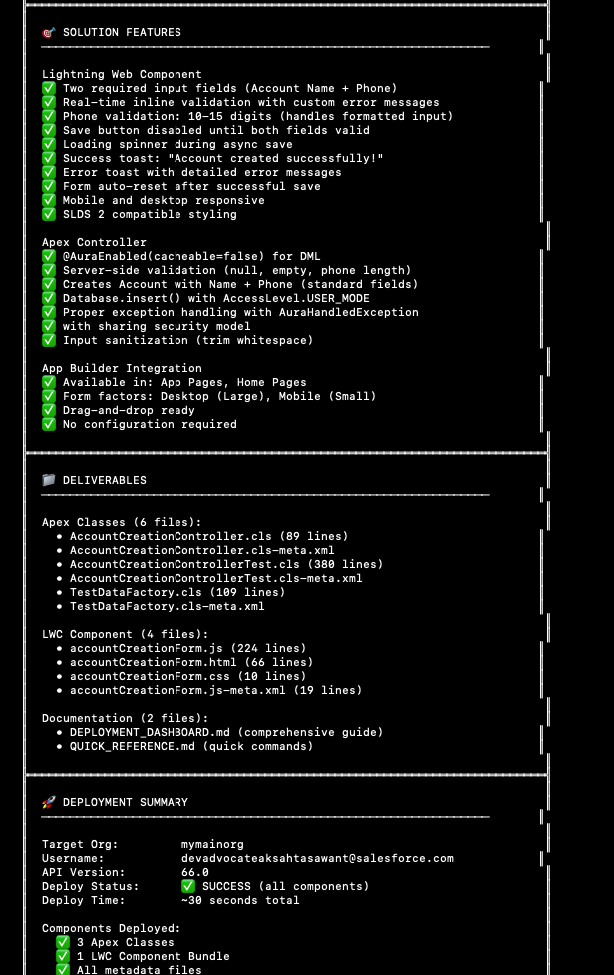
Review the generated code and the test classes. You’ll notice that they are production-ready with the help of Salesforce Skills, and we’ve achieved 100% test coverage for the Apex Class.
Step 5: Deploy and test your solution
Since we’re using Claude, it can help us deploy and test our solution, or you can use Salesforce CLI commands.
Step 6: Add component to your org’s Home page
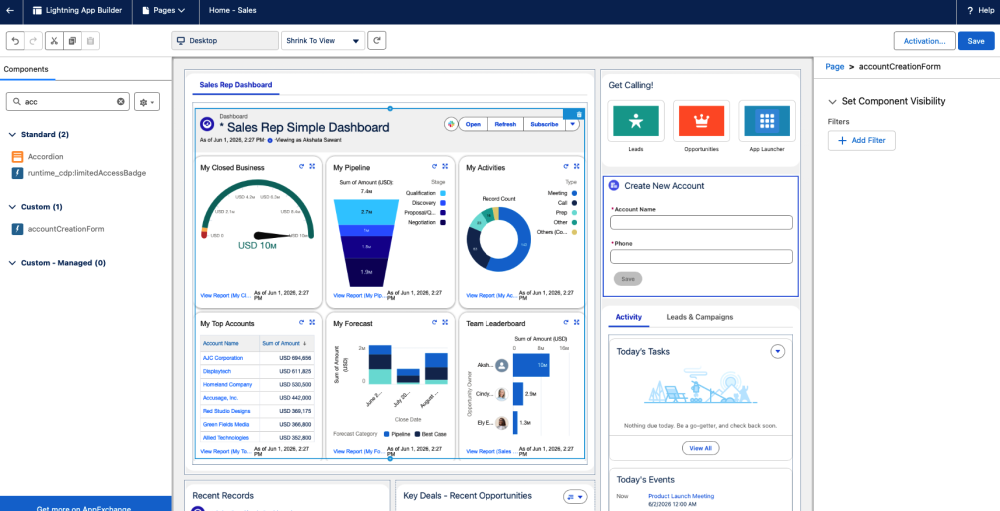
Navigate to Setup → Lightning App Builder and click New → Select Home Page. Choose a template like “Two Regions.” From the Custom components section, drag Account Creation Form onto the page. Click Save → Activation → Assign as Org Default.
The screenshot below shows the Lightning App Builder interface with the accountCreationForm component visible in the custom components panel and being placed in a Home Page layout.
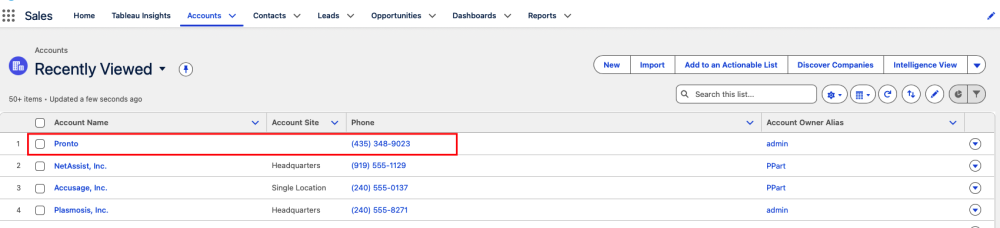
Step 7: Test in Salesforce UI
Navigate to your Salesforce Home page and test the component. Leave Account Name empty and an error message appears. Enter an invalid phone number with nine digits and an error message appears. Enter valid data and the Save button enables.
This tutorial covered a single LWC plus Apex controller pattern, but Skills handle much more complex scenarios, including batch jobs with Database.Stateful, Service-Selector-Domain layered architectures, screen flows with decision routing, and debug log analysis.
Here are five patterns that you can build with Salesforce Skills:
1. Generate a batch job for data processing
Ask Claude to “Create a batch Apex class to archive Cases older than two years named CaseArchivalBatch. Query Cases where ClosedDate < LAST_N_YEARS:2, update Status__c to ‘Archived’, and include proper error handling and logging. Generate test class with 75%+ coverage.”
Claude activates generating-apex and generates CaseArchivalBatch.cls with Database.Stateful for error tracking, proper start/execute/finish methods, governor-safe queries with no SOQL in loops, and CaseArchivalBatchTest.cls with bulk testing for 251+ records.
2. Build a service layer class
Request “Create an AccountService class with a method to update Account billing addresses in bulk using the Service-Selector-Domain pattern. The method signature should be updateBillingAddresses(Map<Id, Address> addressByAccountId). Include proper error handling and generate test class with 90%+ coverage.”
Claude generates AccountService.cls with the with sharing keyword and bulkified DML, delegates queries to AccountSelector.cls, returns List<Database.SaveResult> for partial-success handling, and creates a test class using the TestDataFactory pattern.
3. Create a screen flow
Prompt “Create a screen flow for lead qualification named Lead_Qualification. Add screens for Company Name, Industry, and Annual Revenue. Include a decision element that routes to appropriate queues based on revenue. Assign to Enterprise Queue if revenue > $1M, else assign to SMB Queue.”
Claude activates generating-flow and generates Flow metadata following Salesforce best practices.
4. Debug Apex logs
Tell Claude “Analyze the Apex logs in debug.log to find why the batch job is hitting governor limits.”
Claude uses the debugging-apex-logs skill to parse log files for SOQL and DML statements, identify SOQL-in-loop violations, report CPU time and heap size consumption, and suggest optimizations.
Best practices for working with Skills
The more context you provide in your prompts, the better the output. Instead of “Create an Apex class,” try “Create an Apex controller for my AccountForm LWC that saves Account records with Name and Phone validation.” Include field API names, object relationships, and any specific business logic requirements.
Claude Code is conversational, so if the first pass isn’t quite right, just ask for changes. You can say “Add bulk error handling to that controller” or “Change the test class to use TestDataFactory patterns.” Skills maintain context across the conversation and update the code accordingly.
While Skills generate production-grade code, always review the output before deploying to production. Verify that field API names match your org schema, and check that custom objects and fields exist in your target org. Review security settings including sharing rules and field-level security. Test in sandbox first before production deployment, and run Salesforce Code Analyzer manually as an extra safety check.
Even if you’re an experienced developer, Skills can teach you something new. Try using them once to discover best practices that you might have missed, see how test classes should be structured with Given/When/Then patterns, and learn which Code Analyzer flags are most important for security and performance. Skills are not just automation — they’re also a teaching tool.
Expanding your Skills toolkit
Now that you’ve seen Skills in action, explore the full Skills library to see all 60+ available skills. You can build OmniStudio solutions with Flexcards and Integration Procedures, connect Data Cloud data sources, create B2B commerce stores, and generate screen flows with orchestrations.
Try advanced patterns like Trigger Frameworks using the Trigger Actions Framework (TAF), Queueable with Finalizers for async operations with cleanup logic, and Custom REST Resources to build versioned APIs with proper error handling.
Skills are open source, which means you can fork the repository and customize patterns, add your team’s naming conventions to templates, and create organization-specific skills. See the contribution guide to get started.
Finally, integrate Skills with your existing workflow. They work seamlessly with the Claude Code VS Code extension, CI/CD pipelines for generating code in automated workflows, and code review processes as a first-pass reviewer before PR submission.
Conclusion
Salesforce Skills in Claude Code transform AI from a code generator into a development expert. Instead of managing boilerplate and governor limits manually, you describe your goals and Claude implements them using production-grade patterns.
From generating Apex and LWCs to debugging logs, Skills accelerate your workflow while reinforcing best practices. This allows you to focus on solving business problems rather than repetitive implementation tasks.
Ready to get started? Download Claude Code for free and run npx skills to add forcedotcom/sf-skills in your Salesforce Project. Within minutes, you’ll be generating production-ready code from natural language prompts.
Have questions or want to share what you’ve built with Skills? Join the conversation in the Salesforce Developer Community or connect with us on LinkedIn and Twitter/X. We’d love to hear about your experience.
Resources
- Salesforce Skills Library
- Claude Code Documentation
- Claude Code Getting Started Guide
- Agent Skills Specification
- Salesforce CLI Reference
- Trailhead: LWC Basics
- Trailhead: Apex Testing
About the author
Akshata Sawant is a Senior Developer Advocate at Salesforce and co-author of a book titled “MuleSoft for Salesforce Developers,” published by Packt Publication. For a more in-depth look at Akshata’s accomplishments, visit her LinkedIn profile.