Force.com Platform Fundamentals
 j
j
No Results
Search Tips:
- Please consider misspellings
- Try different search keywords
Newer Version Available
Try It Out: Create the “Send Rejection Letter” Workflow Task
The Specify Workflow Actions step of the workflow wizard allows you to specify which actions, such as tasks, field updates, and email alerts, should occur when the condition of our workflow rule is met.
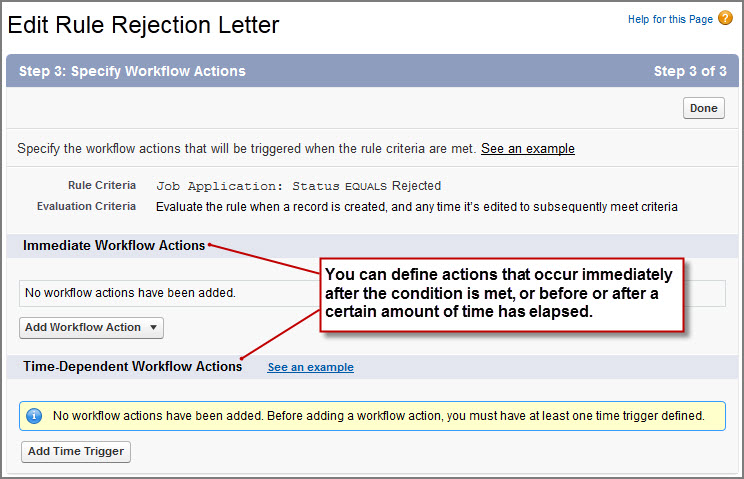
You can either define actions that occur immediately after the condition is met, or you can define actions that occur before or after a certain amount of time has elapsed (for example, seven days before the value of the Hire By field, or three days after the workflow rule is triggered). We'll talk more about these time-dependent workflow actions a little later. For now, we just need to define a single workflow task that executes as soon as our rule criteria is met.
- In the Immediate Workflow Actions area, click Add Workflow Action and select New Task.
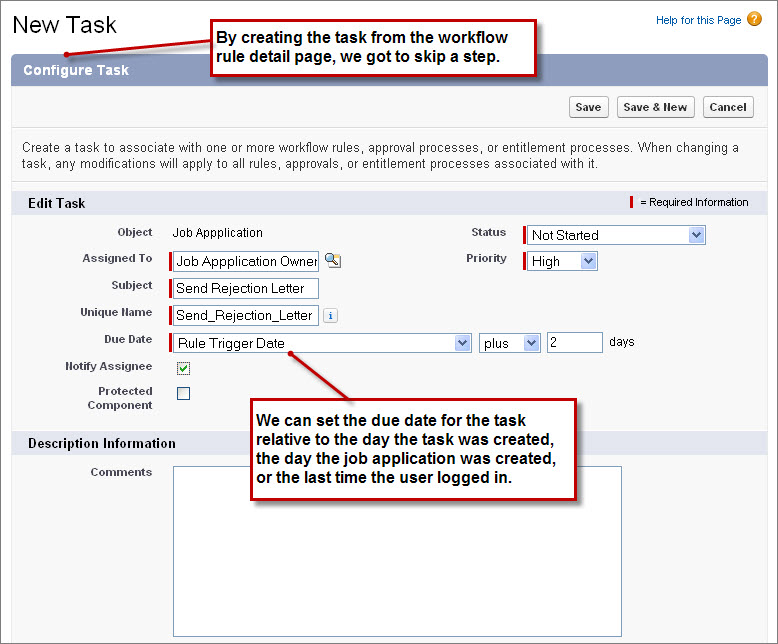
Did you notice that the Object field is already filled in with Job Application? Here's where we saved ourselves a couple of clicks—if we'd started building our workflow task before our workflow rule, we would have needed to specify the object with which the task would be associated. That's because, like workflow rules, workflow actions need to be associated with a single object.
In this case, we got to skip a page because the object with which a workflow action is associated must match the object of a workflow rule that uses it. For example, if we had a workflow rule associated with the Candidate object, any action that's triggered by our candidate workflow rule must also be associated with the Candidate object. Because we started building our “Send Rejection Letter” workflow task in the wizard right after defining our “Send Rejection Letter” workflow rule, the platform knew that the object associated with our task had to match the rule that we'd already built. That's why our new workflow task is already associated with the Job Application object.
- Next to the Assigned To field, click the
lookup icon (
 ).
).
- In the Type drop-down list, choose Owner.
- Click Job Application Owner.
- In the Subject text box, enter Send Rejection Letter.
- In the Due Date drop-down lists, choose Rule Trigger Date plus 2 days.
This Due Date setting will give our recruiters two days to notify the candidate after they're first assigned the task.
- In the Status drop-down list, choose Not Started.
- In the Priority drop-down list, choose High.
The Notify Assignee checkbox allows us to send an email to the assignee as soon as the task is created by the workflow rule. This ensures that the assignee knows about the task without having to log in to the application on a regular basis, so let's select it.
- Select the Notify Assignee checkbox.
- Click Save.
- Click Done.
At this point, we finally get to see the detail page for the workflow rule that we just created. It includes the workflow rule criteria and a list of the associated actions. The only thing that remains to be done is to activate the rule.
- Click Activate.
All done! We've just created our first workflow rule and task. You'll find that the remaining workflow actions all operate in a very similar way, so we'll speed through the rest of them, focusing just on the fields and options that are unique to each.