Salesforce1 App Developer Guide
 j
j
No Results
Search Tips:
- Please consider misspellings
- Try different search keywords
Getting Around in Salesforce1
When users log in to Salesforce1, the first thing they see is a landing page. The first item in the Salesforce1 navigation menu becomes a users’ landing page by default. If your organization has Chatter enabled, and you haven’t customized the Salesforce1 navigation menu to change the first item in the menu to something else, the user’s feed will be their landing page.
The Feed
The Chatter feed shows users their updates, updates to records and people they follow, and updates in groups they follow. Tapping a feed item displays all of the item’s details. Pulling down on the feed reveals the search bar as well as the sort and filter options.
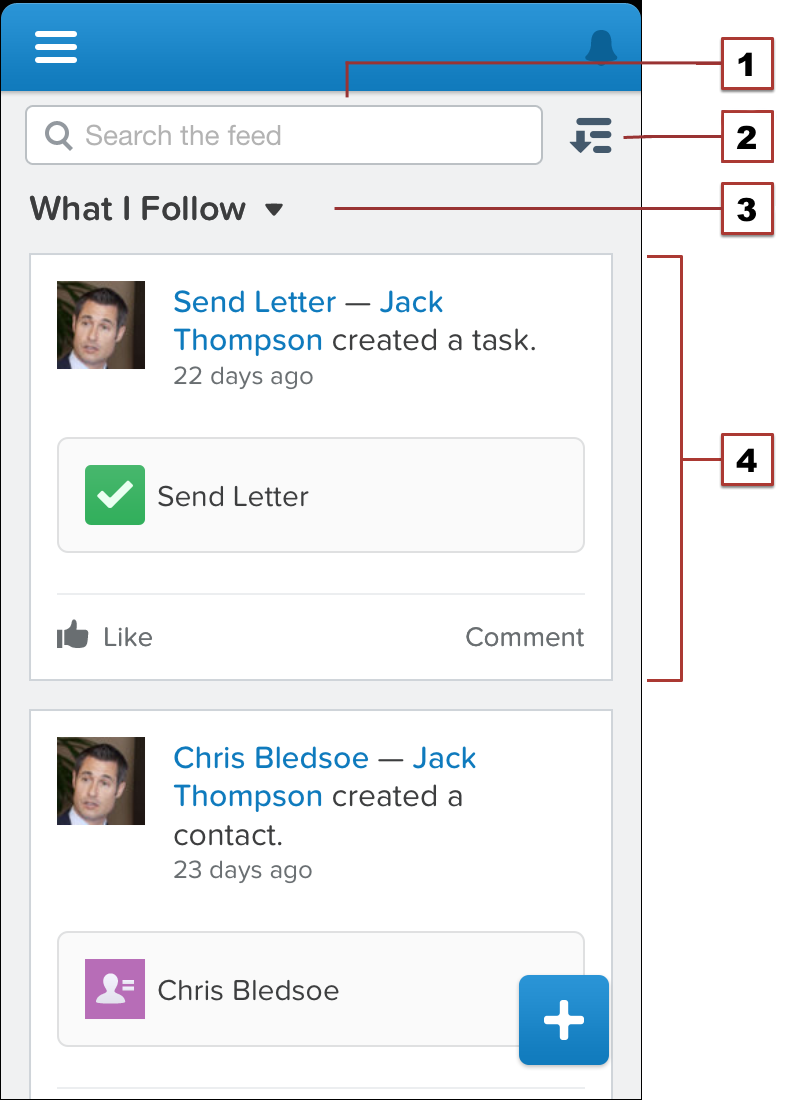
- Search bar
- Sort and filter options
- Feeds drop-down menu
- Feed item
From the feed, record pages, and from elsewhere in Salesforce1, users tap  to access publisher actions.
The Publisher
Depending on which feed or
record page a user is viewing when they tap , they can see different actions. From the feed, for example,
they see a set of global publisher actions. From a record page, however,
they see a mix of standard Chatter actions—such as Post and
File—and object-specific actions assigned to the layout for
that record type. Once in the publisher, users can tap any action
to open it. They can also tap  to return to the page they were viewing.
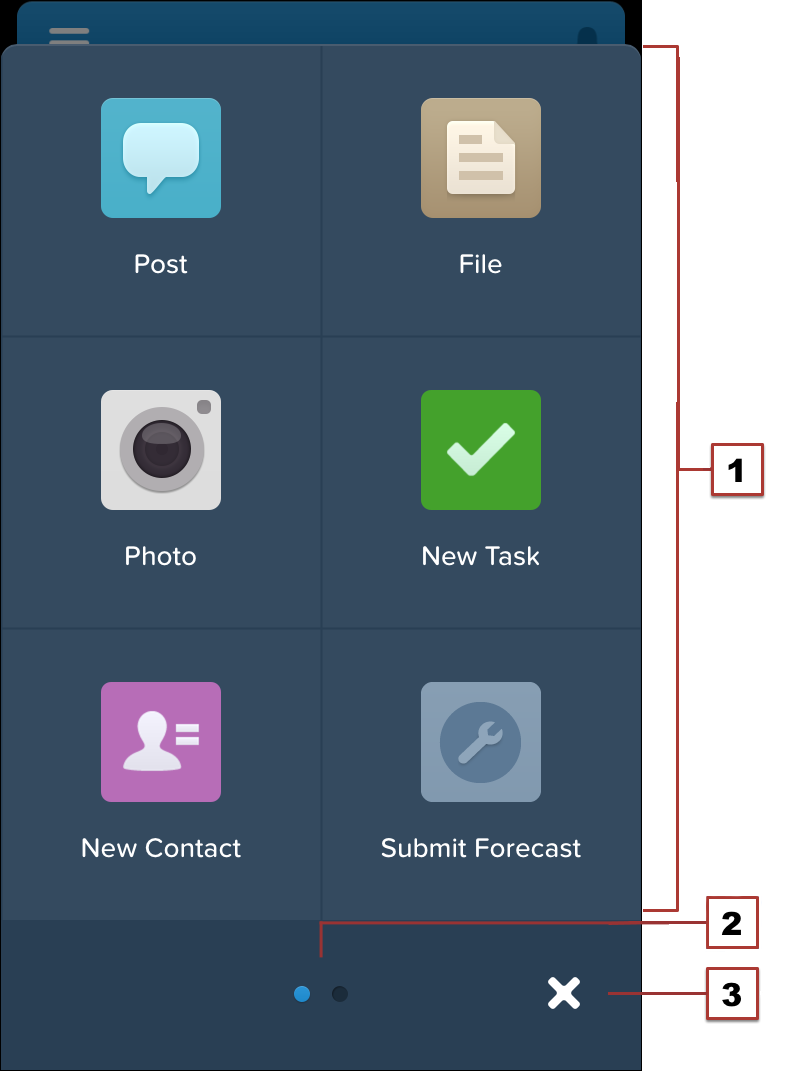
- Actions
- Page indicator
- Cancel
We’ll go over creating and customizing actions in Using Publisher Actions in Salesforce1.
Salesforce1 Navigation Menu
Anywhere users see  in Salesforce1, they can tap it to access the navigation menu.
What your users see in the menu is determined by how you, as the administrator, have configured it, what’s available in your organization, and what users have access to, based on their user permissions and profile. We’ll go over changes you can make to the menu in Customizing the Salesforce1 Navigation Menu.

- Search box
- Menu items—any items you place above the Smart Search Items element when you customize the navigation menu
- Smart Search Items—a set of recently-searched objects
- Apps section—contains any items you place below the Smart Search Items element
From the navigation menu, users can access the feed, objects, apps, tasks, notes, and any other item you’ve added to the menu. We’ll go over the components of the navigation menu in more detail in About the Salesforce1 Navigation Menu. But for now, let’s take a look at records.
The Record View
The record view is made up of the record feed, detail, and related information pages, which your users can swipe left and right to see. If your organization doesn’t have Chatter, the record view only includes the detail and related information pages.
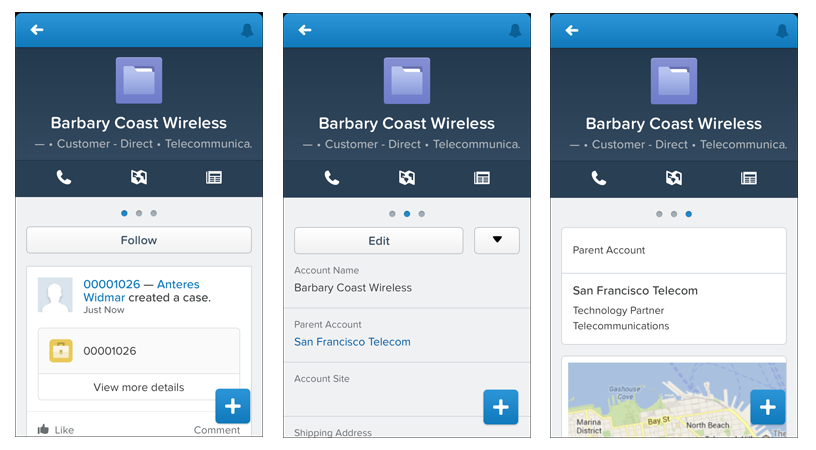
At the top of each record page is the record highlights section. The icon for standard objects is predefined in Salesforce, and you can select the icon for a custom object using the custom object’s tab style.
You can customize the fields displayed in the record highlights by using compact layouts, which we’ll look at in About Compact Layouts.
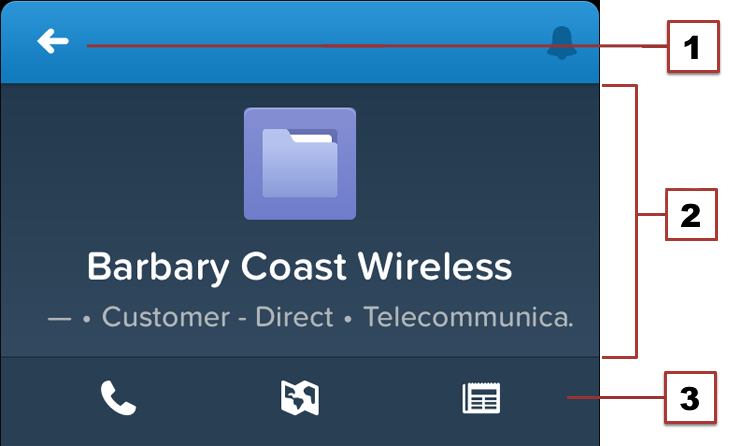
- Back arrow—returns the user to the previous page
- Record highlights
- Record actions bar—contains a set of predefined actions
for the record type. Can include Send Email (
 ), Log a Call (
 ), Map (
 ), View Website (
 ), and Read News (
 ).
).
What else do I need to know?
From the top
of most pages, users can access their notifications by tapping  .
.
Users can create a new record by tapping New at the top of recent object pages, search pages, and related list pages. They can also create records through publisher actions, if create actions have been set up in the organization.