Force.com Platform Fundamentals
 j
jNewer Version Available
Try It Out: Create a Queue for Positions
To define a queue, we simply need to know the types of records that can be placed in the queue (in our case, Positions), and the users who are allowed to pull records out of it (in our case, Recruiters). Once we know those two things, defining the queue itself is just a matter of a few simple clicks:
- From Setup, enter Queues in the Quick Find box, then select Queues.
- Click New.
- In the Label text box, enter Unclaimed Positions Queue.
- In the Queue Email text box, enter an email
address for an individual or a distribution list, such as recruiters@universalcontainers.com.
When you click in the Queue Email text box, the Queue Name text box is automatically populated.
- Select Send Email to Members.
Notice here that if recruiters@universalcontainers.com was a real email distribution list that went to all recruiters, we wouldn't need to select Send Email to Members. We do it here only because recruiters@universalcontainers.com is a fake email address and can't be used for testing later.
You have two options for notifying queue members when new records are added to the queue.
- Send Email to Members not selected
-
- If you don’t specify a queue email, individual queue members are always notified, regardless of the Send Email to Members checkbox.
- If you specify a queue email address, only that address is notified.
- Send Email to Members selected
-
- If you don’t specify a queue email, individual queue members are always notified, regardless of the Send Email to Members checkbox.
- If you specify a queue email address, that address and individual
queue members are notified.
Note that if an individual queue member also receives email sent to the specified queue email address, they'll receive duplicate notifications.
- In the Supported Objects section, move Position into the Selected Objects list.
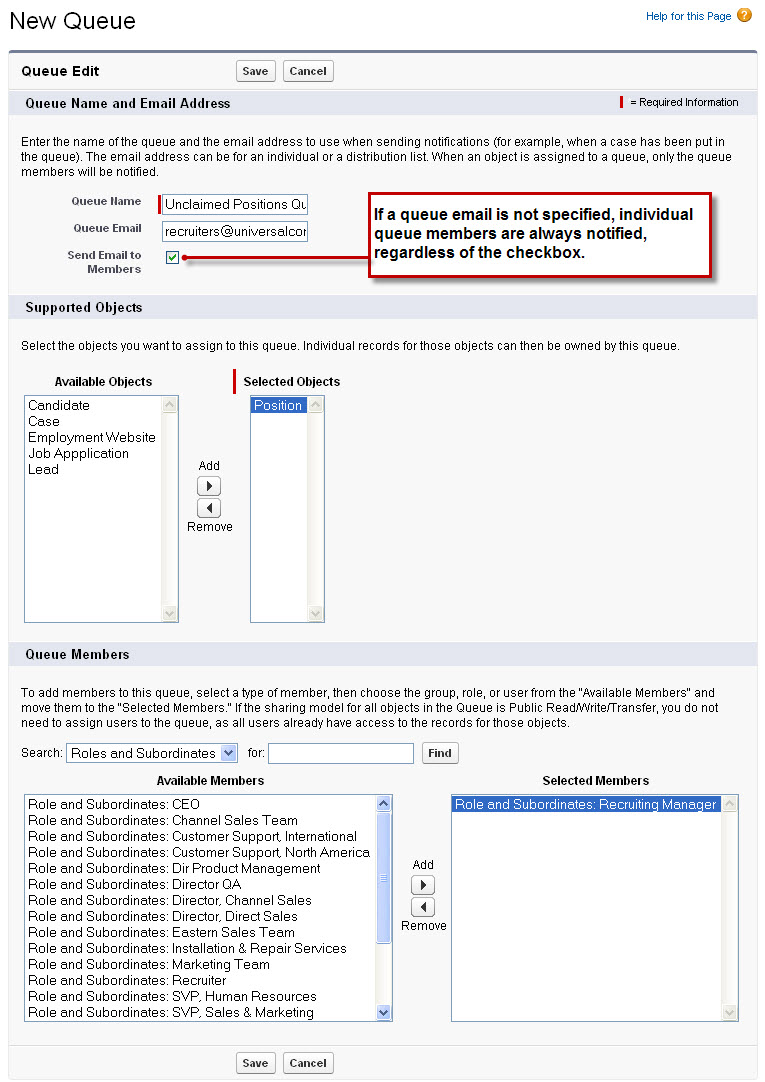
As you can see, a single queue can handle multiple objects—the platform allows you to do this so that you don't have to define multiple queues for the same group of users.
- In the Queue Members section, select Roles and Subordinates from the Search drop-down list.
- Move Role and Subordinates: Recruiting Manager to the Selected Members list.
- Click Save.
Perfect! We've just defined a new queue that can act as a temporary owner for all of the position records that are created by hiring managers. Whenever a position is placed in the queue, all recruiters are notified, and the appropriate person can claim ownership. All we need to do now is define the workflow rule that places those position records into the queue.