Force.com Platform Fundamentals
 j
jNewer Version Available
Try It Out: Define a Public Group
Before we dive head first into creating our sharing rules, we need to make sure that we have the appropriate public groups set up. A public group is a collection of individual users, other groups, individual roles, and/or roles with their subordinates that all have a function in common. For example, users with the Recruiter profile as well as users in the SW Dev Manager role both review job applications. Using a public group when defining a sharing rule makes the rule easier to create and, more important, easier to understand later, especially if it's one of many sharing rules that you're trying to maintain in a large organization. You'll need to create a public group if you ever want to define a sharing rule that encompasses more than one or two groups or roles, or any individual.
Looking at the required permissions that we want to implement, there are just two objects that need a public group for their sharing rules: Job Application and Review. The good news is that we can cover these objects in a single group because the Review object is on the detail side of a master-detail relationship, so it inherits the sharing settings we apply to the Job Application object. Since both recruiters and hiring managers need read and update access to job applications and reviews, let's go ahead and make a public group called Reviewers that encompasses recruiters and hiring managers.
- From Setup, enter Public Groups in the Quick Find box, then select Public Groups.
- Click New.
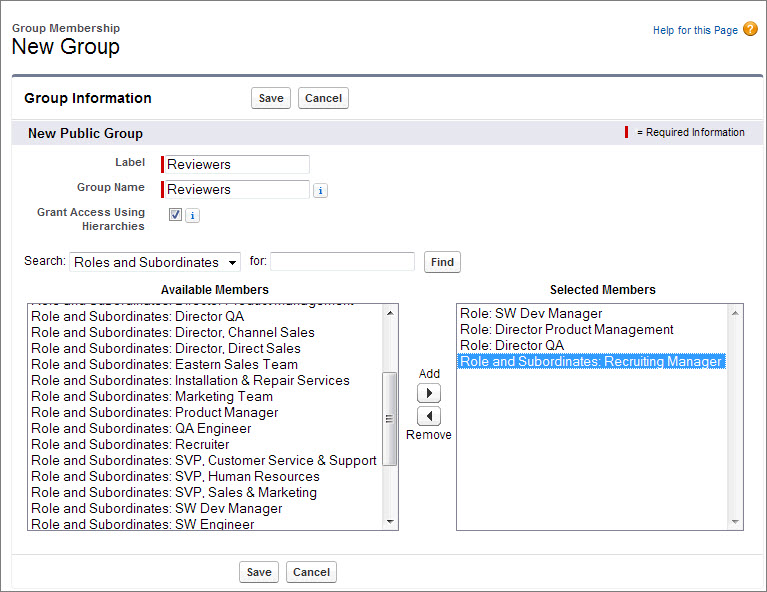
The New Public Group page allows you to choose other public groups, individual roles, individual roles including the roles' subordinates, or individual users.
- In the Label text box, enter Reviewers. Click in the Group Name text box to populate it automatically. Group Name refers to the unique name used by the API and managed packages.
- In the Search drop-down list, choose Roles.
- In the Available Members list, select SW Dev Manager, Director Product Management, and Director QA, then click Add.
- Go back up to the Search drop-down list, and this time choose Role and Subordinates.
- In the Available Members list, select Recruiting Manager, and click Add.
- Click Save.
Easy! Now we're ready to define our sharing rules.