Mobile and Offline Developer Guide
 j
jNewer Version Available
Customize the BarcodeScanner User Interface
BarcodeScanner provides a standard, minimal user interface that can be used out of the
box. For applications and use cases where the standard user interface doesn’t provide enough
information, or to customize for your company or brand, create a custom UI using
HTML.
Using HTML to define your custom user interface gives you a lot of flexibility for your UI.
Here’s an example of the HTML for a minimal custom
UI:
1<header><meta name="viewport" content="width=device-width, initial-scale=1.0,
2    maximum-scale=1.0, minimum-scale=1.0"></header>
3<html>
4  <head>
5    <style>
6        a:link { text-decoration: none; }
7        a:hover { text-decoration: none; }
8    </style>
9  </head>
10  <body>
11    <h1 align="right"><a href="nimbusbarcodescanner://dismiss">✖</a></h1>
12    <h2 align="center">Welcome, let's get you verified!</h2>
13    <h3 align="center">Point the front side of your Health Card<br/>
14      at the camera on this device.</h3>
15  </body>
16<html>
You can use a static HTML string, or generate the HTML at runtime. There are only a few
requirements.
- The <header> element is required, and should not be modified. Confine your customizations to the <html> and child elements of the page.
- You should also provide a UI element to dismiss or cancel the scanning session. See Dismiss the Scanner.
To apply your custom UI to BarcodeScanner, set the backgroundViewHTML property of the BarcodeScannerOptions configuration object to the string value of your HTML page, including the <header>. Then provide BarcodeScannerOptions when calling beginCapture().
UI Customization Layers
Your custom UI overlays — and completely hides — all parts of the standard BarcodeScanner
UI. The following diagram illustrates the layers of the scanner UI as rendered by
BarcodeScanner: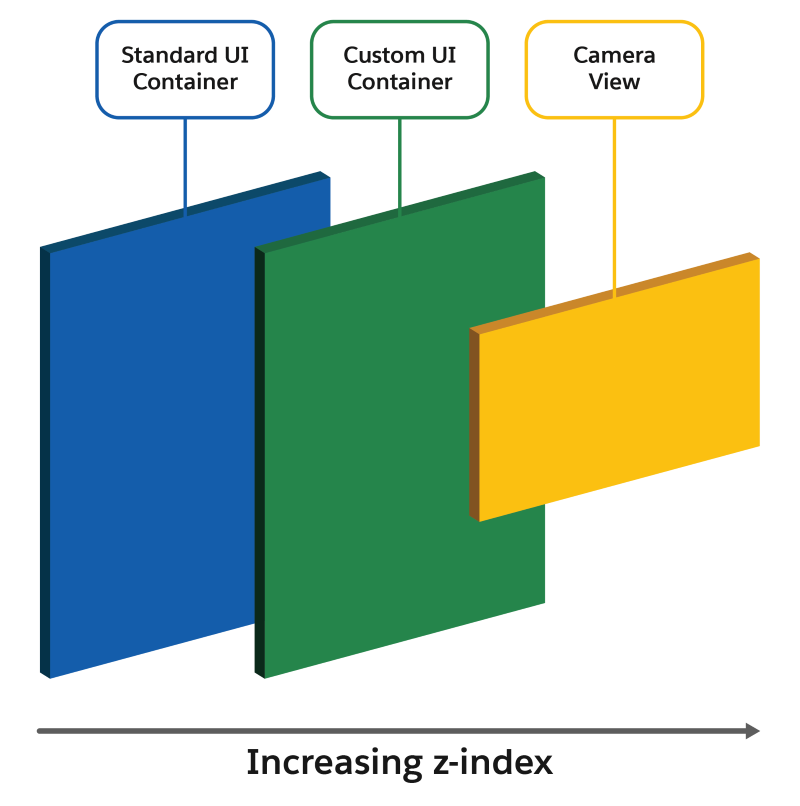
Dismiss the Scanner
When you define a custom UI, you replace the standard scanner dismissal control. In your custom UI, it’s your responsibility to handle dismissing the scanner. You can dismiss the scanner two different ways:
- Programatically: by calling endCapture to dismiss the scanner UI.
-
UI Triggered: by adding an element to your custom UI that, when triggered,
navigates to a special URL: nimbusbarcodescanner://dismiss.For example, here’s a simple text link that closes the scanner when tappedPlace this anywhere in your custom user interface that makes sense.
1<a href="nimbusbarcodescanner://dismiss">Dismiss</a>
Considerations
- The camera view is always placed in the center of the device screen (horizontally and vertically), and is superimposed onto your custom UI. Consider this when designing your custom UI, and avoid having essential parts of the UI obscured by the camera view.
- The custom UI is rendered in a separate webview container than the main webview container that hosts your Lightning web component. The HTML that renders your custom UI can’t reference or access elements or objects that are defined in your component.