
Appearance
Exercise 2: Configure a Salesforce Project
In this Exercise, you'll enable the MCP Service (Beta) in your Salesforce org and configure your Salesforce Project so that you can begin Vibe Coding with context.
Step 1: Enable MCP Service (Beta)
From Setup, in the Quick Find box, enter
User Interface Settings, then select User Interface Settings.Locate Enable MCP Service (Beta) and turn it on.
Click Save.
TIP
The MCP Service is currently in Beta. Enabling it allows your org to host MCP endpoints that AI clients and agents can call using a standardized, governed protocol.
Step 2: Activate Salesforce MCP Servers
From Setup, in the Quick Find box, enter
MCP Servers, then select MCP Servers.Click Salesforce Servers.
Open the sobject-all MCP server and click Activate.
Open the salesforce-api-context MCP server and click Activate.
TIP
Activating these servers exposes Salesforce object data and API context to your MCP clients. Both servers are required for a complete MCP experience.
Step 3: Configure Your Project
Open the Org Browser Sidebar in Agentforce Vibes to retrieve your project metadata.
Expand Custom Objects and retrieve (download) the following standard objects:
- Account
- Lead
- Opportunity
TIP
Downloading objects ensures Agentforce Vibes can analyze your org’s schema and accurately generate Apex and LWC code.
Expand Lightning Component Bundle and download the genericPageHeader component.
Expand Permission Sets and download the Partner Management Permission Set.
Use the Explorer Sidebar to verify your project folder includes:
- Account, Lead, and Opportunity metadata
- Partner Management permission set
- The genericPageHeader LWC
- Any additional Apex classes required for your project context
Your project is now fully configured with the metadata Agentforce Vibes needs to plan and generate the Partner Performance Dashboard.
Step 4: Explore the Agentforce Vibes Sidebar
In this step we take a look at the key features that can be configured as part of Agentforce Vibes.
Open the Agentforce Vibes Sidebar.
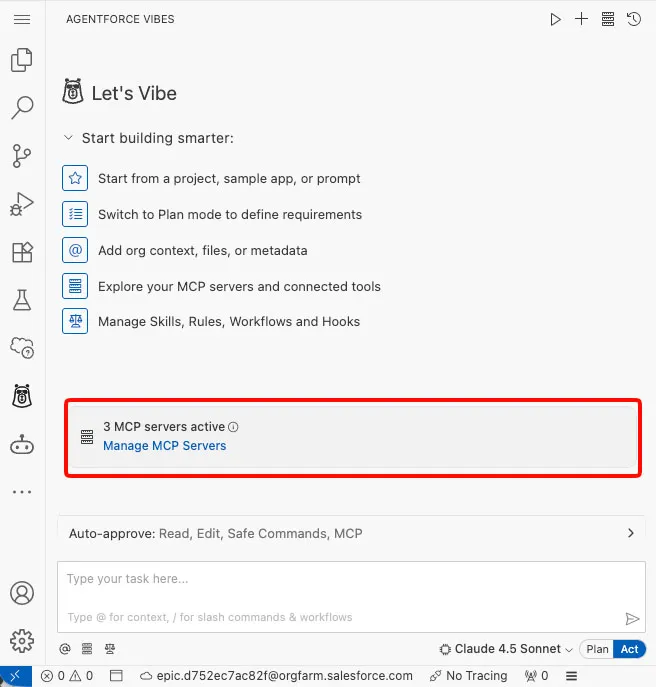
Take note of the Manage MCP Server options, we will visit those later.
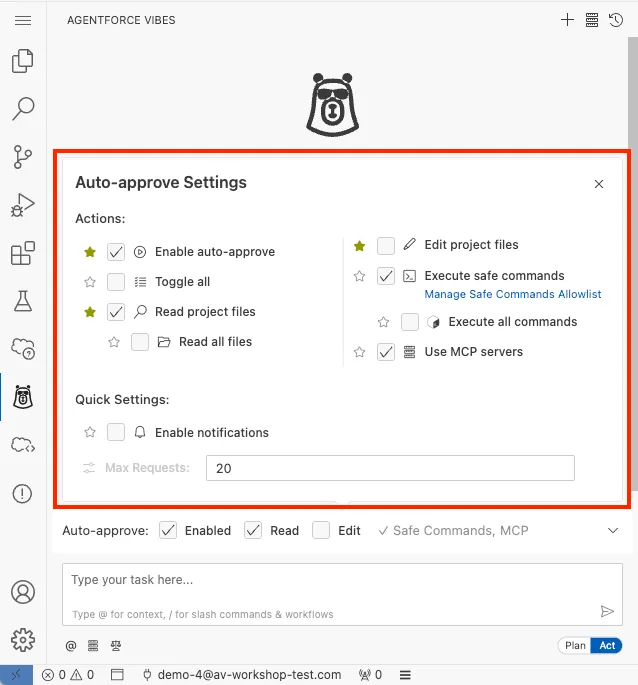
You can modify the Auto-approve settings to adjust the actions an agent can take on your behalf.
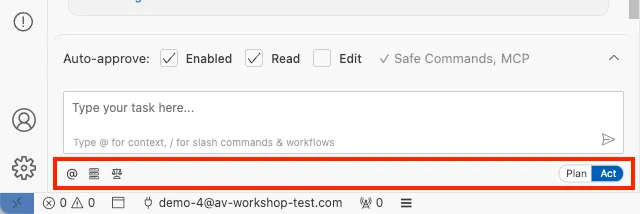
You can adjust the context settings and mode in the toolbar at the bottom of the sidebar.
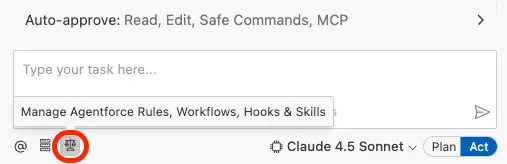
Click on Manage Agentforce Rules, Workflows, Hooks & Skills in the context settings.
Select the Skills tab and take note of the built-in Salesforce Skills available. Skills are modular instruction sets that Agentforce loads on-demand for specific tasks.
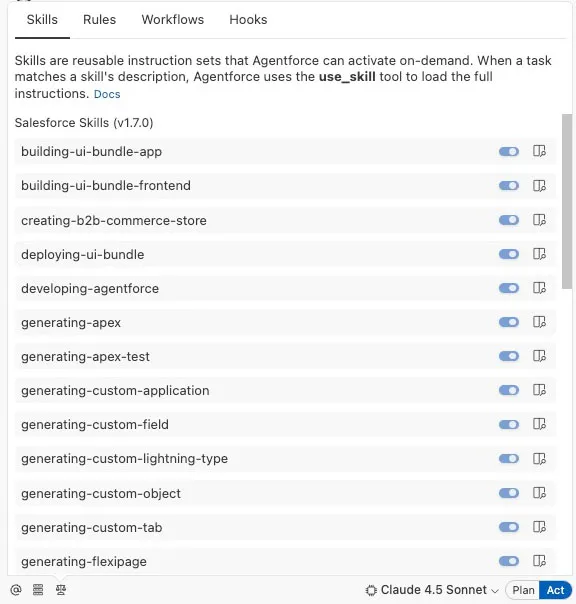
TIP
The Rules tab provides persistent guidance that applies to every conversation. One rule (
a4v-expert-global-rule.md) is active by default. You can create your own skills and rules to align the agent to your team's standards.
Step 5: Activate the Salesforce MCP Servers
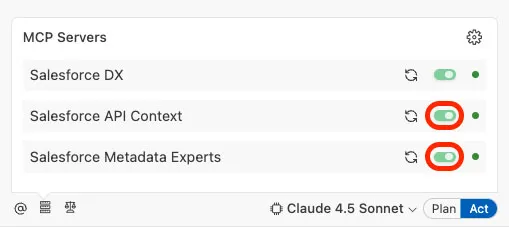
In the Agentforce Vibes Sidebar, Click Manage MCP Servers.
Toggle on all three MCP servers.
Click the MCP Servers' Configuration Icon.
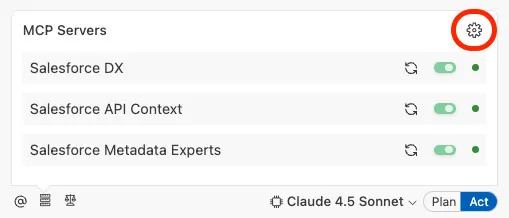
Expand the Salesforce DX MCP server to take a look at the various tools that are enabled.

Step 6: Enable Local Development
Open your Salesforce org from the status bar at the bottom of the IDE using the Open Default Org in Browser Button.

TIP
If you get an error while opening the org, open the terminal(
cmd+`ORctrl+`) and runsf org login web.Navigate to Setup.
Search for and Select
Local Devin the quick find.Set Enable Local Dev to On.
TIP
If you are working with VS Code instead of the browser-based Agentforce Vibes IDE, you need to install the Salesforce Live Preview extension.
Summary
In this exercise, you activated the Salesforce hosted MCP servers, configured your local project and became familiar with the Agentforce Vibes IDE. You explored key areas like the Explorer, Extensions, Org Browser, Terminal, and Status Bar, and retrieved the metadata needed for the Partner Performance Dashboard. You also explored the Agentforce Vibes sidebar settings and took a look at the available Skills and Rules to understand what's possible.
Your environment is now fully prepared for the next steps - where you’ll begin using Agentforce Vibes to analyze your project and build your application.