Salesforce1 Mobile App Admin Guide
 j
j
No Results
Search Tips:
- Please consider misspellings
- Try different search keywords
Working with Actions
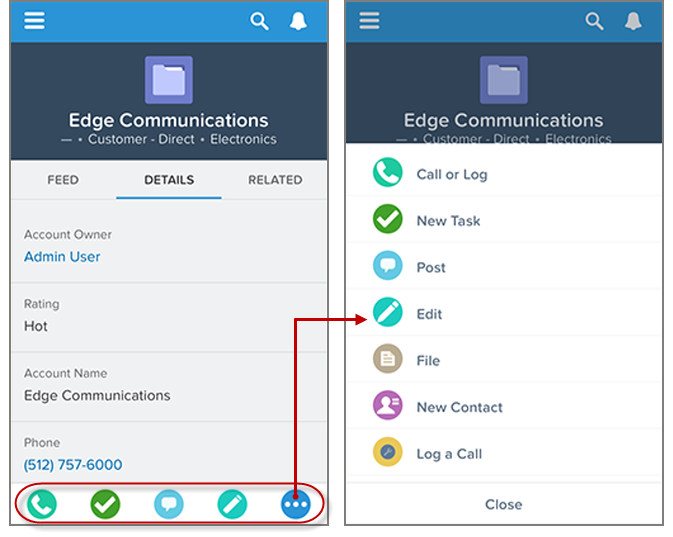
The publisher actions feature lets you create actions and add them to the Chatter publisher on the home page, on the Chatter tab, in Chatter groups, and on record detail pages. In Salesforce1, actions appear in the action bar, its associated action menu, and as list-item actions.
After creating actions, you can customize them. Actions have their own action layouts, which let you specify which fields are included in the action, and in which order.
However, before you start working with actions in your organization, enable feed tracking on any object for which you want actions to show up in the Chatter publisher. You can do this in Setup at . Select the object, and then select Enable Feed Tracking.
After you enable feed tracking on an object, there are a few more steps to complete to ensure that your actions show up where they’re supposed to in the Salesforce1 app and in the full Salesforce site and to make sure that your actions are optimized for a mobile experience.
- Create a global or object-specific action.
- Customize the action’s layout, choosing the fields users see when they use it.
- If you created an object-specific action, add it to one or more of that object’s page layouts. If you created a global action, add it to a global publisher layout.
- Set predefined field values for required fields, where possible.
Let’s learn a little more about the types and categories of actions. First we’ll look at global and object-specific actions.