Salesforce Security Guide
 j
jNewer Version Available
Limit the Number of Concurrent Sessions with Login Flows
Install the Concurrent-Sessions Package
The concurrent-sessions unmanaged package includes the elements and sources of a login flow solution. The package includes a plug-in that retrieves the number of concurrent sessions for a user. If the pending login exceeds the concurrent session limit, the flow blocks it.
You can customize the package, for example, changing the session limit. By default, the package uses a session limit of 1.
- To install the concurrent-sessions package, go to https://login.salesforce.com/packaging/installPackage.apexp?p0=04to0000000WR73.
- After you install the package, you can connect the login flow to user profiles. Assign the flow to profiles for which you want to limit concurrent sessions.
Creating the Package Components
Let’s take a closer look at the components in the concurrent-sessions package. If the package didn’t exist, here’s how you can create the plug-in and the login flow.
SessionPlugin is an Apex class that retrieves the number of concurrent sessions. The class queries the AuthSession table and sums the number of sessions, excluding temporary sessions.
- In Setup, enter Apex Classes in the Quick Find box, and select Apex Classes.
- To create a class, click New.
- Copy and paste this code as the Apex class
content.
1global class SessionPlugin implements Process.Plugin
2{
3   global Process.PluginDescribeResult describe()
4   {
5      Process.PluginDescribeResult result = new Process.PluginDescribeResult();
6      result.description='This plug-in returns the no of concurrent sessions for the current user';
7      result.tag='Identity';
8
9      result.inputParameters = new List<Process.PluginDescribeResult.InputParameter> {
10      };
11
12      result.outputParameters = new List<Process.PluginDescribeResult.OutputParameter> {
13           new Process.PluginDescribeResult.OutputParameter('CONCURRENT_NO',
14               Process.PluginDescribeResult.ParameterType.INTEGER)
15      };
16
17       return result;
18   }
19
20   global Process.PluginResult invoke(Process.PluginRequest request)
21   {
22       Map<String, Object> result = new Map<String, Object>();
23       List<AuthSession> sessions;
24       Integer no = 0;
25
26       String userid   = UserInfo.getUserId();
27
28       sessions = [Select Id, ParentId, SessionType from AuthSession where UsersId=:userid];
29       for (AuthSession s : sessions)
30       {
31           // Count only parent and non-temp sessions
32           if(s.ParentId == null && s.SessionType != 'TempUIFrontdoor' )
33           {
34                   no++;
35           }
36       }
37
38       result.put('CONCURRENT_NO', no);
39
40       return new Process.PluginResult(result);
41   }
42}
Creating the Login Flow
- SessionPlugin—The Apex plug-in that queries the number of concurrent sessions.
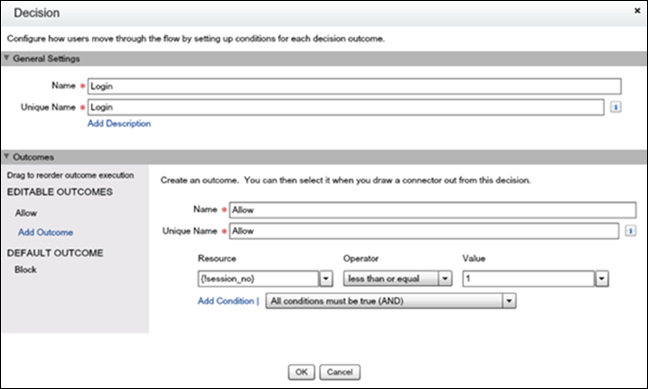
- Decision—Verifies whether the number of concurrent sessions exceeds the limit. The outcome determines whether the login is blocked or allowed.
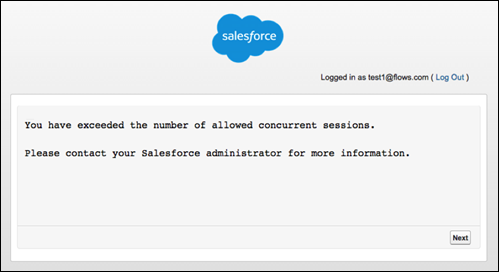
- Block Screen—If the login exceeds the limit, the flow displays the block screen element.
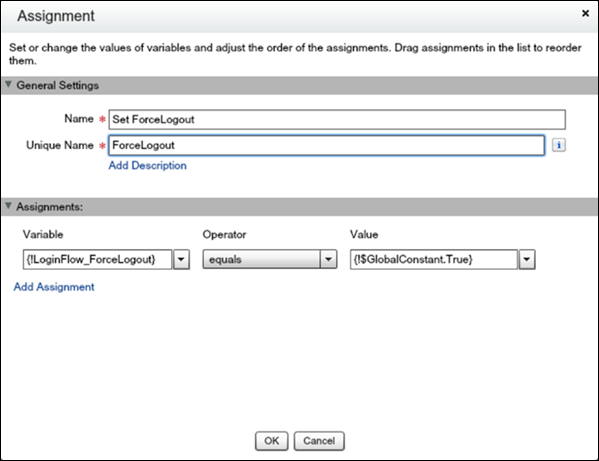
- Assignment—If the login exceeds the limit, this element assigns the LoginFlow_ForceLogout variable to true and prevents the login.
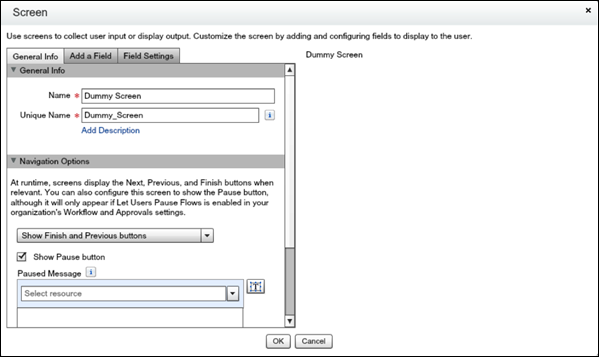
- Dummy Screen—This element is a placeholder. A flow requires a UI element to follow an output variable.

- To create a flow, go to the Cloud Flow Designer in Salesforce.
- On the Resources tab, create a LoginFlow_ForceLogout output variable. When set to
true, this variable blocks the login
attempt.

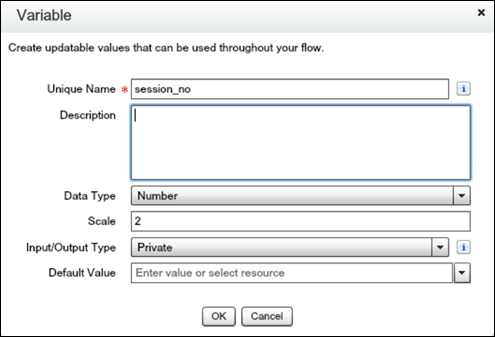
- Create a numeric variable to store the allowed number of concurrent sessions for the
user.
- Create a block screen element.

- Create a dummy screen.
- Create an assignment element that sets the LoginFlow_ForceLogout
output variable to true.
- Create a decision element that has two outcomes. If the login exceeds the limit, the
outcome is Block, which is the default. Otherwise, the outcome is
Allow.
- Save the flow and its elements.
- Activate the flow.
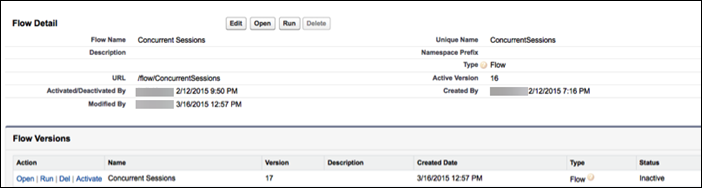
- Connect the login flow to a user profile. Best practice is to create a dedicated test user with a test profile.
- Log out, and then log in as the test user and test the flow.
When you assign the profile to users, Salesforce redirects them at login through the flow. When a login attempt exceeds the limit, the user sees the block screen and can’t log in. Here’s an example of the block screen in Lightning Experience.