ISVforce Guide
 j
jNewer Version Available
Enable AppExchange Checkout on a Listing
After you create a Stripe account and configure subscription plans for your product, you
can enable AppExchange Checkout on a listing. When you enable Checkout, you choose a pricing
model and the payment methods that you accept.
| User Permissions Needed | |
|---|---|
| To manage AppExchange listings: | Manage Listings |
- Log in to the Partner Community.
- Click Publishing.
- Create a listing or edit an existing one.
-
On the Pricing tab, select Paid, using Checkout.

-
Select when to collect payment details from the customer.

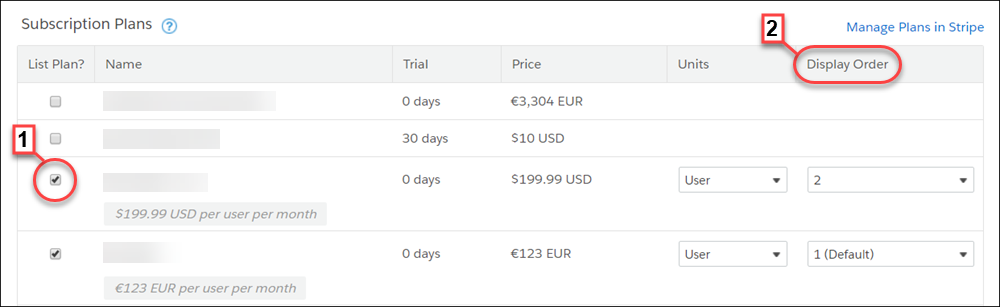
-
Select pricing models (1) and adjust the display order (2).
Pricing Model Steps Subscription - Select one of the subscription plans that you created in Stripe.
- Select company or per-user pricing.
One-time payment - Click Add One Time Price Option.
- Provide a name for the plan.
- Select a price and currency.
- Select company or per-user pricing.
-
Select the payment methods that you accept.

- Click Save.