ISVforce Guide
 j
jNewer Version Available
Enable Checkout on an AppExchange Listing
After you create a Stripe account and set up pricing plans for your solution, you can
enable Checkout on an AppExchange listing. When you enable Checkout, you choose the payment
plans and methods that you support.
| User Permissions Needed | |
|---|---|
| To manage AppExchange listings: | Manage Listings |
Before you enable Checkout on a listing, verify that Salesforce approved your
business plan.
- Log in to the Salesforce Partner Community.
- Click Publishing.
- Create a listing, or edit an existing one.
-
On the Pricing tab, select Paid, using Checkout.

-
Select when to collect payment details from the customer.

-
Select payment plans (1) and adjust the display order (2).
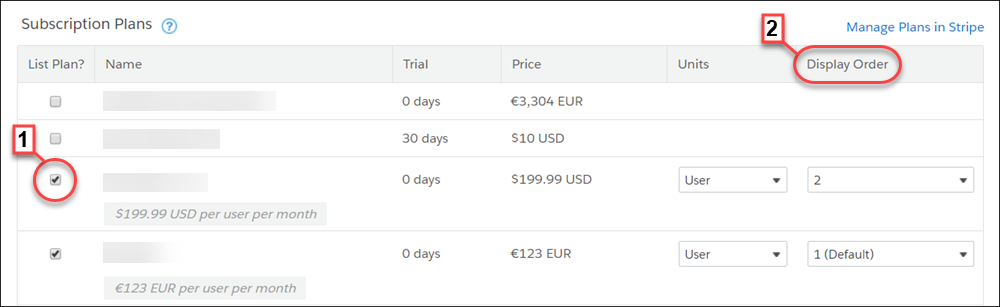
Payment Plan Steps Subscription - Select one of the pricing plans that you created in Stripe.
- Select company or per-user pricing.
One-time payment - Click Add One Time Price Option.
- Provide a name for the plan.
- Select a price and currency.
- Select company or per-user pricing.
-
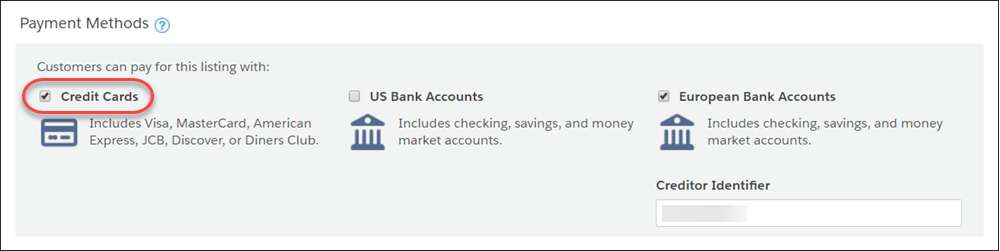
Select the payment methods that you accept.
- Click Save.