Experience Cloud Developer Guide
 j
jNewer Version Available
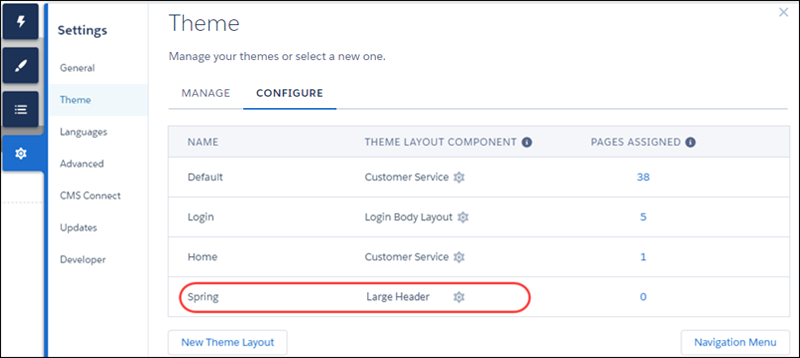
How Do Custom Theme Layouts Work?
For example, the Customer Service template includes the following theme layouts and components, but you can create custom components or switch layouts as needed.
- Default applies the Customer Service theme layout to all pages, except the login pages.
- Login applies the Login Body Layout theme layout component to the login pages.
Example
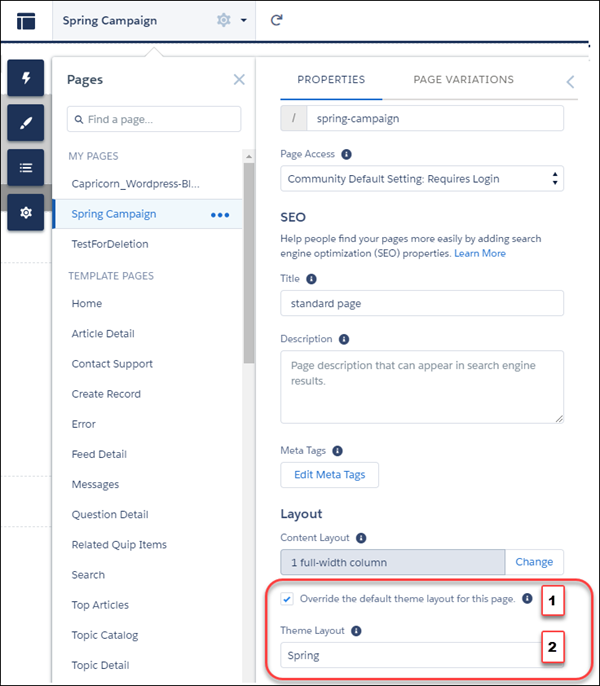
Let’s say you create three pages for your upcoming Spring campaign. Using the forceCommunity:themeLayout interface, you create a custom Large Header theme layout in the Developer Console. In the area, you add a custom theme layout called Spring to categorize the campaign pages and you assign the Large Header layout component to it.
Next, you apply the Spring theme layout in each page’s properties, which instantly applies the Large Header layout to each page. Select Override the default theme layout for this page. (1) to display Theme Layout. Choose the new layout (2) from the available choices.
Everything looks rosy until the VP of marketing decides that the header takes up too much room. That’s an easy fix, because you don’t have to update the properties of each page to change the theme layout. Instead, with one click in the Theme area, you can switch Spring to the Small Header layout and instantly update all three pages.
Example
Now let’s say that the Small Header layout includes two custom properties—Blue Background and Small Logo. You enabled and applied these properties to all your campaign pages. However, for one page, you want to apply only the Small Logo property.
In this case, you could create a theme layout called Spring B, assign the Small Header
layout component to it, and enable Small Logo. Then, you apply the Spring B theme to the
page.
Not sure which pages are associated with any of your theme layouts?
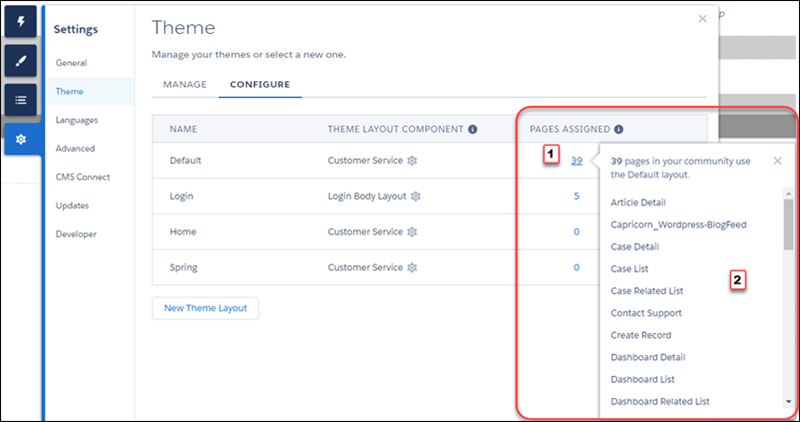
With a click and a glance, you can see how many and which pages are associated with any of your theme layouts. From , click the Pages Assigned total for any theme layout row (1). Clicking this value opens a list of the pages associated with that theme layout (2).
Theme layouts make it easy to reuse the same theme layout component in different ways while maintaining as much granular control as you need.