Lightning Aura Components Developer Guide
 j
jCreate a Component for Lightning Experience and the Salesforce Mobile App
Explore how to create a custom UI that loads contact data and interacts with Lightning
Experience and the Salesforce mobile app.
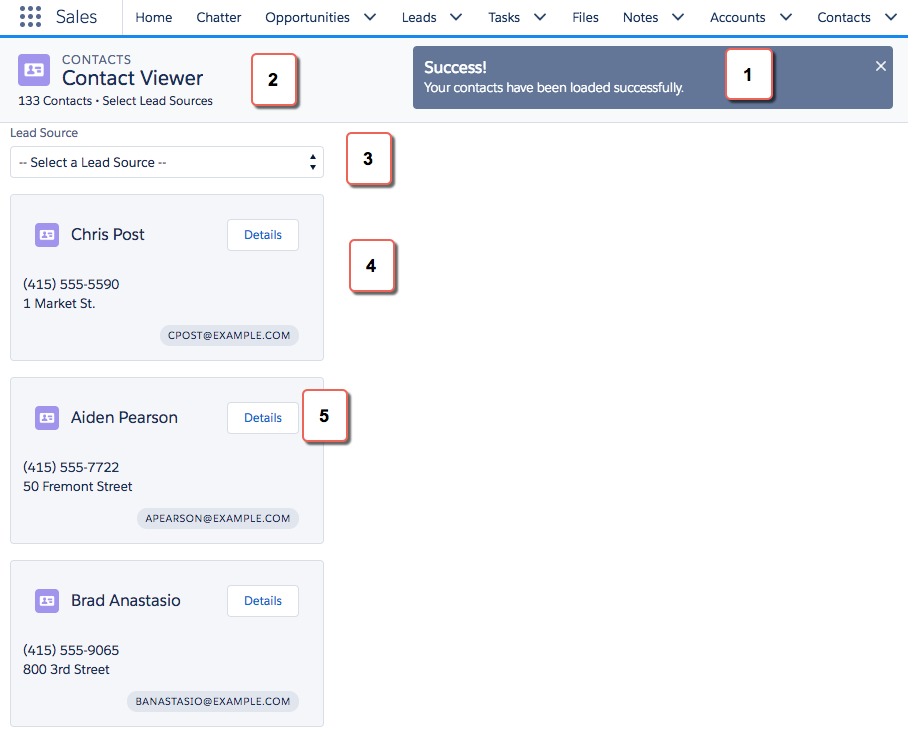
This tutorial walks you through creating a component that:
- Displays a toast message (1) using the force:showToast event when all contacts are loaded successfully.
- Updates the number of contacts (2) based on the selected lead source.
- Filters the contacts using the lightning:select component (3) when a lead source (referral or social media) is selected.
- Displays the contact data using the lightning:card component (4).
- Navigates to the record when the Details button (5) is clicked.
Here’s how the component looks in the Salesforce mobile app. You’re creating two components, contactList and contacts, where contactList is a container component that iterates over and displays contacts components. All contacts are displayed in contactList, but you can select different lead sources to view a subset of contacts associated with the lead source.

In the next few topics, you create the following resources.
| Resource | Description |
|---|---|
| Contacts Bundle | |
| contacts.cmp | The component that displays individual contacts |
| contactsController.js | The client-side controller action that navigates to a contact record using the force:navigateToSObject event |
| contactList Bundle | |
| contactList.cmp | The component that loads the list of contacts |
| contactListController.js | The client-side controller actions that call the helper resource to load contact data and handles the lead source selection |
| contactListHelper.js | The helper function that retrieves contact data, displays a toast message on successful loading of contact data, displays contact data based on lead source, and update the total number of contacts |
| Apex Controller | |
| ContactController.apxc | The Apex controller that queries all contact records and those records based on different lead sources |