Chat REST API Developer Guide
 j
jGetting Started with the Chat REST API
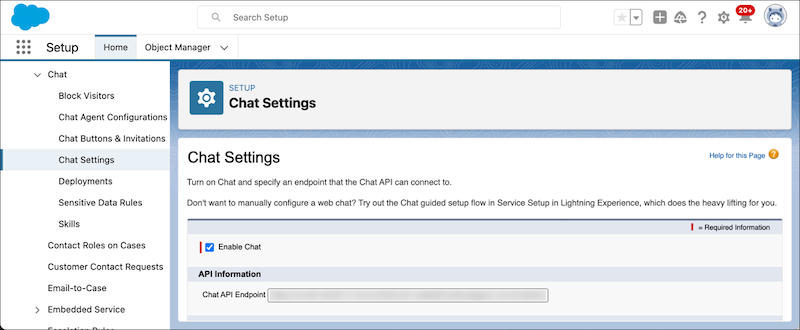
Retrieve Your Chat API Endpoint
- From Setup, in the Quick Find box, enter Chat Settings, and then select Chat Settings.
- Retrieve the hostname from the Chat API Endpoint. The hostname is the URL without “/chat/rest/” at the end, for example, “https://yourChatApiEndpoint.com”. Substitute hostname in the Chat API endpoints with this URL.
Start a Chat Session
To start a Chat session, send a SessionId request. Replace hostname with the URL that you retrieved from Chat API Endpoint.
1GET https://hostname/chat/rest/System/SessionId/- X-LIVEAGENT-AFFINITY
- X-LIVEAGENT-API-VERSION
Confirm the Chat Session Started
A ChatRequestSuccess response tells you that the Chat session started.
1{
2        queuePosition: 1,
3        estimatedWaitTime: 120,
4        geoLocation: {
5                countryCode:"US",
6                countryName: "United States of America",
7                region: "CA",
8                city: "San Francisco",
9                organization: Salesforce,
10                latitude: 37.793880,
11                longitude: -122.395114
12        },
13        url: "http://yoursite",
14        oref: "http://www.google.com?q=yoursite",
15        postChatUrl: "http://yoursite/postchat",
16        customDetails: [
17                {
18                        label: "E-mail Address",
19                        value: "jon@example.com",
20                        transcriptFields: [
21                                 "c__EmailAddress"
22                         ],
23                        displayToAgent: true
24                }
25
26        ],
27        visitorId: "acd47048-bd80-476e-aa33-741bd5cb05d3"
28}
Then wait for a ChatEstablished response. That response tells you that an agent accepted the chat session.
1{
2        name: "Andy L.",
3        userId: "f1dda237-57f8-4816-b8e8-59775f1e44c8",
4        sneakPeekEnabled: true
5}
Now you’re ready to send, for example, Messages requests. Before you send further requests, wait until you receive the ChatRequestSuccess and ChatEstablished responses, otherwise the API throws a Null Pointer exception, and you receive a 500 error.
End the Chat Session
The Chat session ends when you send a ChatEnd request or send a DELETE SessionId request. In both request types, X-LIVEAGENT-SESSION-KEY is the unique ID of the Chat session that you want to end.
Here’s the ChatEnd request.
1https://hostname/chat/rest/Chasitor/ChatEnd- X-LIVEAGENT-AFFINITY
- X-LIVEAGENT-API-VERSION
- X-LIVEAGENT-SESSION-KEY
- X-LIVEAGENT-SEQUENCE
Here’s the SessionId request.
1DELETE https://hostname/chat/rest/System/SessionId/X-LIVEAGENT-SESSION-KEY- X-LIVEAGENT-AFFINITY
- X-LIVEAGENT-API-VERSION