


Visualforce Developer Guide
 j
jNewer Version Available
Overriding an Existing Page with a Visualforce Page
Suppose you want to change the format of an existing page, such as the standard account detail page. All the information for an account displays on a single page. If there's a lot of information, you might end up doing a lot of scrolling. Using a Visualforce page you can make each section for an account display in a tab, such as contacts, opportunities, and so on.
First, create a new Visualforce page using the quick fix.
- In your browser, add the text /apex/tabbedAccount to the URL for
your Salesforce instance. For example, if your Salesforce instance is
https://MyDomainName.my.salesforce.com,
the new URL would be
https://MyDomainName.my.salesforce.com/apex/tabbedAccount.
You will get the following error message:
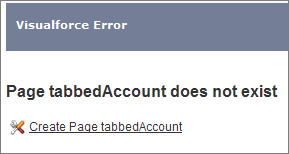
- Click Create Page tabbedAccount to create the new page.
- Click the Page Editor link in the bottom left corner of the page. This displays the
code for the new page, which should look like
this:
- Replace the existing code with the following and click
Save:
- Notice that there is no data in the Account page. You need to specify the ID of a
particular account in the URL, as you've done with previous pages, for example,
https://MyDomainName.my.salesforce.com/apex/tabbedAccount?id=001D000000IRt53.
After you add in an account ID, your page should display as follows:

Things to note about the page markup:
- <style> is actually part of CSS markup, not Visualforce markup. It defines the styles for two types of tabs: activeTab and inactiveTab.
-
<apex:tabPanel> is used to generate the
tabs. Notice how it uses the following attributes:
- tabClass attribute: specifies the style class used to display a tab when it is active.
- inactiveTabClass attribute: specifies the style class used to display a tab when it is inactive.
- Within the definition of the tab panel, is the definition of each child tab component,
<apex:tab>. The first tab uses the
<apex:detail> tag to return that portion
of the detail view for the
page:While the rest of the tabs use the <apex:relatedList> to specify the different parts of the account page. The following is the tab for contacts. It uses an existing list of contacts.
Now that you've created a page to display an account with tabs, you can use this page to
override the detail view for all accounts.
- From the object management settings for accounts, go to Buttons, Links, and Actions.
- Click Edit next to View.
- In the Salesforce Classic section, select Visualforce page.
- From the Visualforce page drop-down list, select tabbedAccount.
- Click Save.
Click the Account tab, and select any account. The detail for the account is now displayed with tabs.