To use HXL widgets on channels that support MCP (Claude Desktop, Slackbot, and ChatGPT), you need a custom MCP server. You can also update an existing custom MCP server if you prefer.
You use Setup in your org to create an MCP server. But Setup doesn’t currently support configuring the server with HXL resources. After creating the MCP server, retrieve its metadata to your DX project, update the metadata file, and then deploy it back to your org, as described in this topic.
Note
In your org’s Setup UI, enter MCP in the Quick Find box and select MCP Servers under API Catalog.
Click Add MCP Server, enter the basic information, and then click Create.
To modify an existing MCP server, click it in the table.
Note the MCP Server URL because you’ll use it later to configure your MCP client. The URL looks something like https://api.salesforce.com/platform/mcp/v1/custom/getHotelDetailsMcpServer.
Important
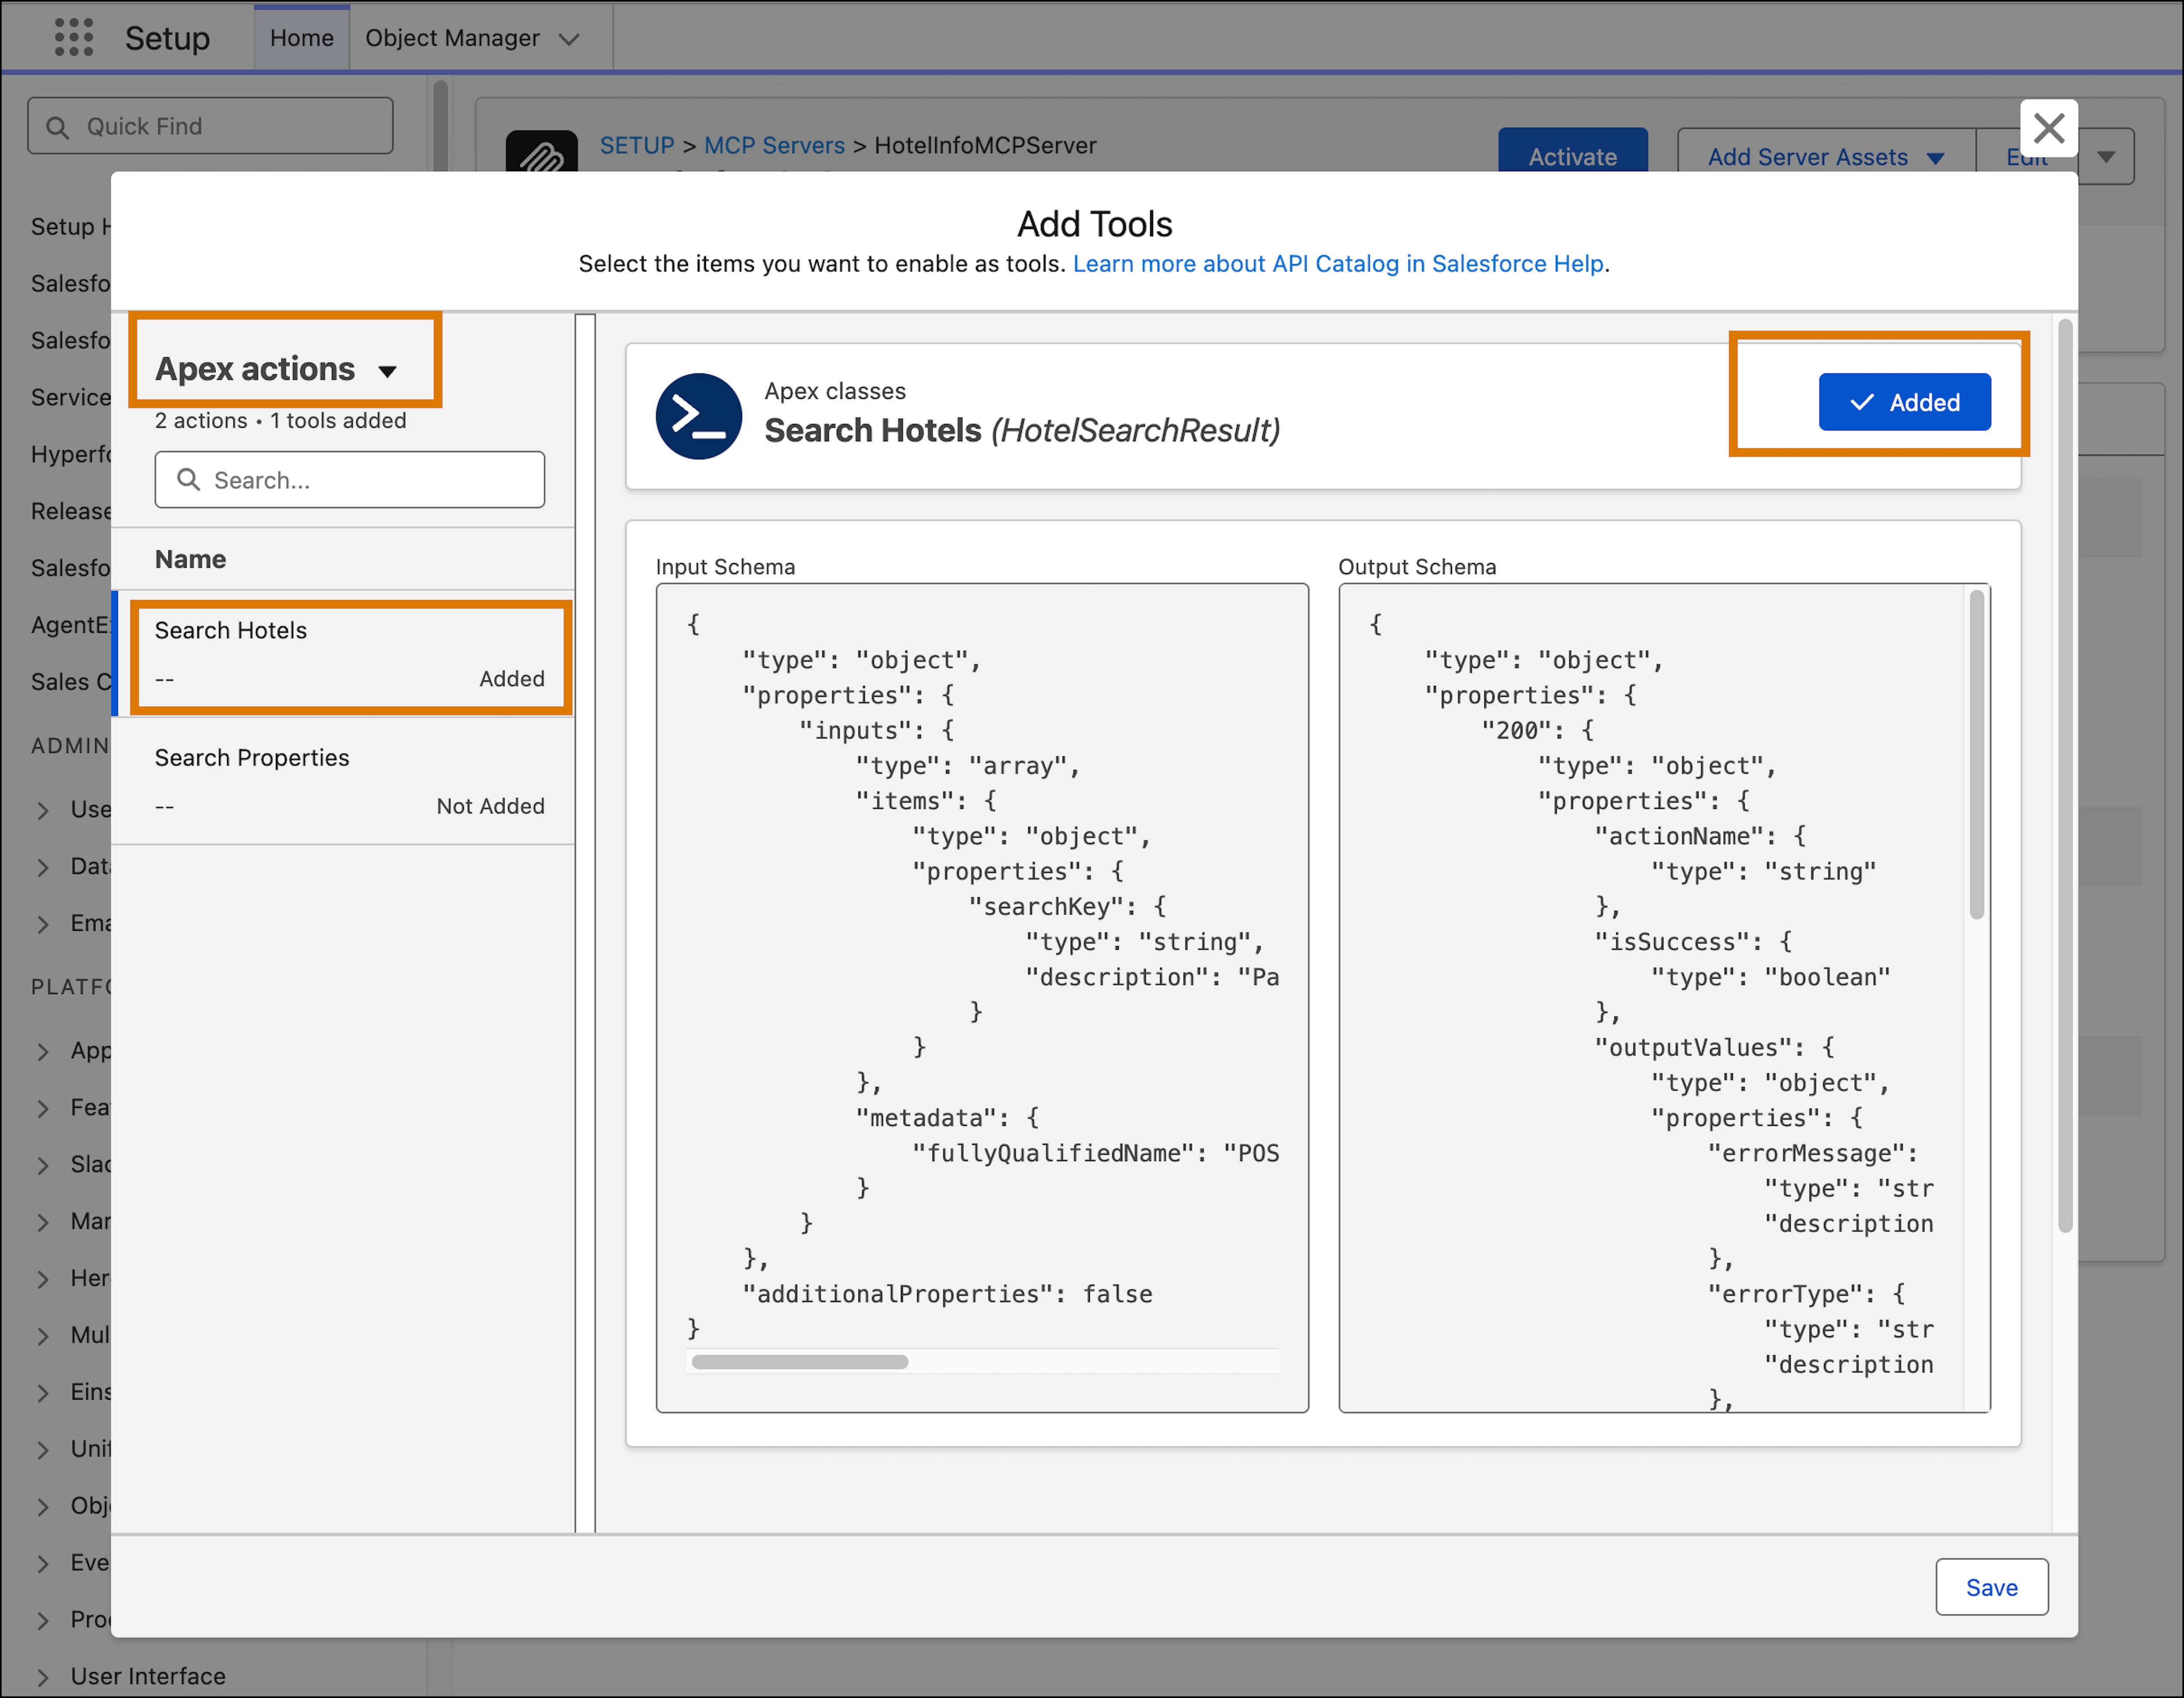
Click Add Server Assets > Add Tools.
Select Apex actions from the dropdown menu on the left, select the Apex action you previously created, and then click + Add Tool. When you’re satisfied, click Save.
In your local DX project, retrieve the metadata file associated with your new MCP server. This example uses the project Salesforce CLI command, assumes your MCP server is called getHotelDetailsMcpServer, and that you’re retrieving from an org with alias my-org:
The CLI command retrieves the metadata source to this location in your DX project: force-app/main/default/mcpServerDefinitions/getHotelDetailsMcpServer.mcpServerDefinition-meta.xml.
Open the MCP server metadata file (such as getHotelDetailsMcpServer.mcpServerDefinition-meta.xml) in your IDE and update it by adding the widget resource and then associating it to the MCP tool.
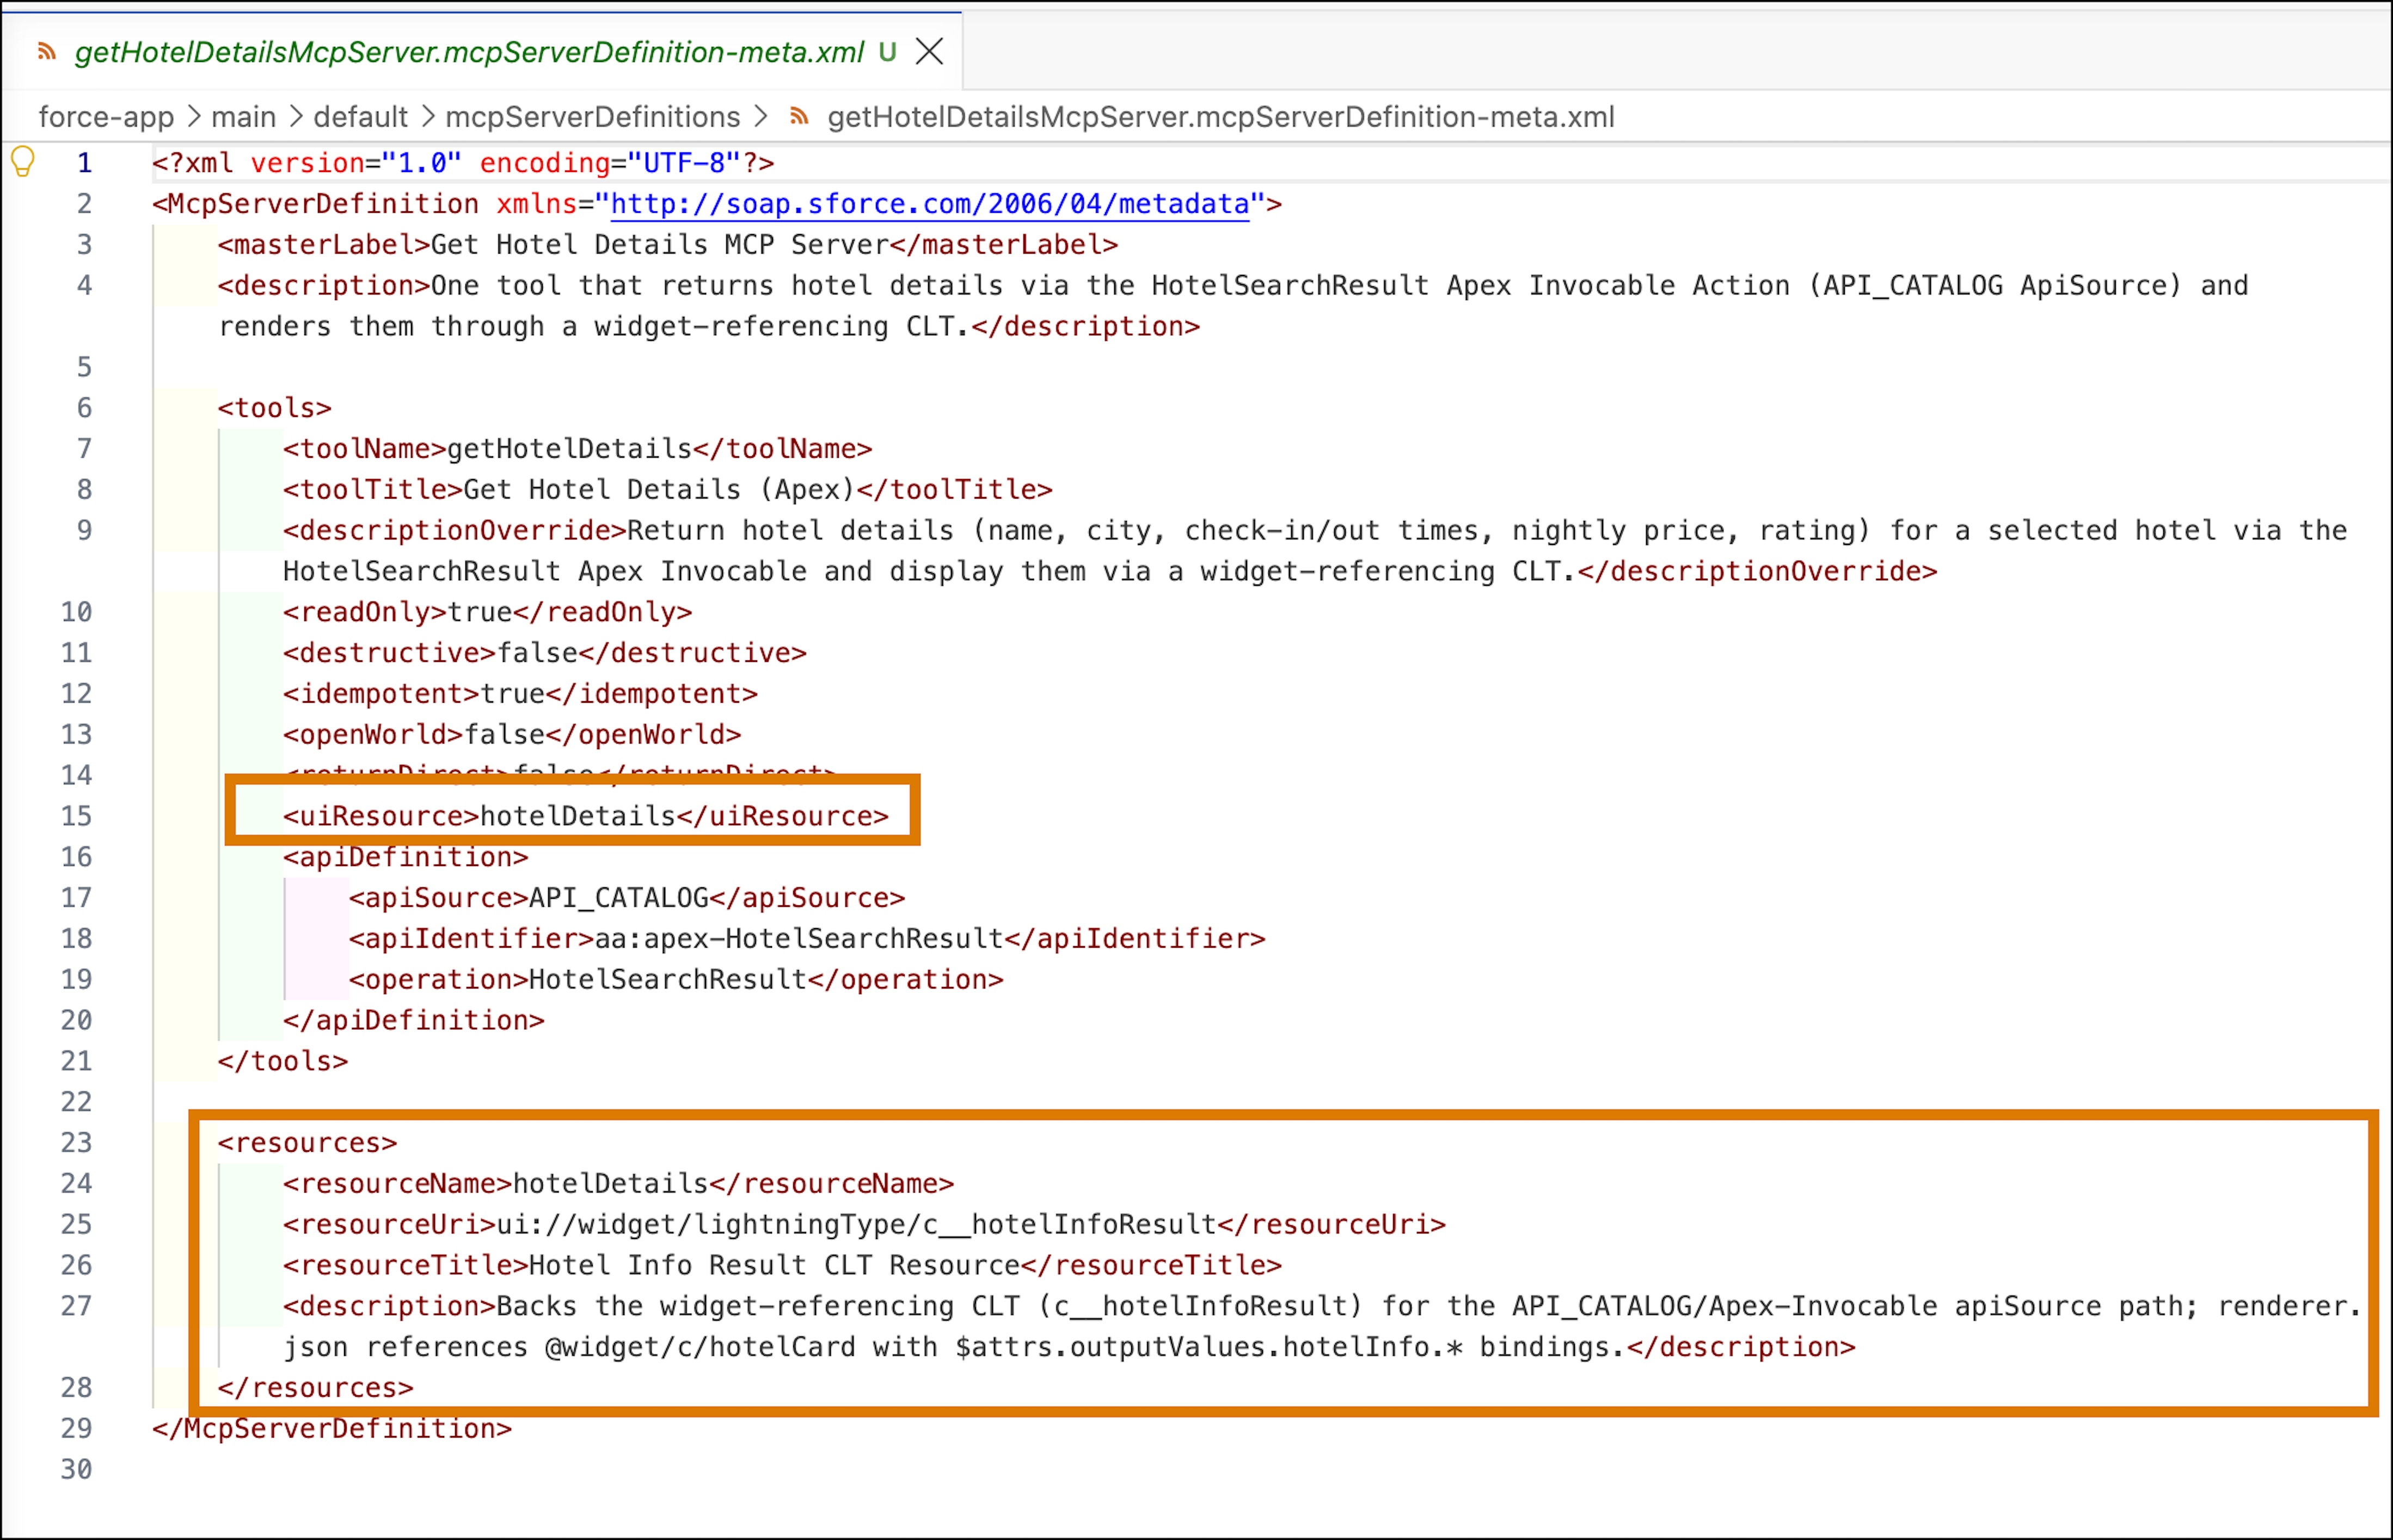
Add a <resources> XML element alongside the <tools> element and add these child elements that describe your widget:
<resourceName>: The name of this widget resource. You can use any name; the <tools> section uses the name to reference this resource.
<resourceUri>: The URI of the widget. Use this format: ui://widget/lightningType/<CLT-API-NAME>. For example, ui://widget/lightningType/c__hotelInfoResult.
<resourceTitle>: The title of the widget resource.
<description>: The description of the widget resource.
Add a child <uiResource> element to the <tools> element that references the <resourceName> of the new widget resource you just added. For example:
<uiResource>hotelDetails</uiResource>
Important: Be sure that the value of the <uiResource> element exactly matches the value of the <resourceName> element for the widget <resources> entry. Otherwise your widget won’t render correctly.
Here’s an example of an updated MCP server metadata file:
Deploy the updated MCP server definition back to your org. Here’s a Salesforce CLI example:
Headless Experience Layer is a pilot or beta service that is subject to the Beta Services Terms at Ageements - Salesforce.com or a written Unified Pilot Agreement if executed by Customer, and applicable terms in the Product Terms Directory. Use of this pilot or beta service is at the Customer's sole discretion.


 j
j