Set Up the Subscriber Org with Client Credentials Flow
This Page
All Documentation
Use this option when all users in the subscriber org should see the same data from the publisher org, regardless of who they are. A single service account authenticates on behalf of everyone, so there’s no browser popup and no per-user login required. This is the right starting point for most teams: simpler to set up, fully automated, and well-suited for background integrations and admin-configured pipelines. If you need per-user authentication, see Set Up the Subscriber Org with Browser Flow (Per-User Authentication).
Prerequisites: Set Up the Publisher Org
Before you set up the subscriber org, you must set up the publisher org. Follow the steps in Set Up the Publisher Org and be sure that the external client app has the right settings for client credentials authentication.
Step 1: Create the External Credential
From the Quick Find box in Setup, enter Named Credentials, and select Named Credentials.
From the External Credentials tab, click New.
Enter these fields:
Label: Acme_OrderManagement_EC
Name: Acme_OrderManagement_EC
For Authentication Protocol, select OAuth 2.0.
For Authentication Flow Type, select Client Credentials with Client Secret Flow.
On the External Credential detail page, scroll to Principals and click New.
In the Parameter Name field, enter ClientCredsPrincipal.
Enter these values.
Client ID: the Consumer Key value that you saved when you created the external client app in the publisher org.
Client Secret: the Consumer Secret value you saved when you created the external client app in the publisher org.
Click Save.
Step 2: Grant Credential Access Using a Permission Set
All users who will query the external objects need a permission set granting access to this external credential’s principal. If you skip this step, the Validate and Sync process fails with an “internal server error” that’s actually a permissions failure.
From the Quick Find box in Setup, enter Permission Sets, and select Permission Sets.
Click New.
Enter a label such as Acme_CrossOrg_Access and click Save.
From the permission set page, click External Credential Principal Access.
Click Edit.
Enable your external credential’s principal Acme_OrderManagement_EC - ClientCredsPrincipal and click Save.
Click Manage Assignments to assign this permission set to yourself and all users who will query external objects.
Step 3: Create the Named Credential
From the Quick Find box in Setup, enter, Named Credentials, and select Named Credentials.
Click New.
Enter these fields:
Label: Acme_CrossOrg_NC.
Name: Acme_CrossOrg_NC.
URL: the publisher org’s My Domain URL you previously saved.
External Credential: select the external credential you created, in this case, Acme_OrderManagement_EC.
Click Save.
Step 4: Create the External Data Source
From the Quick Find box in Setup, enter External Data Sources, and select External Data Sources.
Click New External Data Source.
Enter these fields:
External Data Source: Orders_EDS.
Type: Salesforce Connect: Cross-Org.
Named Credential: select the named credential you just created, in this case, Acme_CrossOrg_NC.
Enable Writable External Objects: optional, select this field if you need to create, edit, or delete records in the publisher org.
Click Save.
Step 5: Validate and Sync External Objects
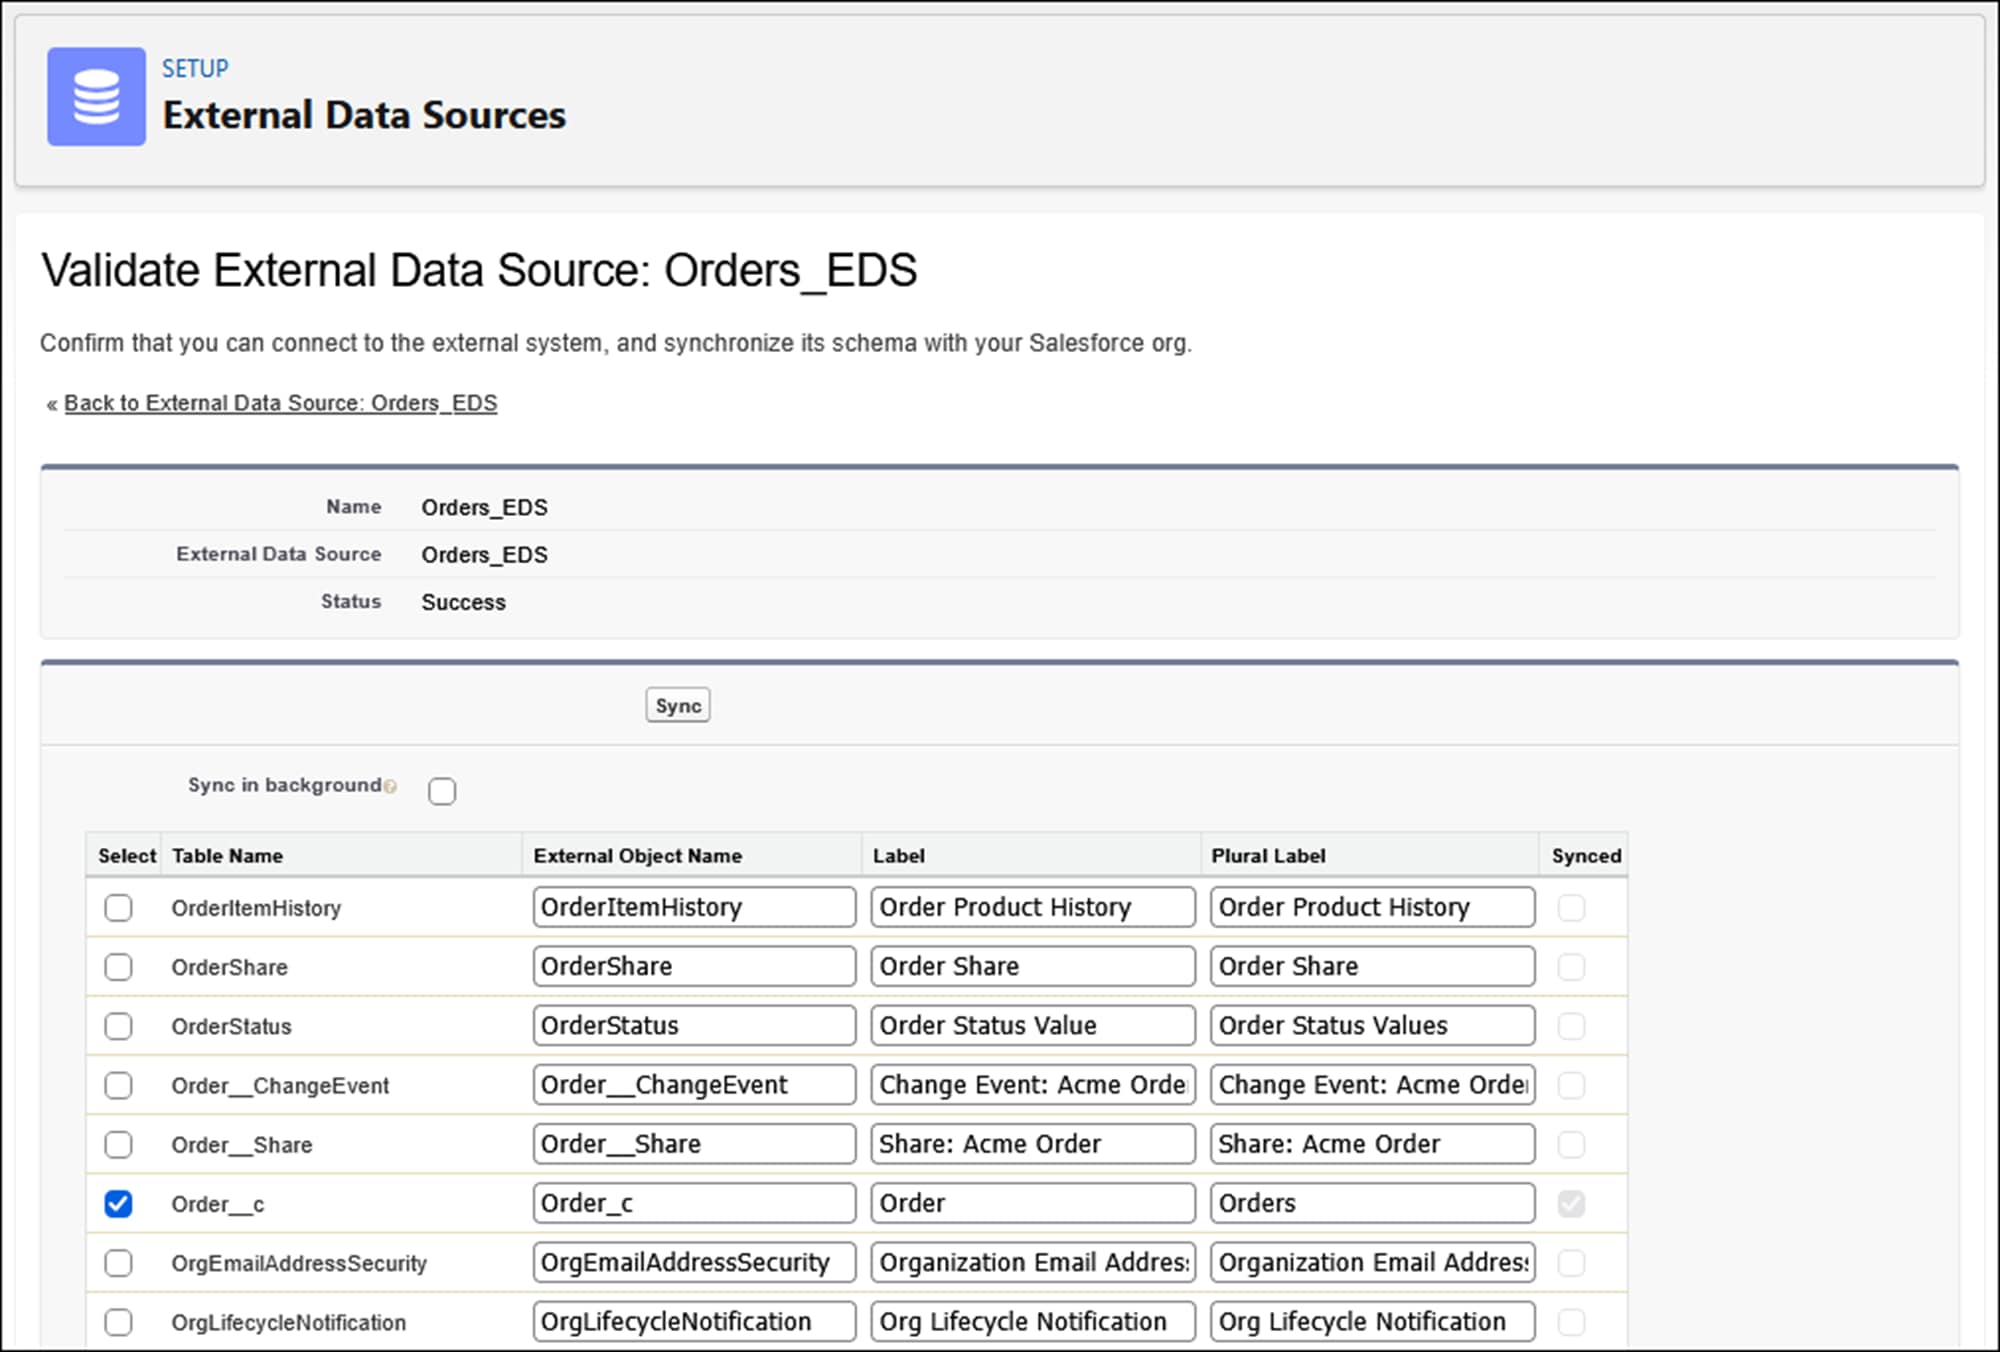
On the External Data Source page, click Validate and Sync. Salesforce queries the publisher org’s schema and lists available objects.
Select the Order__c object.
Click Sync.
From the Quick Find box in Setup, enter External Objects, and select External Objects. Confirm that the Acme Order external object appears in the list. If you see the Acme Order external object here, the connection works. You’ll see live order records in the next section.


 j