
Appearance
Exercise 3: Unify and Aggregate Data
In this exercise, you will create a real-time data graph to ingest the identity and behavior data from the website.
Step 1: Explore the Identity Resolution Rules
Connect the Pronto Website with Data Cloud
In the Data Cloud app, select the Identity Resolution tab.
Select Real-Time Individual Matching.
Review matching and reconciliation rules.
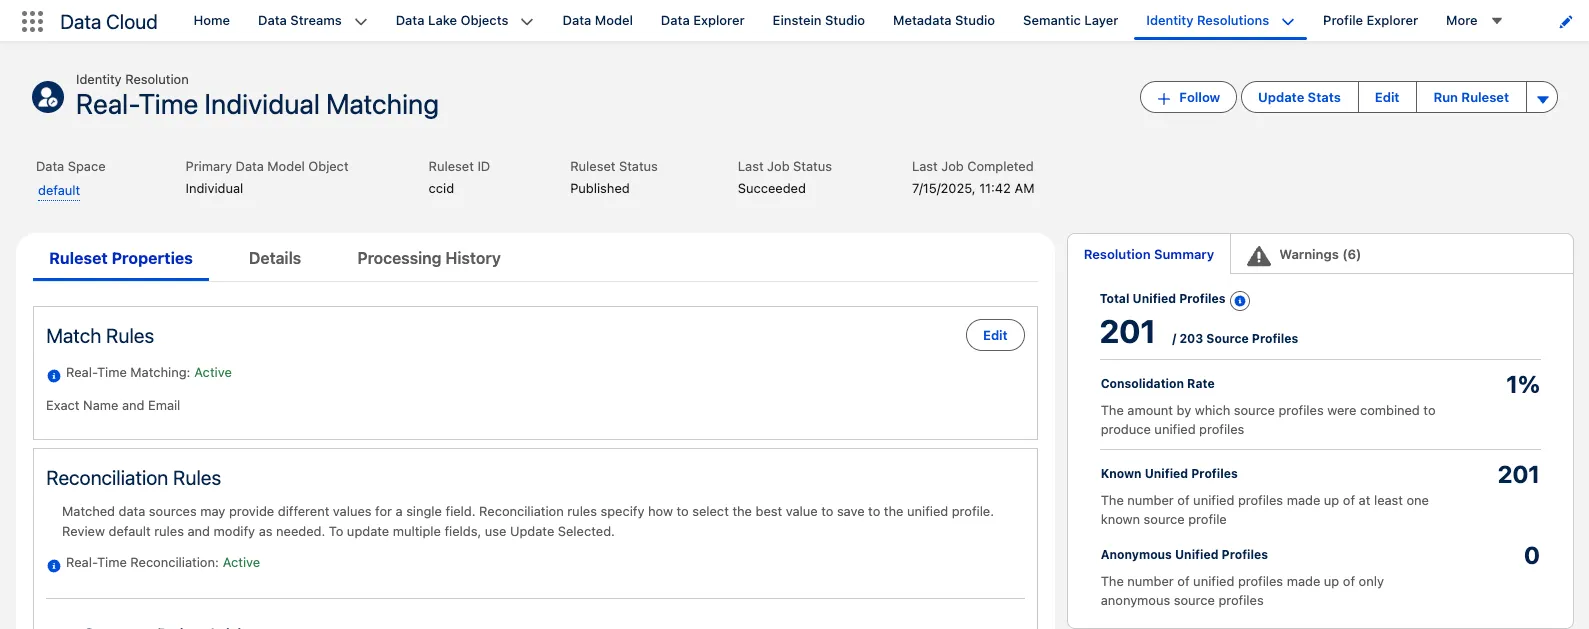
And Identity resolution ruleset becomes real-time when it is associated to a Real-time Data Graph and only uses exact matching criteria on an Individuals Name and Email Address fields.
Step 2: Explore the Real-time Data Graph
In the Data Cloud app, select the Data Graphs tab.
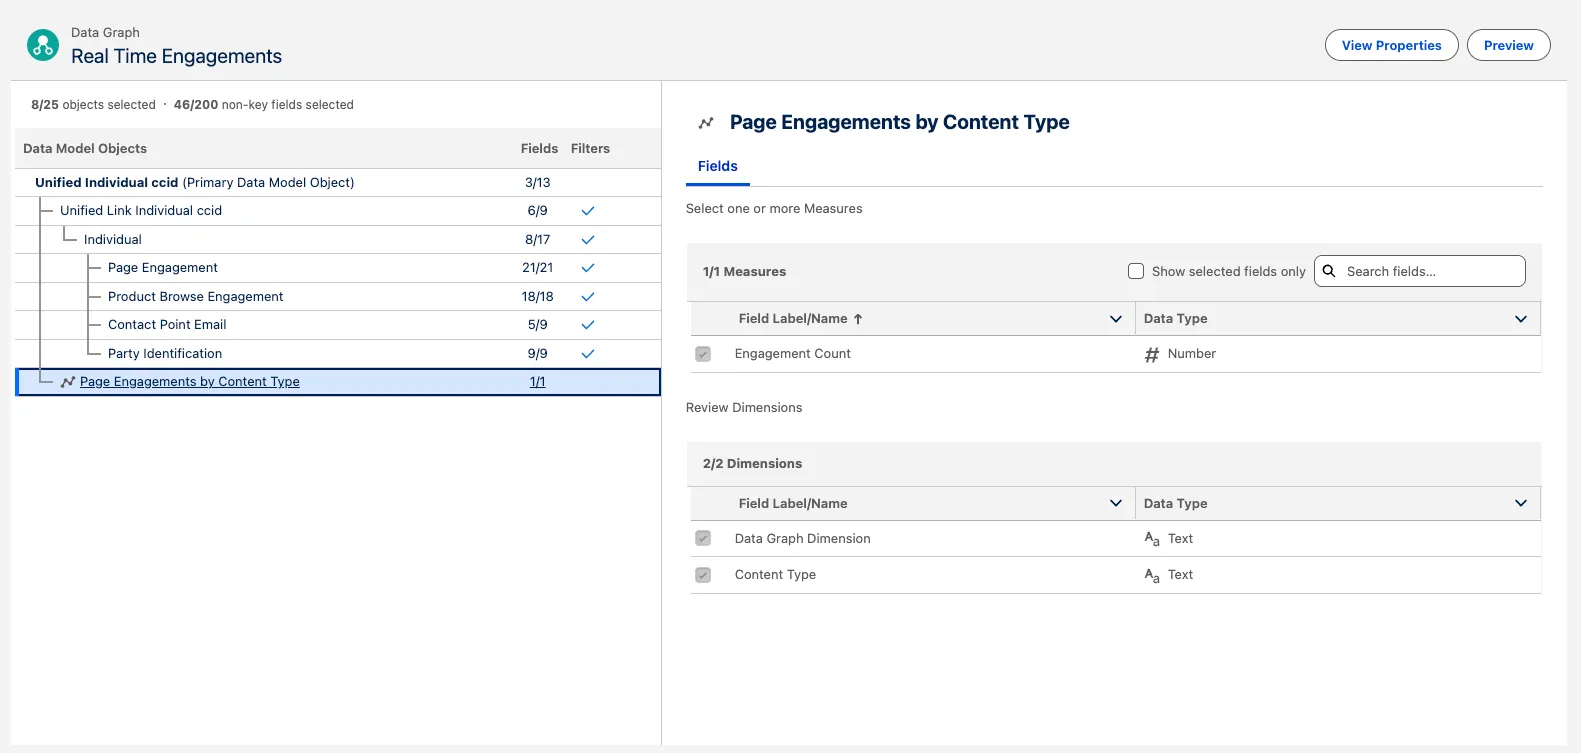
Select Real Time Engagements.
Click on Preview to view the payload structure.

This Data Graph uses the Unified Individual Link to bring together individual records and their related engagement records so that they can be accessed in real-time.
Step 3: Create Real-time Insights
In the Data Cloud app, select the Calculated Insights tab.
Click New.
Select Real-Time Insight.
Select Use Visual Builder and click Next.

Select Real Time Engagements Data Graph and click Next.
Click + and select Aggregate.
Click + under Measure and select the Count metric function.

Select Page Engagement field from the Page Engagement source.
Click Next.
Set the name to Engagement Count and click Apply.
Click + under Dimensions and select the contentType field from the Page Engagement source.
Click Next.
Set the name to Content Type and click Apply.
Click Apply at the bottom.

Click Save.
Set the name to Page Engagements by Content Type.
Click Save.
(Optional) View the Real-time Insight in the Data Graph
Click the back arrow button to get back to the Data Cloud app.
In the Data Cloud app, select the Data Graphs tab.
Select Real Time Engagements
You can see that the Page Engagements by Content Type insight is now associated to the Data Graph.
Step 4: Interact with the Pronto Site
In the App Launcher, select the Merchant Management app
On the Home Page click on Launch App
Scroll to Partner with Pronto → Become a Partner
Watch the video, expand Enterprise, click Learn More, then Continue to Review → Submit application
Step 5: Query Real-Time Data Graph with the API Utility
Scroll down to the bottom of the Pronto Website, and copy the AnonymousId. This is the unique Id associated with the browser on that device.
In the Merchant Management app
On the Home Page click on Launch API Callout Tool
In the Lookups keys field, paste the AnonymousId in the placeholder given. This lets us query the data graph that belongs to this individual record.
Make the callout. For every click on the website, keep making the callout again, and notice the data graph being updated in real-time.
Once you submit the form, the user becomes known, and is unified with an existing lead from Salesforce. Notice this in the data graph as well.
Step 6: View the Data Graph in an LWC
In the Merchant Management app
Navigate to the Leads Tab and select the All Open Leads list view.
Select Carlos Hernandez.
In the Engagement Feed component, you can see all the Page Engagements that we just generated on the pronto site.
Click on the Menu Button and select View Unified Profiles.
This shows all of the related records to the Unified Profile stored in Data Cloud.

Summary
Now, when users interact with the Pronto Web App, their interactions will stream in Real-time to Data Cloud so that you can build out a dynamic and personalized experience.