
Appearance
Exercise 1: Enrich CRM with Data Cloud
In this Exercise, you’ll explore the Pronto Salesforce and Data Cloud implementation to understand their use case.
Step 1: Explore the Merchant Management App
In the App Launcher, select the Merchant Management app
Open the Accounts Tab.
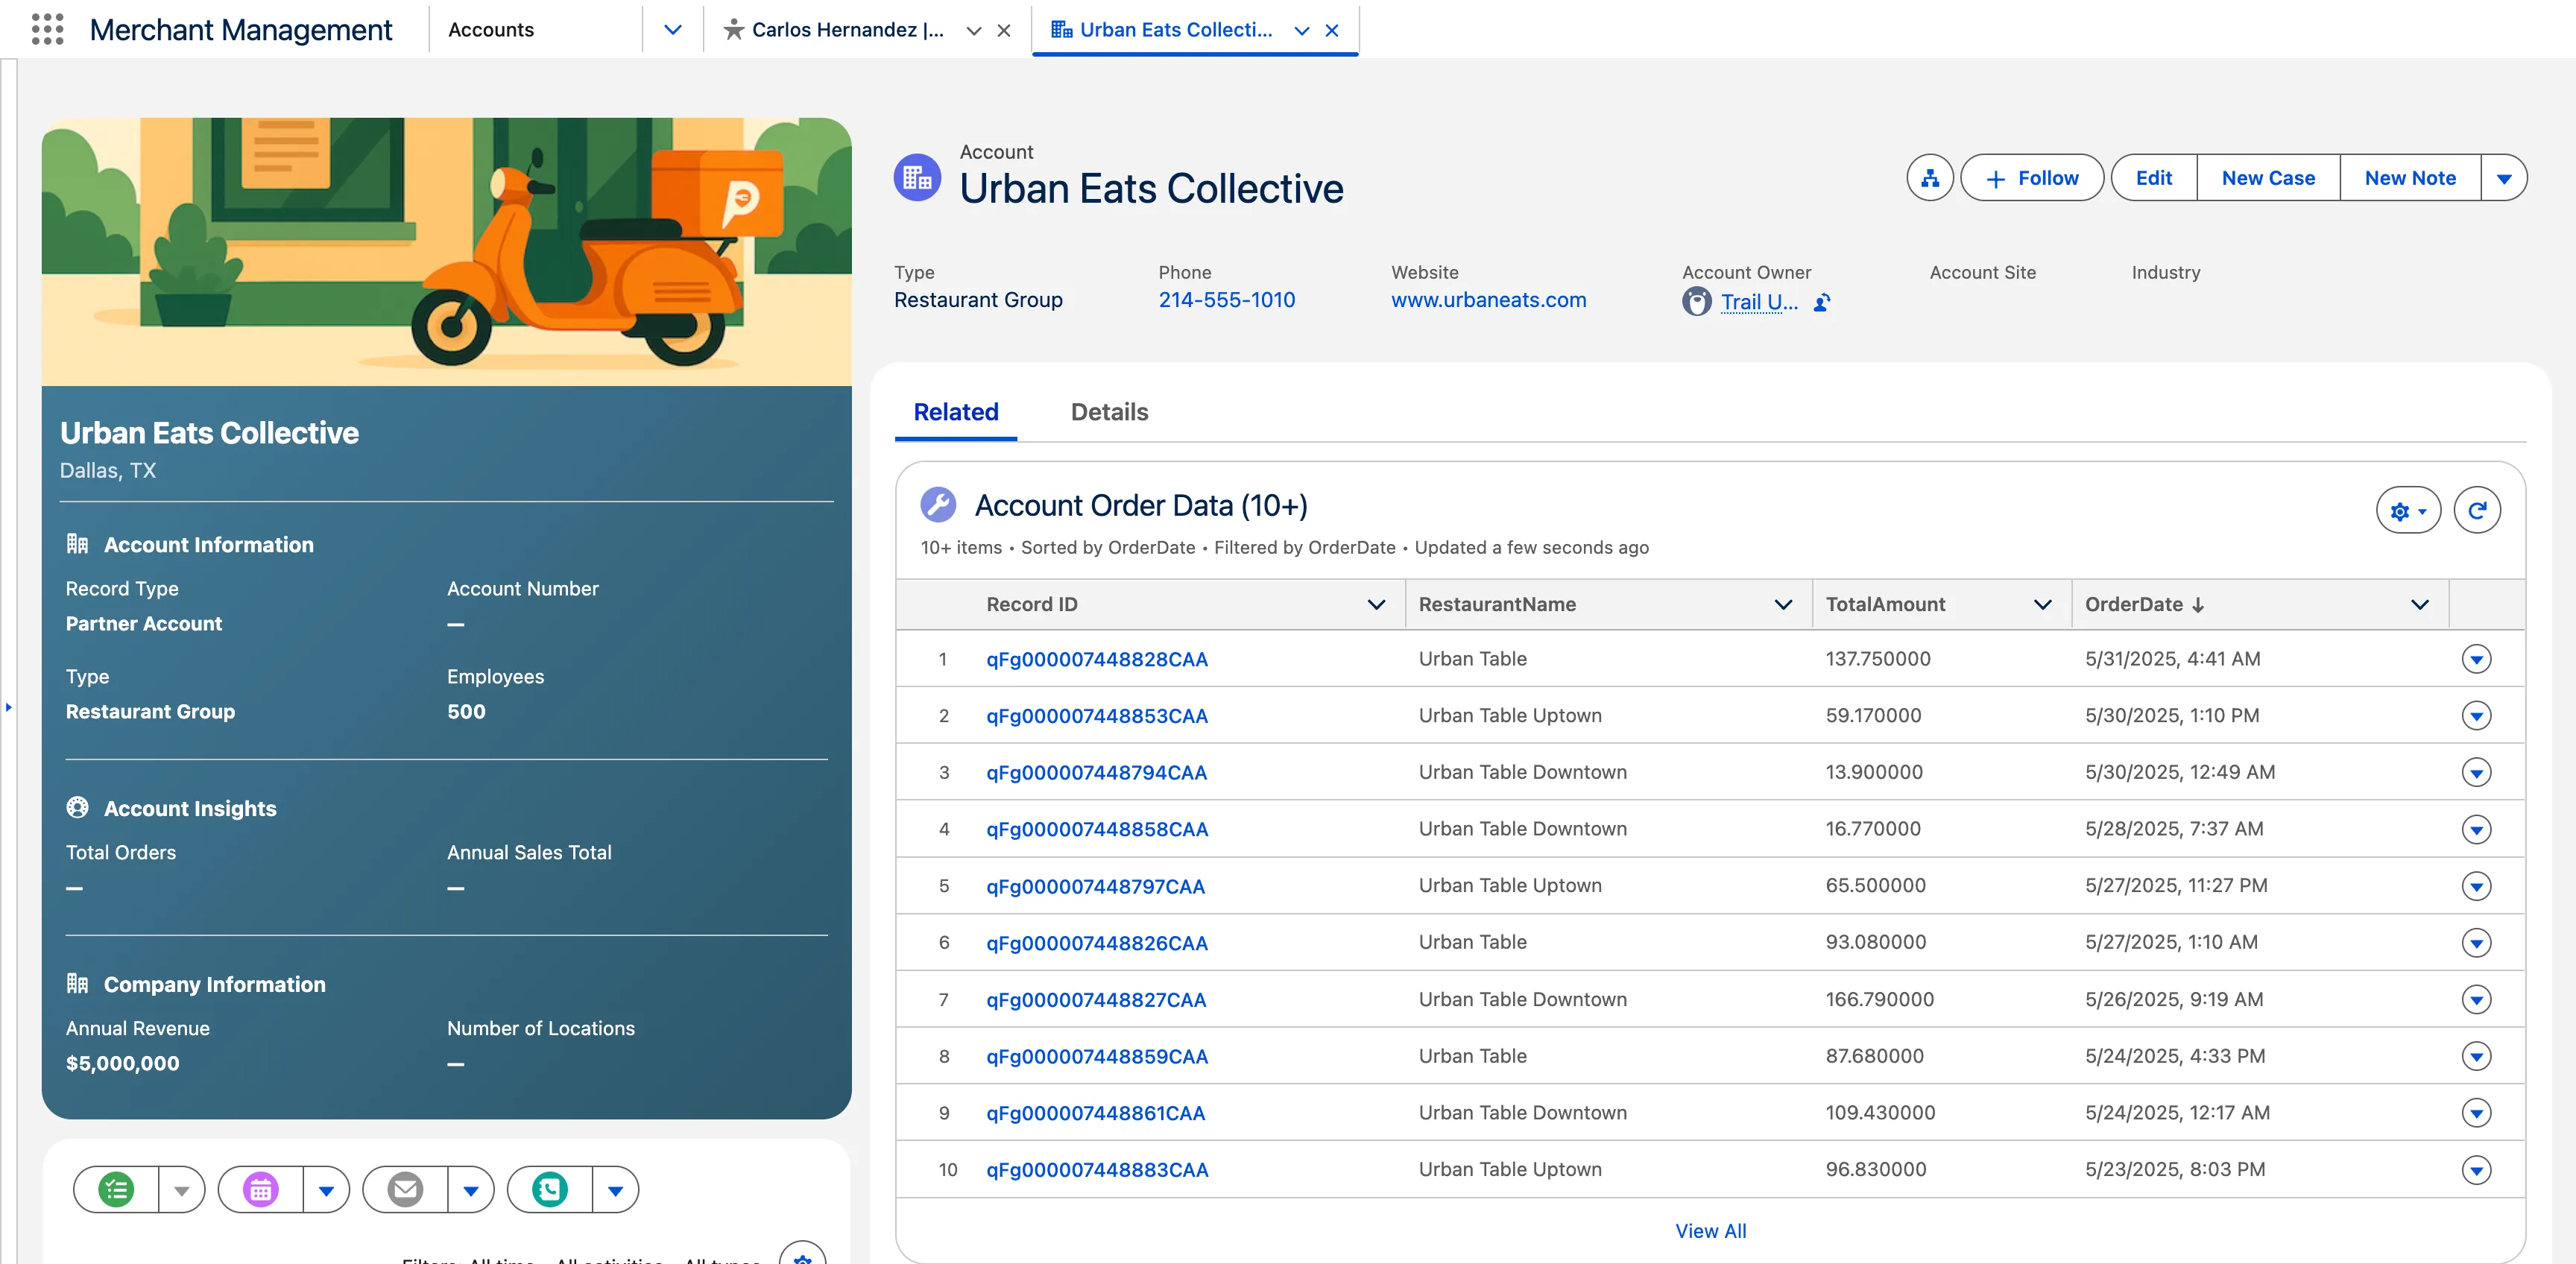
Open the Urban Eats Collective Account.
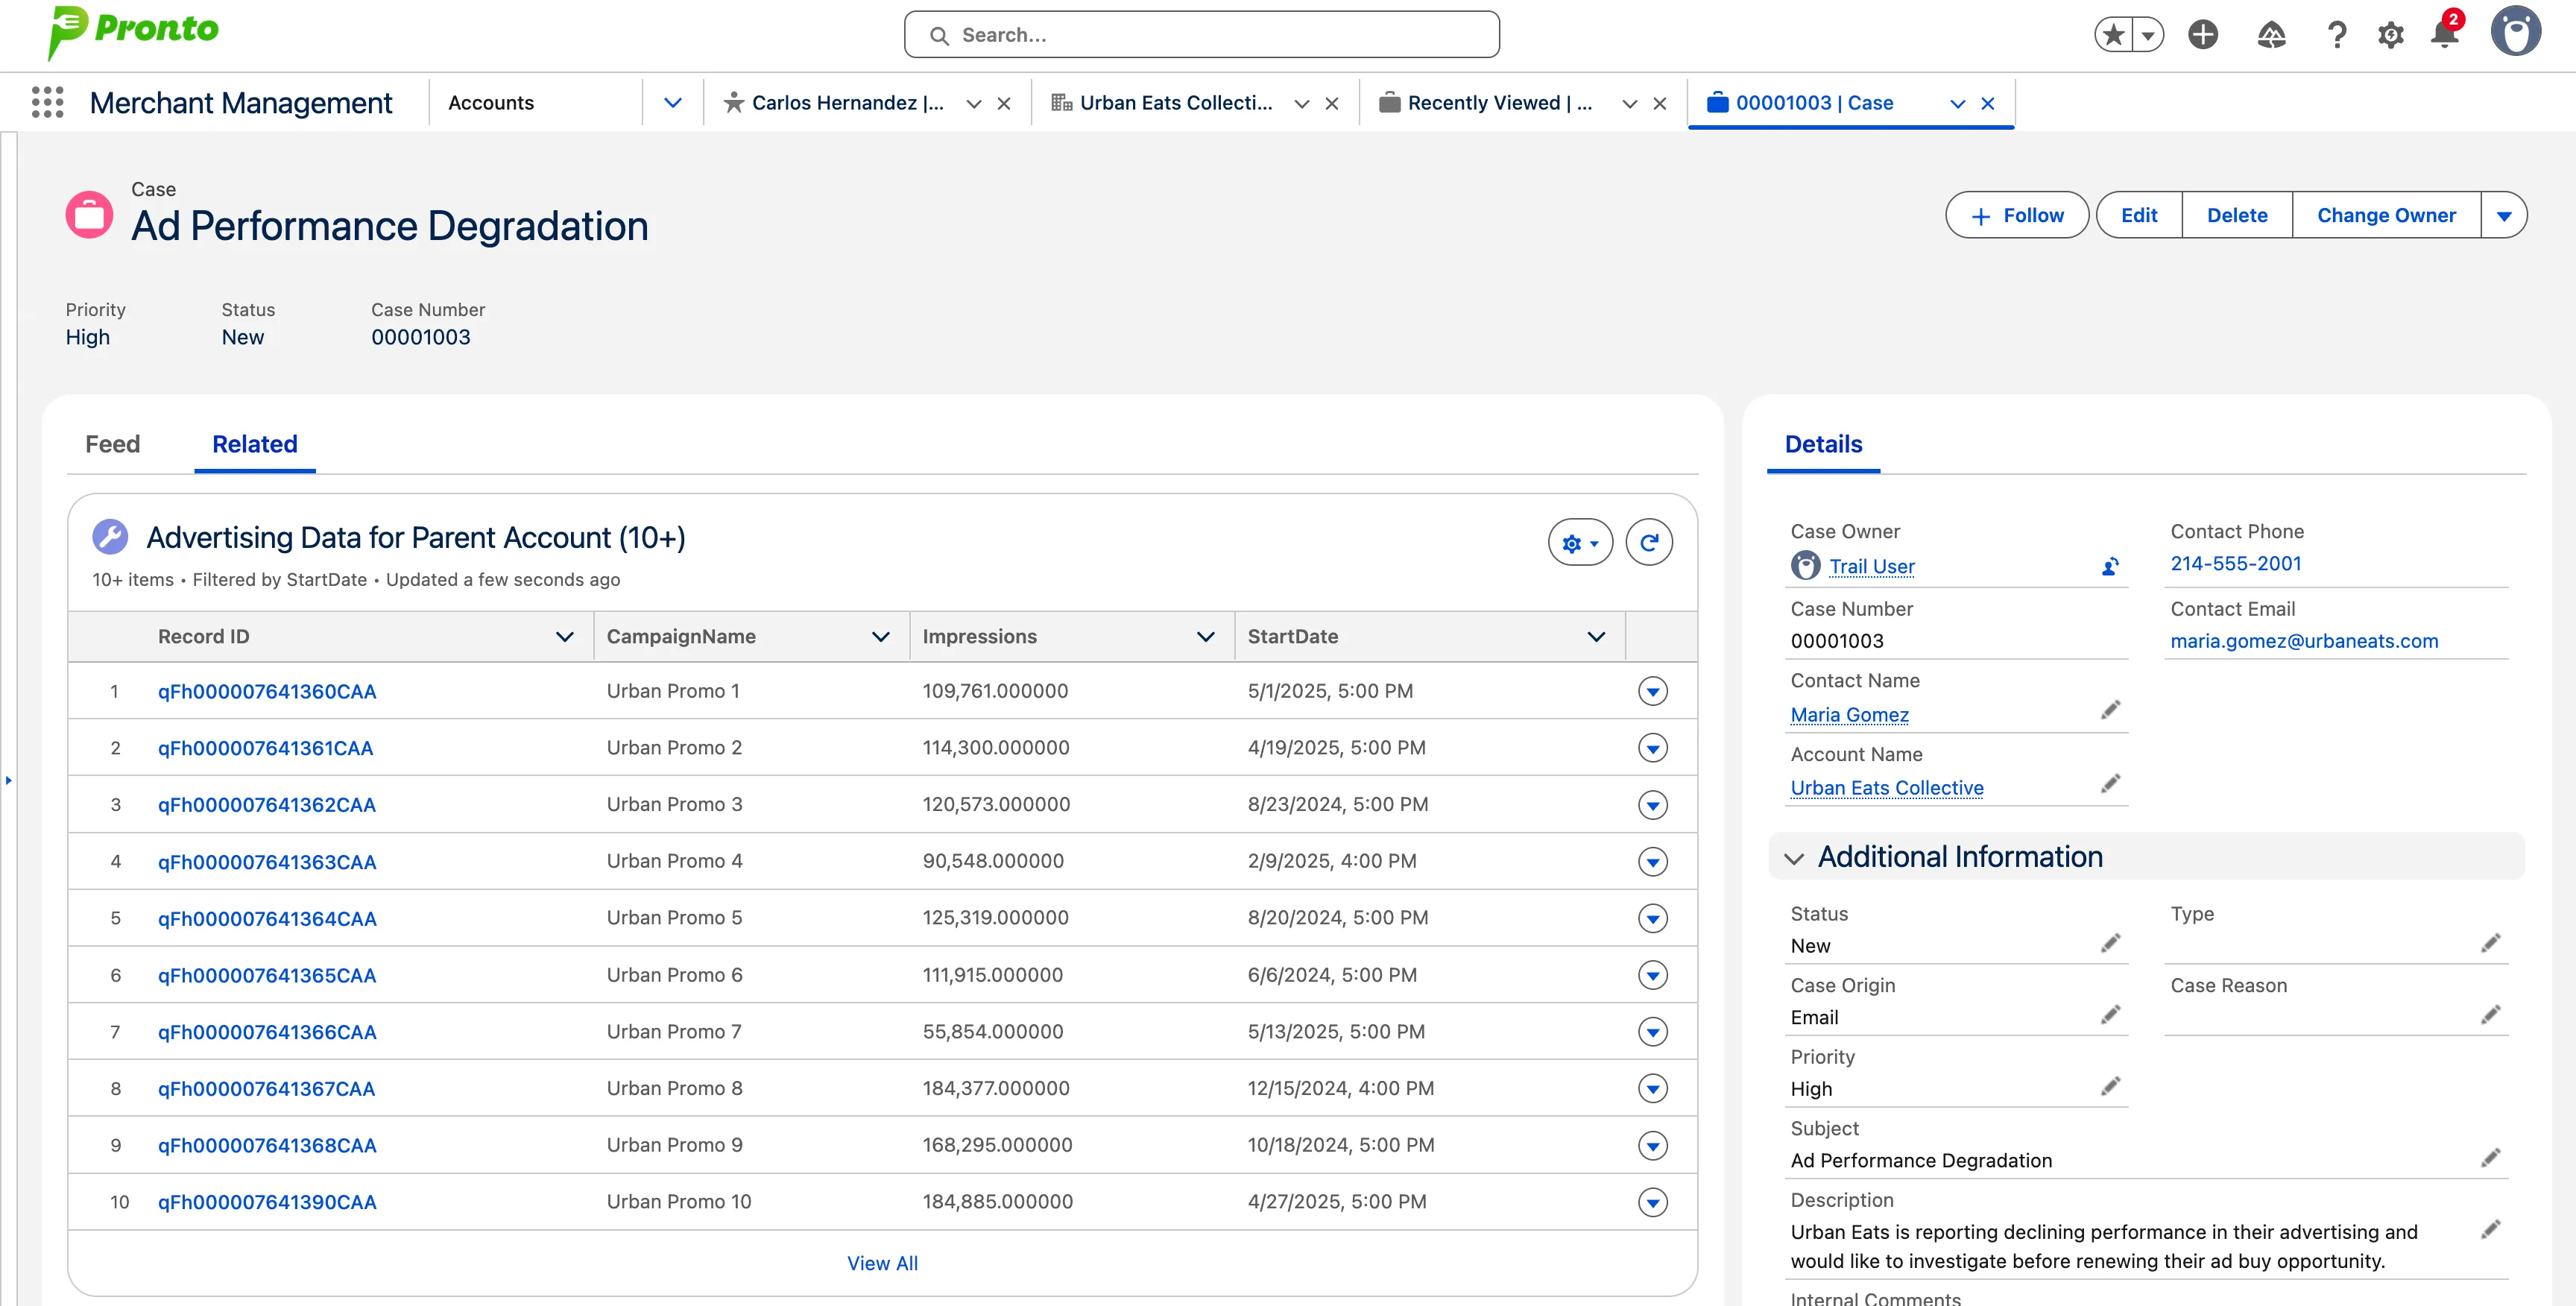
Open the Ad Performance Degradation Case.
Step 2: Unify Account Records
In the App Launcher, select the Data Cloud app
Select the Identity Resolution Tab.
Open the Account Matching ruleset.
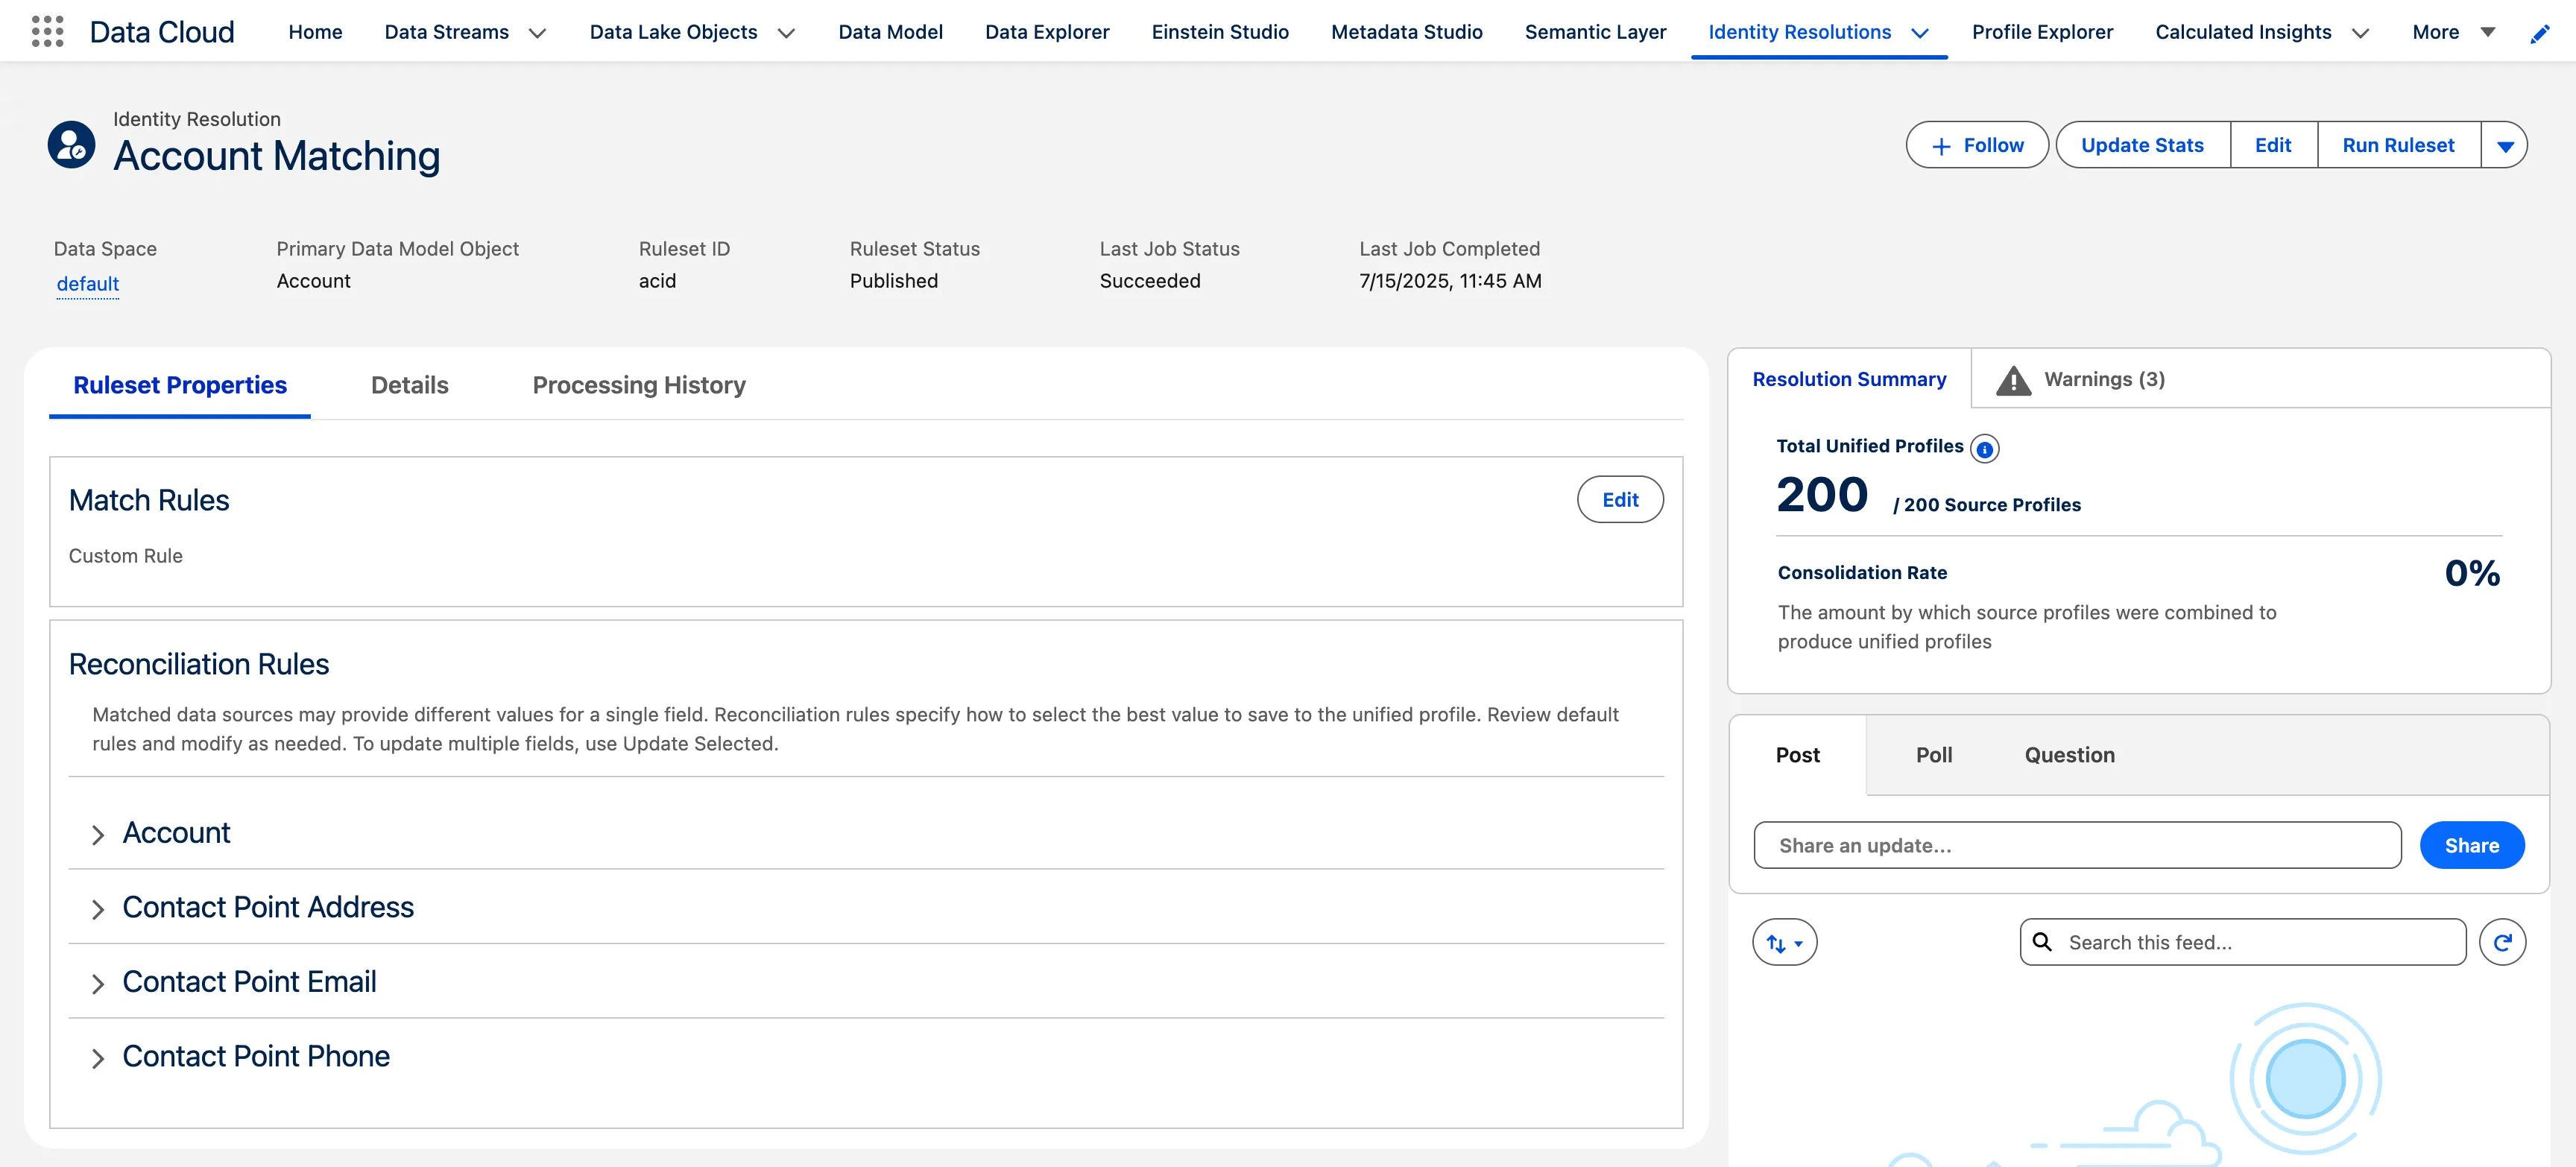
This is an Account based Identity Resolution Ruleset that allows you to unified accounts by the designated criteria in the same way that you unify Individuals.
Review matching and reconciliation rules.
Step 3: Surface Ad Insights in Service Cloud
Enable Data Cloud Related Lists
Open the Setup Menu and navigate to Setup.
Open the Object Manager and select the Account Object.
Select Data Cloud Related Lists in the sidebar.
Click New.
Leave the default data space.
Select the Advertising Data DMO.
Click Next.
Leave the default Relationship configuration and click Next.
Leave the default Related List Label.
Set Add related list to selected page layouts and Add to customized pages to TRUE.
Click Next.
Add the related list to the Case Record Page
In the App Launcher, select the Merchant Management app
Open the Accounts Tab.
Open the Urban Eats Collective Account.
Open the Ad Performance Degradation Case.
Edit the Page in the Lightning App Builder.
Drag the Dynamic Related List - Single component to the top of the page under the Related tab.
Make sure the Dynamic Related List component is selected. In the Parent Record field (right sidebar), select Account Name.
Set the Related List to Advertising Data.
Under Related List Fields, click the Add Field button, select the Campaign Name field and click Done.
Repeat the previous step to add the following fields:
- Impressions
- Start Date
- End Date
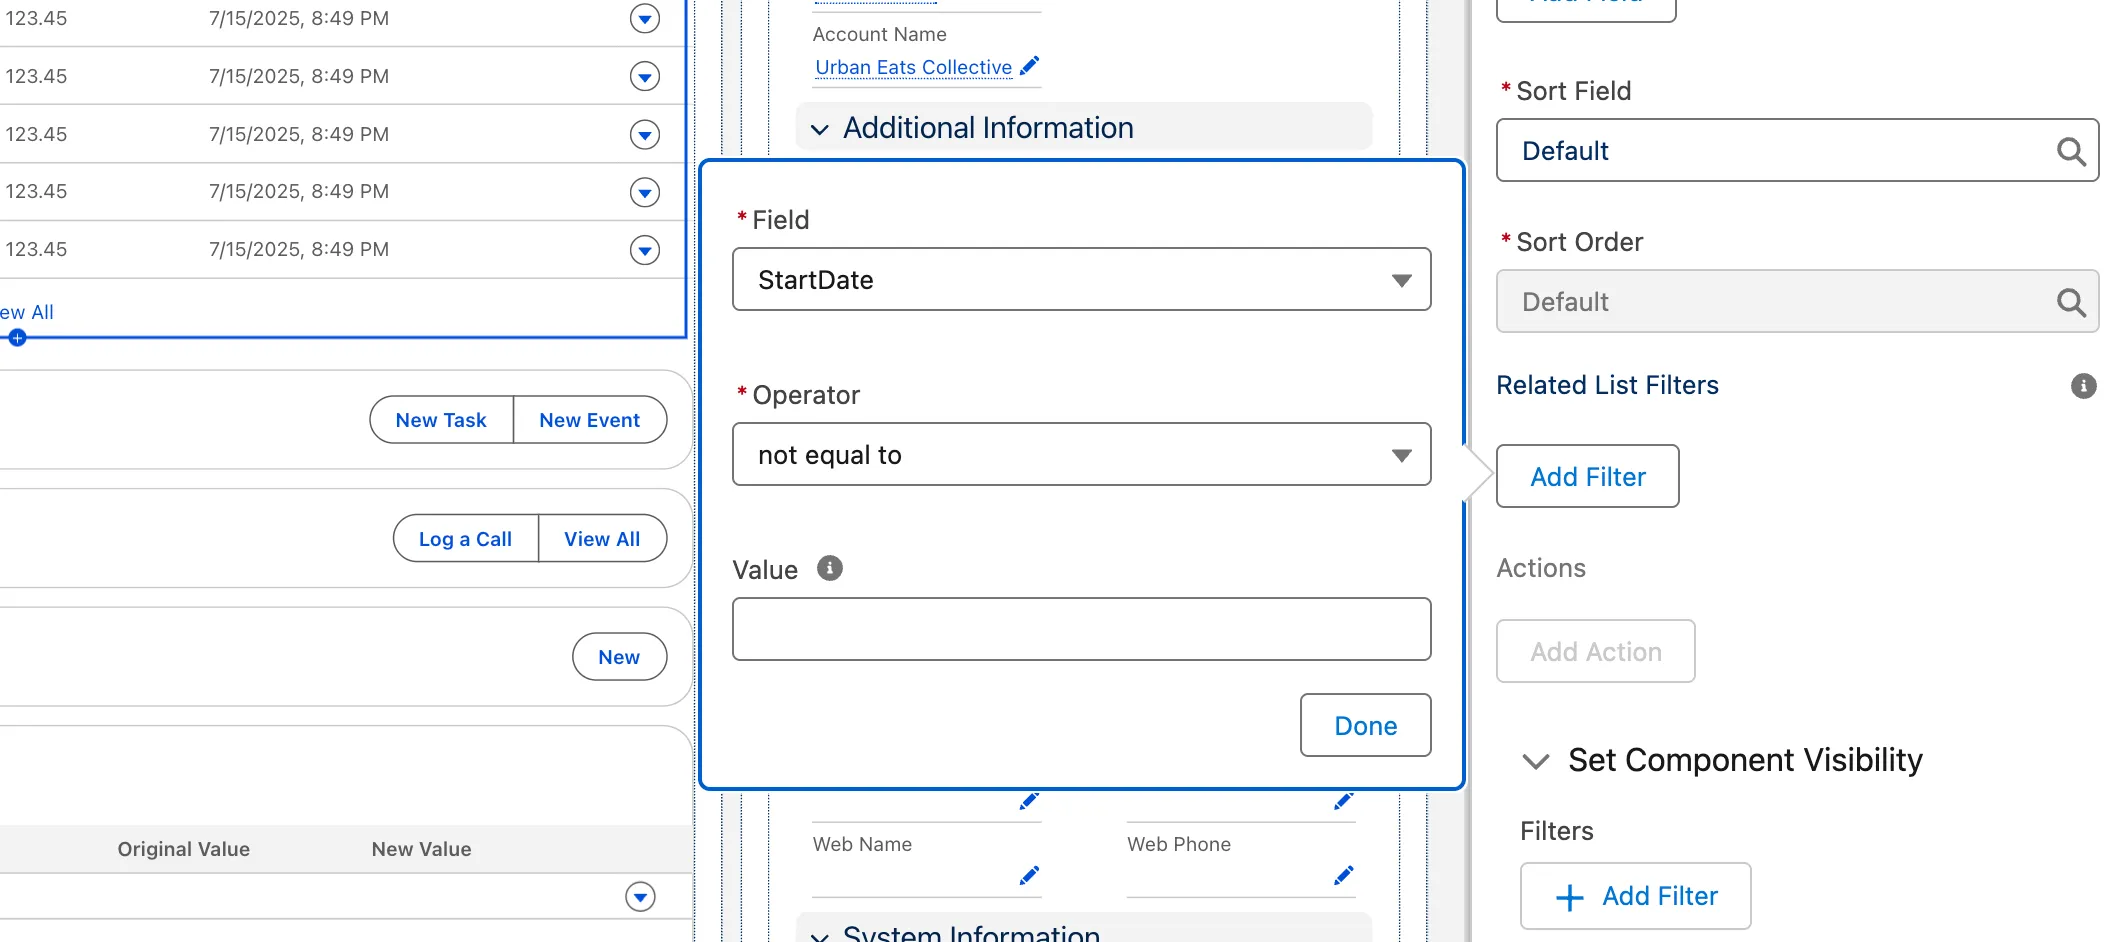
Under Related List Filters, click the Add Filter button and add the following filter:
- Field = StartDate
- Operator=not equal to
- Value=<leave blank>
TIP
If you don’t specify a filter, only the last seven days worth of data will be shown. For most contacts, this would result in an empty related list.
Click Save in the top right corner of the page to save the page layout.
Click Activate.
Click Assign as Org Default.
Click Next.
Click Save.
Click the back arrow button to get back to Case Record and view the data.
Step 4 (Optional): Surface Order Data in Sales Cloud
Enable Data Cloud Related Lists
Open the Setup Menu and navigate to Setup.
Open the Object Manager and select the Account Object.
Select Data Cloud Related Lists in the sidebar.
Click New.
Leave the default data space.
Select the Account Order Data DMO.
Click Next.
Leave the default Relationship configuration and click Next.
Leave the default Related List Label.
Set Add related list to selected page layouts and Add to customized pages to TRUE.
Click Next.
Add the related list to the Case Record Page
In the App Launcher, select the Merchant Management app
Open the Accounts Tab.
Open the Urban Eats Collective Account.
Edit the Page in the Lightning App Builder.
Drag the Dynamic Related List - Single component to the top of the page under the Related tab.
Make sure the Dynamic Related List component is selected.
Set the Related List to Account Order Data.
Under Related List Fields, click the Add Field button, select the Restaurant Name field and click Done.
Repeat the previous step to add the following fields:
- Total Amount
- Order Date
Under Related List Filters, click the Add Filter button and add the following filter:
- Field = OrderDate
- Operator=not equal to
- Value=<leave blank>
Click the back arrow button to get back to Case Record and view the data.
Summary
The Environment has been prepopulated with a number of data sets that help Pronto manage their Business Partners that help them run their platform. In the following exercises we will enable them to bring Data Cloud into every part of their Unified Platform.