
Appearance
Exercise 2: Configure a Salesforce Project
In this exercise, you'll configure your Salesforce Project so that you can begin Vibe Coding with context.
Step 1: Configure Your Project
Open the Org Browser Sidebar in Agentforce Vibes to retrieve your project metadata.
Expand Custom Objects and retrieve (download) the following standard objects:
- Account
- Lead
- Opportunity
TIP
Downloading object metadata ensures Agentforce Vibes can analyze your org’s schema and accurately generate Apex and LWC code without calling MCP tools.
Expand Lightning Component Bundle and download the genericPageHeader component.
Expand Permission Sets and download the Partner Management permission set.
Use the Explorer Sidebar to verify that your project includes these files and folders:
force-app/main/default/
  ├── objects/
  │   └── Account/
  │   └── Lead/
  │   └── Opportunity/
  ├── permissionset/
  │   └── Partner_Management.permissionset-meta.xml
  ├── lwc/
  │   └── genericPageHeader/
Your project is now fully configured with the metadata Agentforce Vibes needs to plan and generate the Partner Performance Dashboard.
Step 2: Activate the Salesforce MCP Servers
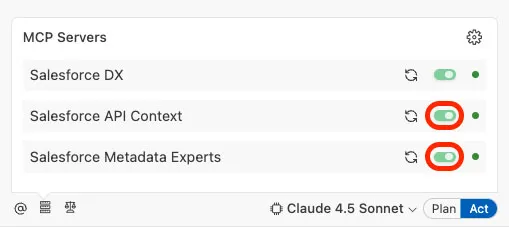
In the Agentforce Vibes Sidebar, Click Manage MCP Servers.
Toggle on all three MCP servers.
Click the MCP Servers' Configuration Icon.
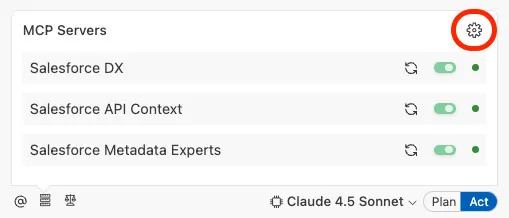
Expand the Salesforce DX MCP server to take a look at the various tools that are enabled.

Click Done.
Summary
In this exercise, you configured your local project by retrieving the metadata needed for the Partner Performance Dashboard and enabling the Salesforce MCP servers.
Your environment is now fully prepared for the next steps - where you’ll begin using Agentforce Vibes to analyze your project and build your application.