
Appearance
Exercise 1: Configure Salesforce MCP Servers
In this exercise, you'll create the trusted OAuth connection and activate the Salesforce Hosted MCPs needed for both the Headless 360 Playground and Agentforce Vibes.
You'll:
- Set and verify your user's email.
- Create an External Client App (ECA) so MCP clients can authenticate and connect.
- Prepare a permission set to secure access to your MCP servers.
- Secure access to your ECA with a permission set.
- Activate the Salesforce Hosted MCP servers.
Step 1: Set and Verify your User's Email
From Setup, in the Quick Find box, enter
Users, then select Users.Click Edit next to EPIC, OrgFarm in the user table.
Replace the Email value with your own email.
Click Save.
Click OK to confirm the email change.
Open your email inbox and look for an email from Salesforce titled "Finish changing your Salesforce account’s email address".
Click on the link to validate the email change.
Click Verify Email Address.
Click Continue.
TIP
Updating and verifying your user's email lets you reset your password if needed and is required for the next steps.
Step 2: Create an External Client App (ECA)
From Setup, in the Quick Find box, enter
External Client, then select External Client App Manager.Click New External Client App.
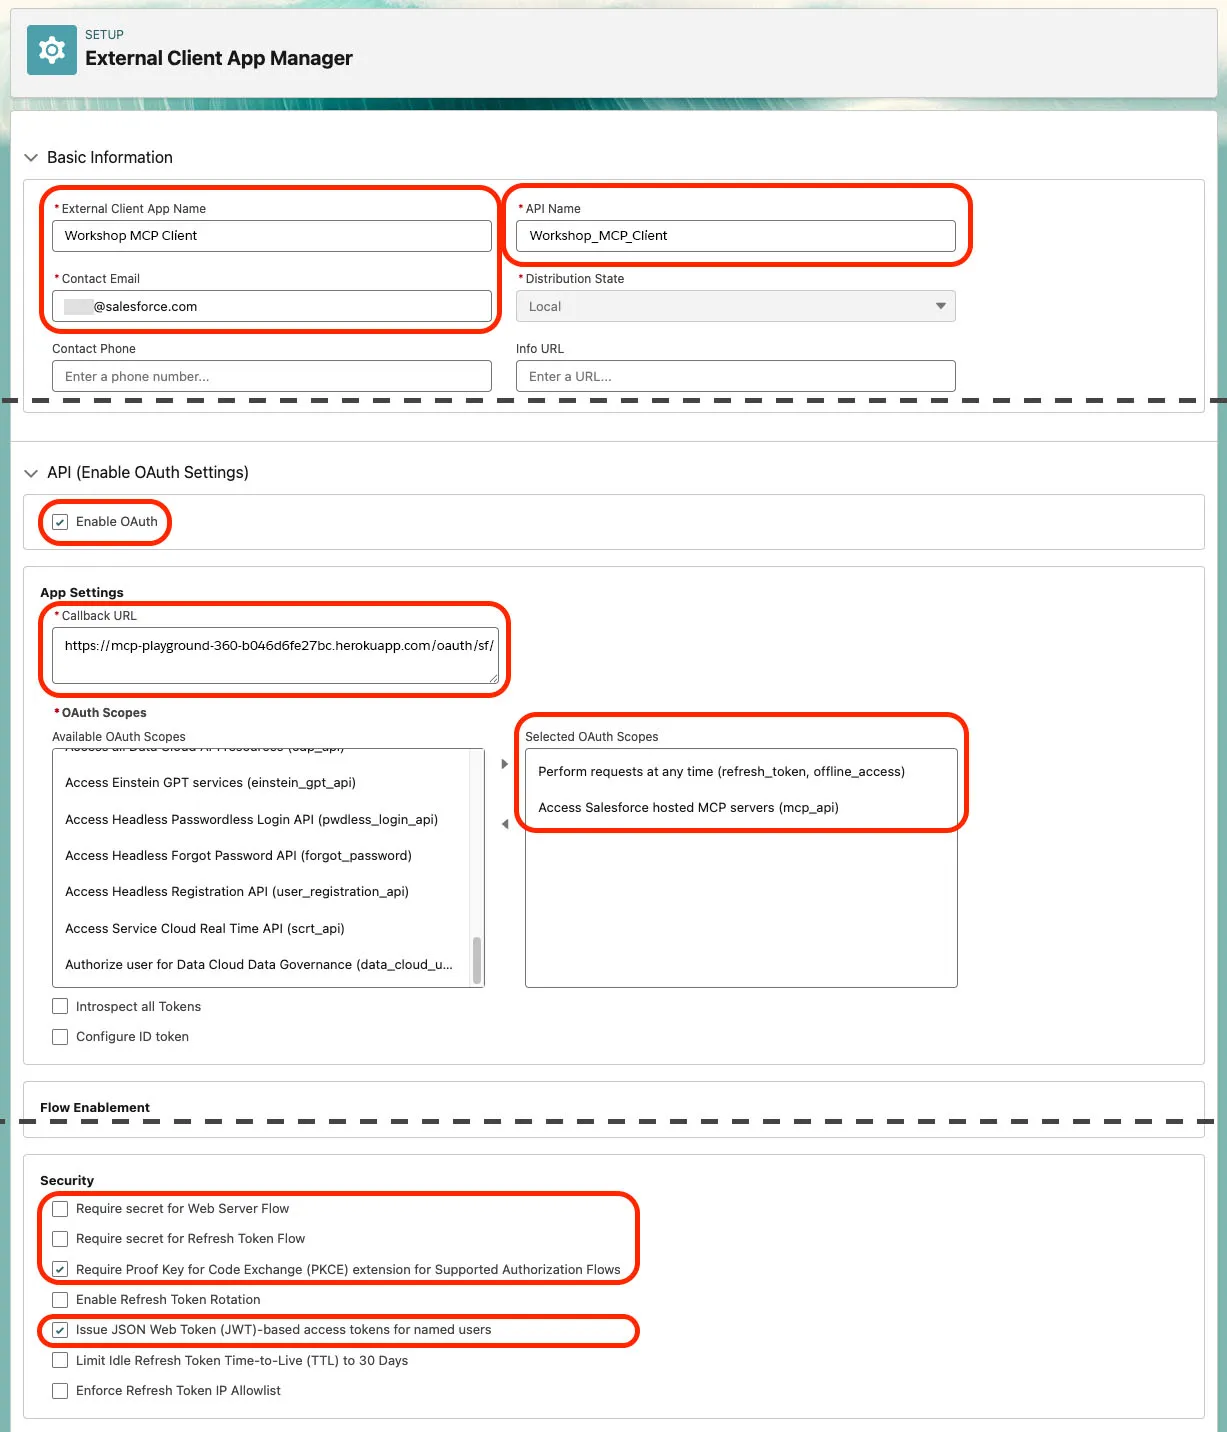
Under Basic Information, fill in the required fields:
Field name Field Value App Name Workshop MCP ClientAPI Name Workshop_MCP_Client(auto-filled)Contact Email Your email address Expand the API (Enable OAuth Settings) section and configure the following app settings:
Check Enable OAuth
Callback URL:
txthttps://mcp-playground-360-lb-75bfc079c1f3.herokuapp.com/oauth/sf/callbackSelected OAuth Scopes:
- Perform requests at any time (
refresh_token, offline_access) - Access Salesforce hosted MCP servers (
mcp_api)
- Perform requests at any time (
Under Security, apply the following configuration:
- Uncheck these boxes:
- Require secret for Web Server Flow
- Require secret for Refresh Token Flow
- Check these boxes:
- Require Proof Key for Code Exchange (PKCE) extension for Supported Authorization Flows
- Issue JSON Web Token (JWT)-based access tokens for named users
At this point, your configuration should look like this:
TIP
Always define one ECA per client type (one for Claude, one for ChatGPT...). This helps you control permissions and facilitates logging.
- Uncheck these boxes:
Click Create.
TIP
The External Client App can take several minutes, and up to 30 minutes, to become available. The delay is similar to registering a new domain with DNS.
Step 3: Create a Permission Set
From Setup, in the Quick Find box, enter
Permission, then select Permission Sets.Click New.
Fill in the following fields:
Field name Field Value Label MCP Client UserAPI Name MCP_Client_User(auto-filled)Description Grants access to the Salesforce hosted MCP servers.Click Save.
Assign the permission set to yourself:
- Click Manage Assignments.
- Click Add Assignment.
- Check the box next to OrgFarm EPIC (this is your user).
- Click Next.
- Click Assign.
Step 4: Secure the Access to the External Client App
From Setup, in the Quick Find box, enter
External Client, then select External Client App Manager.Click Workshop MCP Client.
Click Edit in the Policies tab of your ECA.
Expand the OAuth Policies section.
Change the Permitted Users dropdown to Admin approved users are pre-authorized.
Click OK to confirm the changes.
Under Select Permission Sets, select your MCP Client User permission set from the Available Permission Sets list and move it to the Selected Permission Sets list.
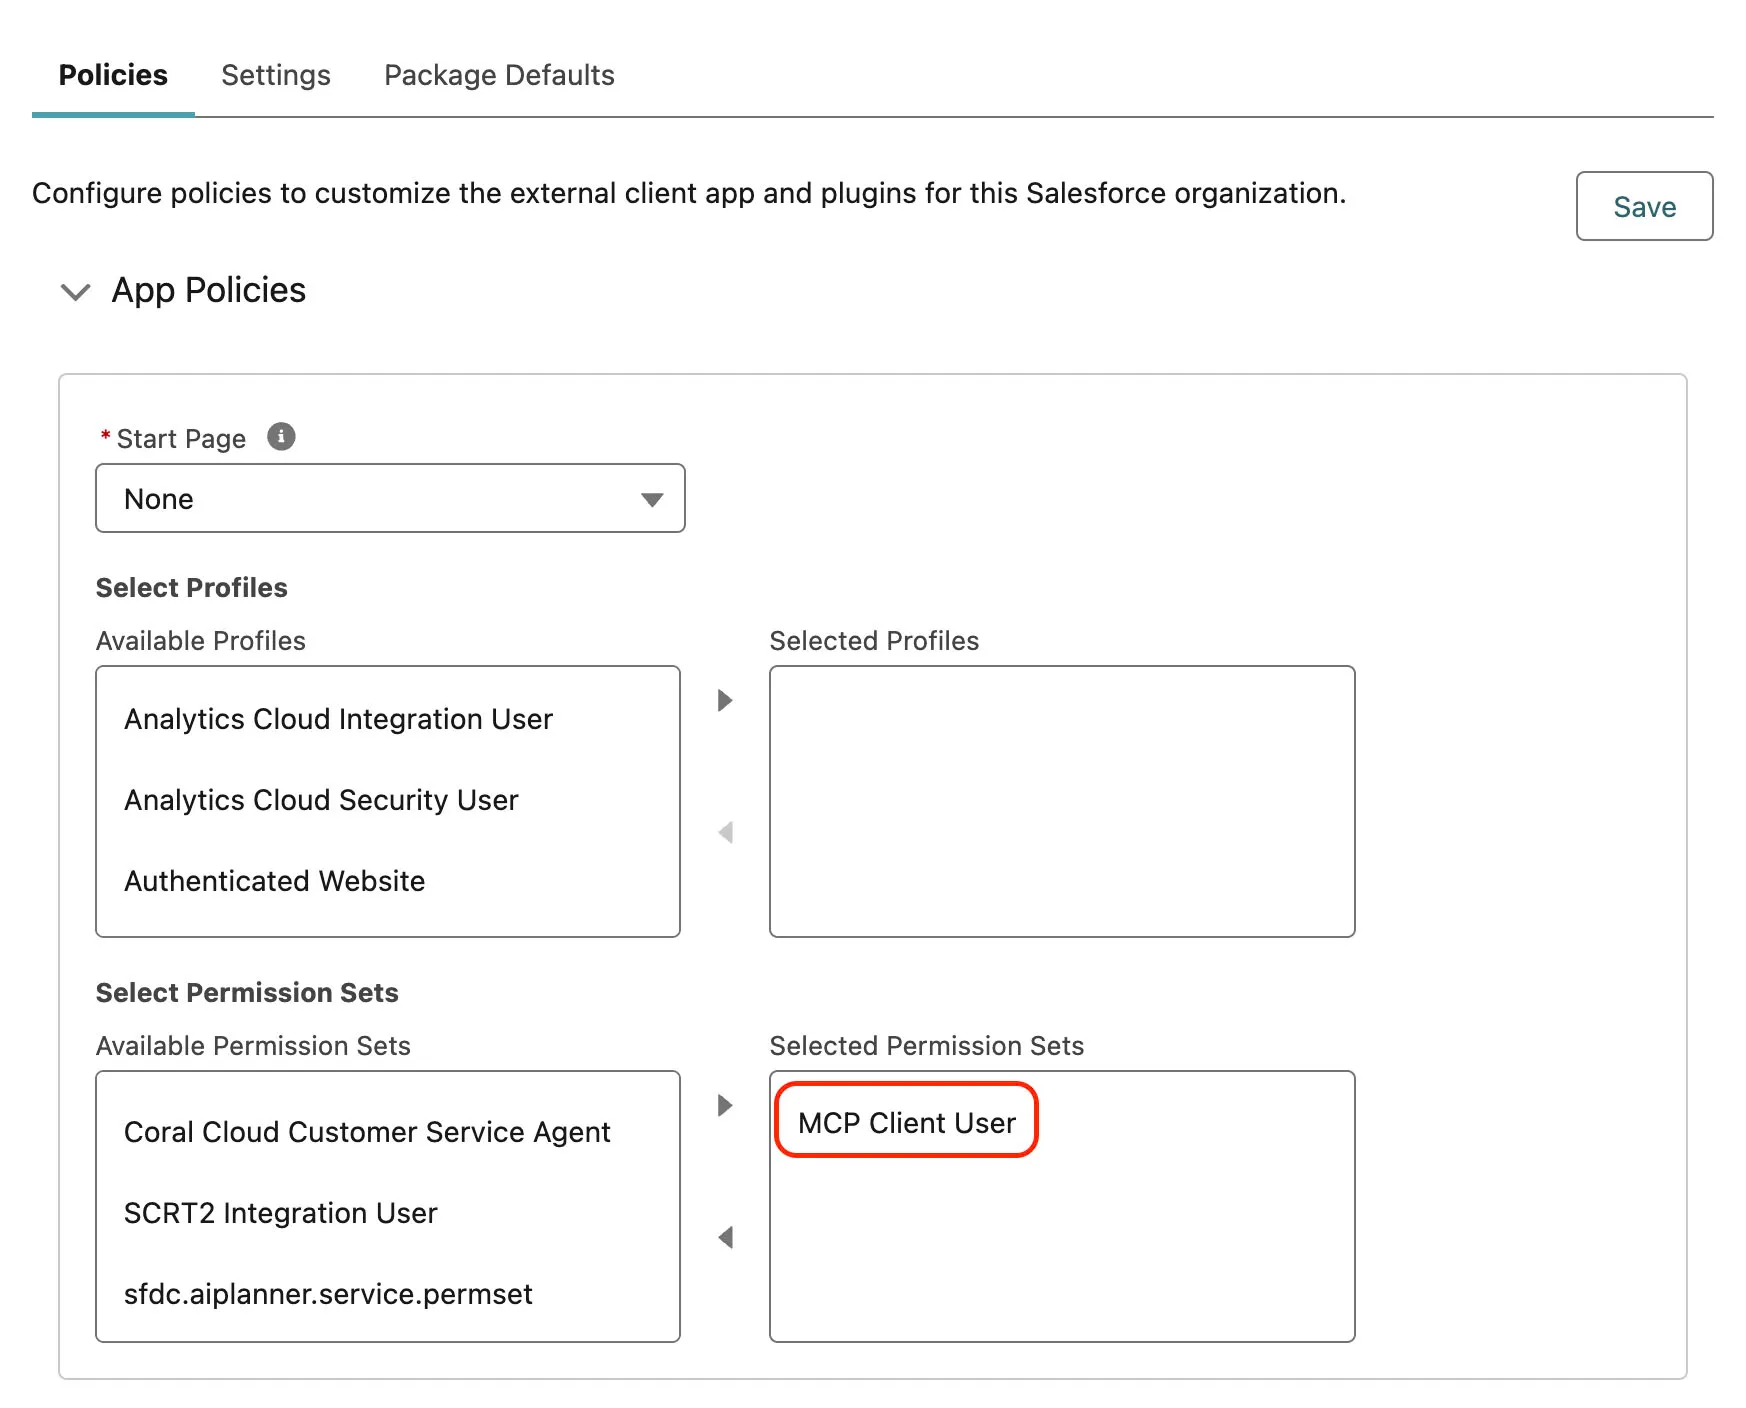
Click Save.
Click Settings, then under OAuth Settings click Consumer Key and Secret.
Check your inbox for a verification code email and enter the code in the form.
Copy the Consumer Key and Consumer Secret. Store them securely — you'll need them to connect MCP clients to your org.
Step 5: Activate Salesforce Hosted MCP Servers
From Setup, in the Quick Find box, enter
MCP Servers, then select MCP Servers under API Catalog.Click Salesforce Servers.
Review the servers you'll activate.
Server Why you need it sobject-all Lets MCP clients query and update Salesforce records. You'll use it in Exercise 2 to investigate live Sales Cloud data. salesforce-api-context Lets MCP clients inspect your org's API shape, objects, fields, and relationships. You'll use it in Exercise 2 before querying records. metadata-experts Gives metadata-aware development guidance for later workflows. Keep it active for the Agentforce Vibes chapter and Salesforce DX development. Open the sobject-all MCP server and click Activate.
Open the salesforce-api-context MCP server and click Activate.
Open the metadata-experts MCP server and click Activate.
TIP
Leave salesforce-api-context and metadata-experts active after Exercise 2. You'll use API context during the Playground investigation and metadata expertise later when Agentforce Vibes plans and generates Salesforce code.
Summary
- You verified your user's email so Salesforce can complete security checks.
- You created a secure External Client App for MCP client authentication.
- You created and assigned a permission set that controls who can use the External Client App.
- You activated sobject-all, salesforce-api-context, and metadata-experts.
Next, you'll test the Salesforce Hosted MCP servers in the Headless 360 Playground.