Use the Sandbox API to create and manage on-demand sandboxes.
Manage Sandboxes with the B2C Commerce CLI
The B2C Commerce CLI wraps the Sandbox API with an easy-to-use workflow, so you can manage sandbox lifecycle from your terminal without writing raw API calls. To install the tool and authenticate, see B2C CLI, MCP and Tooling SDK.
1# Create a new on-demand sandbox in a realm and wait for it to be ready2b2c sandbox create --realm abcd --wait34# Create a larger sandbox with a 48-hour TTL and auto-scheduled start/stop5b2c sandbox create --realm abcd --profile large --ttl 48 --auto-scheduled67# List your sandboxes8b2c sandbox list910# Get sandbox details (including hostname and state)11b2c sandbox get<sandbox-id>1213# Start, stop, or restart a sandbox14b2c sandbox start<sandbox-id>15b2c sandbox stop<sandbox-id>16b2c sandbox restart<sandbox-id>1718# Reset a sandbox to a clean state19b2c sandbox reset<sandbox-id>2021# Delete a sandbox when you're done22b2c sandbox delete<sandbox-id>
For the full command reference, see Sandbox Commands in the B2C DX documentation.
Access the Sandbox API
Access documentation for the Sandbox API and issue API calls from the Sandbox API user interface.
Click Authorize to log in with the API Client ID you configured using Account Manager.
For details about the API call, expand the API method and click the Model for each call. To issue an API call from the Sandbox API user interface, click Try it out for any method. Edit the Example Values in the request body and click Execute.
Get the On-Demand Sandbox ID
Many of the Sandbox API calls require you to provide a sandbox’s ID. Get the ID using the GET/sandboxes method.
To dismiss the authorization window and return to the Sandbox API user interface, click Close.
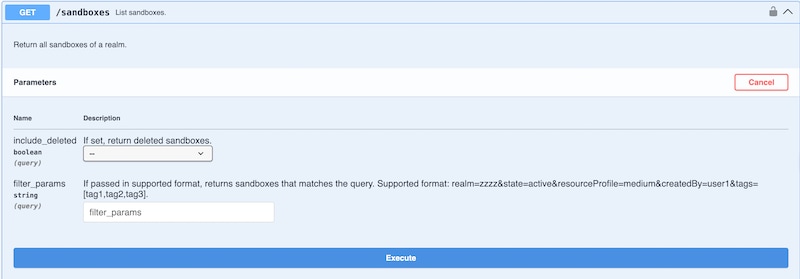
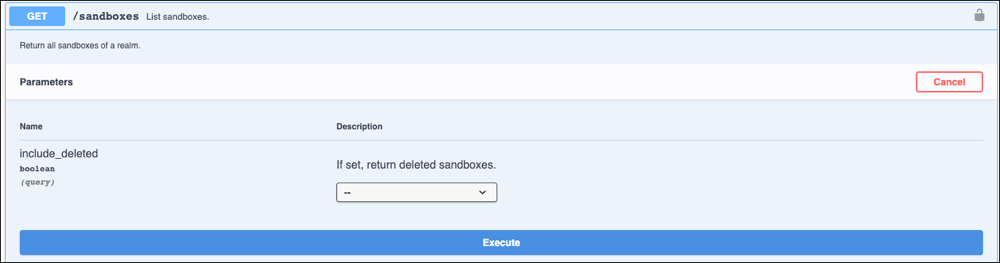
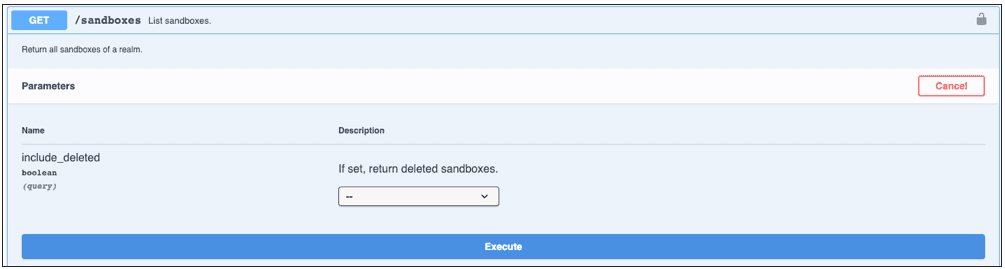
In the Sandboxes section of the Sandbox API user interface, click to expand the GET/sandboxes method.
From the include_deleted dropdown menu, select true to include deleted sandboxes in the list of sandboxes returned.
In the filter_params field, specify criteria to narrow the sandbox results. This table lists the supported filter values:
If no filter parameters are provided, the API returns all matching sandboxes. The realm filter only shows sandboxes from realms you can access.
Note
Filter Name
Description
Example
realm
Filter sandboxes by realm name (case-insensitive).
realm=zzzt
state
Filter sandboxes by their current state. Possible values are: deleted, failed, new, started, stopped, unknown, and upgrading.
state=started
resourceProfile
Filter sandboxes by resource profile.
resourceProfile=medium
createdBy
Filter sandboxes by the user who created them.
createdBy=user1
tags
Filter sandboxes by tags (comma-separated within square brackets).
tags=[tag1,tag2]
Examples:
Filter by realm and state: realm=testrealm&state=active
Filter by realm and resource profile: realm=production&resourceProfile=large
Filter by realm, state, resource profile, created by, and tags: realm=testrealm&state=active&resourceProfile=medium&createdBy=admin&tags=[tag1,tag2]
Click Try it out.
Click Execute.
Assign Profiles to Define Sandbox Resources
Manage your sandboxes more efficiently by assigning resource profiles to them based on your needs. Resource profiles define the disk, CPU, and memory allocation for their assigned sandboxes.
Assigning resource profiles to sandboxes provides several benefits:
Assign different size resource profiles to sandboxes according to your performance needs.
Developers can more easily maintain sandbox content, ensuring that configuration is aligned with the production environment.
When running automated tests, use the full data set.
View sandbox usage information by profile using the GET/realm/{realm}/usage method.
Assign one of three discrete profiles to each on-demand sandbox. This table describes the settings for each resource profile:
Resource Profile
CPU & Memory Units
Storage
Running Cost (Credits/Minute)
Stopped Cost (Credits/Minute)
medium (Default)
1
10 GB
1
0.3
large
2
20 GB
2
0.3
xlarge
4
50 GB
4
0.3
xxlarge
8
100 GB
8
0.3
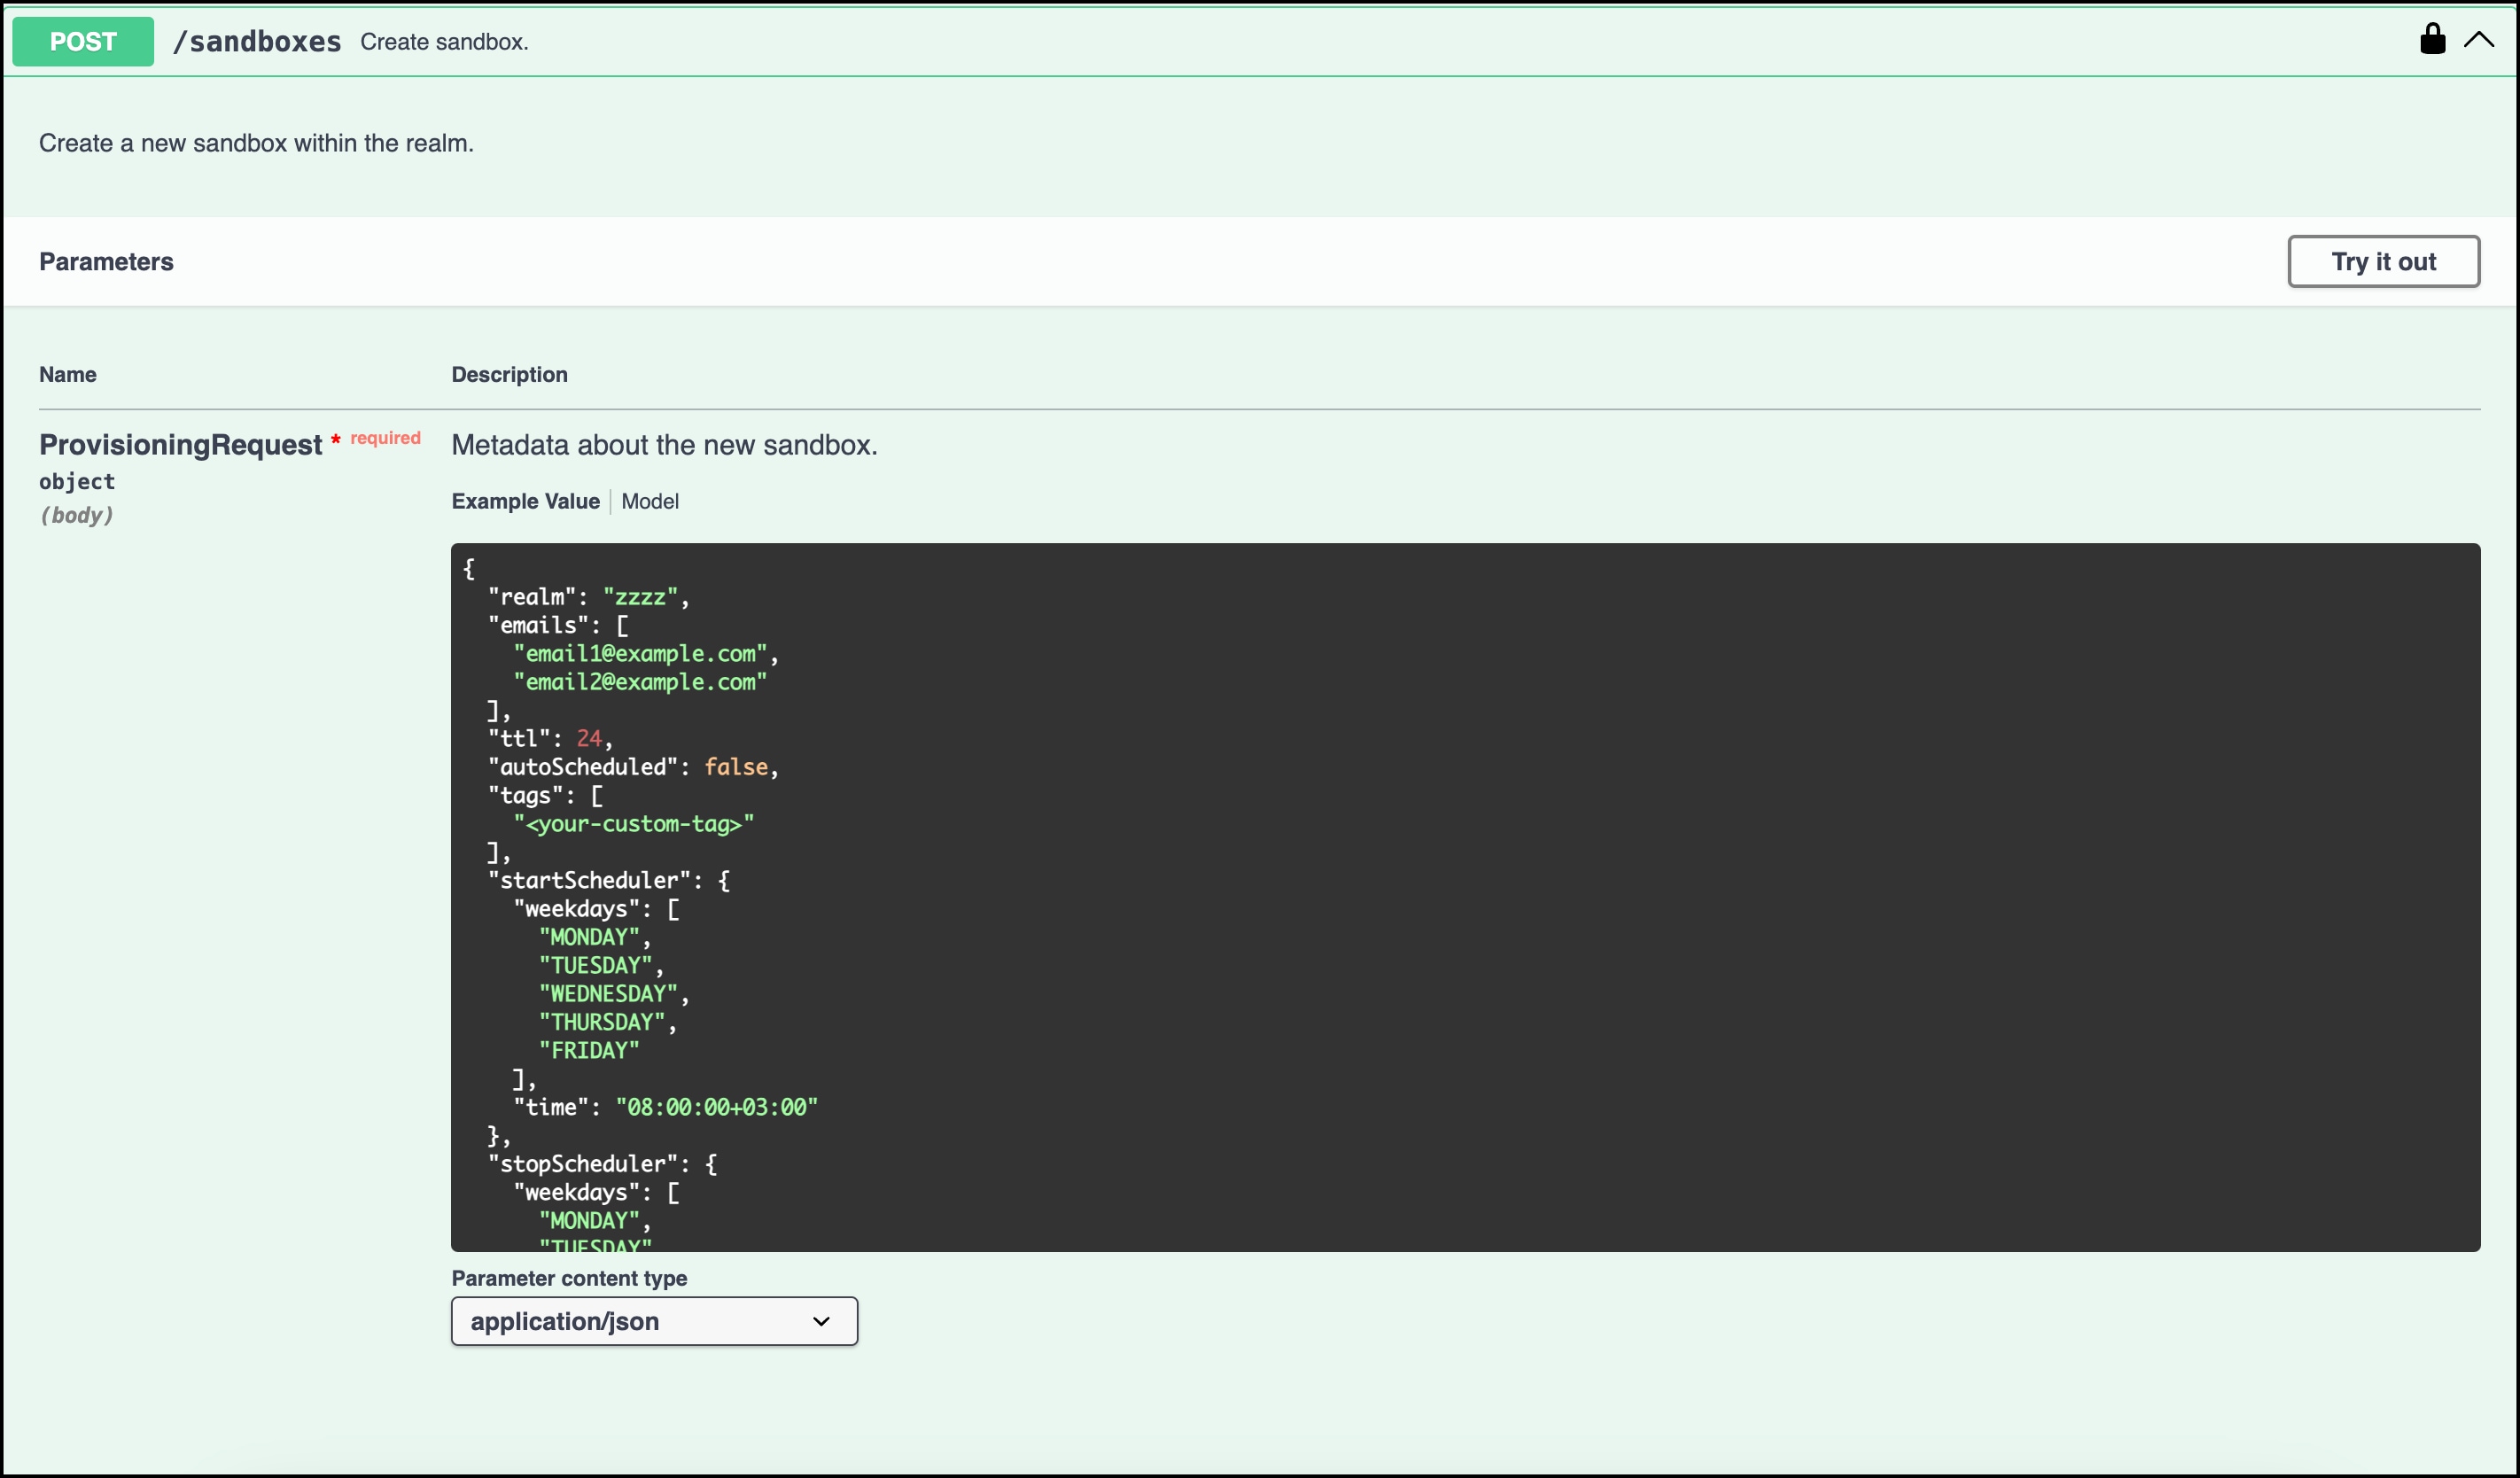
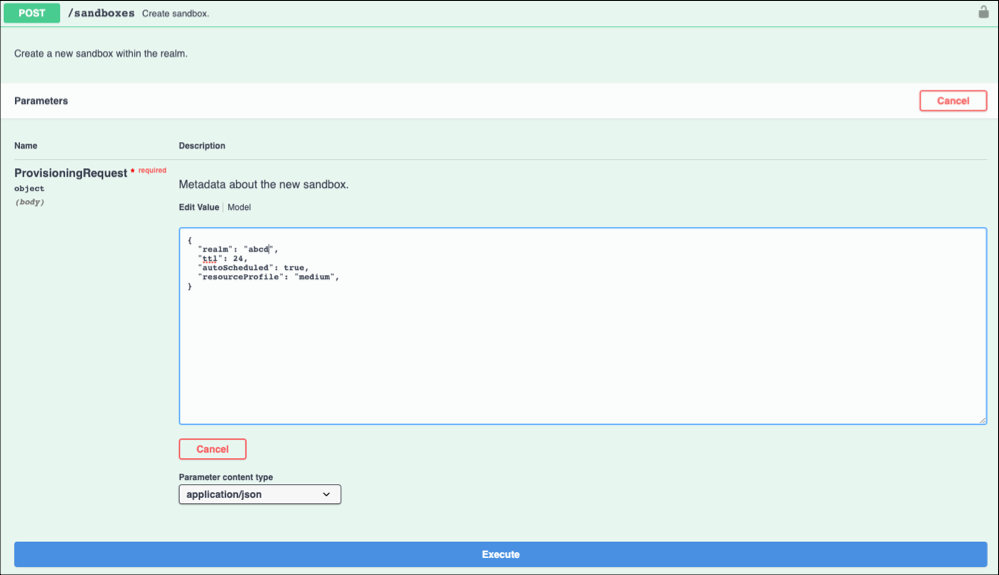
Define an on-demand sandbox with a resource profile using the POST/sandboxes method.
To dismiss the authorization window and return to the Sandbox API user interface, click Close.
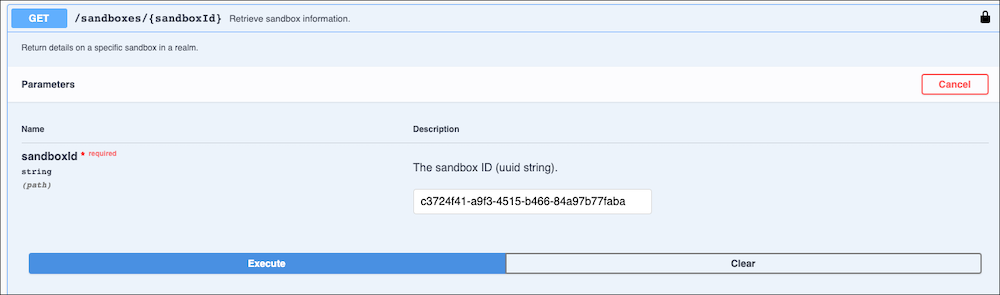
In the Sandboxes section of the Sandbox API user interface, click to expand the GET/sandboxes/{sandboxId} method.
Click Try it out.
Enter the sandbox ID.
Click Execute.
Create an Operation Scheduler for On-Demand Sandboxes
Realm administrators can configure when to start and stop sandboxes to better manage on-demand sandbox usage. For example, with an Operation Scheduler, turn sandboxes on or off at specific times on specified weekdays.
When creating an Operation Scheduler, keep these considerations in mind:
For the scheduler to manage an on-demand sandbox, you must set the sandbox autoScheduled parameter to true.
Scheduler times use Zulu (Coordinated Universal Time) or Greenwich Mean Time (+offset) format.
Default Operation Scheduler settings turn all auto-scheduled sandboxes on Monday through Friday at 08:00:00+03:00 and off on the same weekdays at 19:00:00Z.
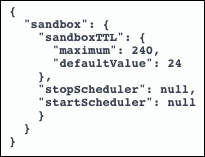
To turn off the scheduler, set the startScheduler and stopScheduler parameters to null. For example:
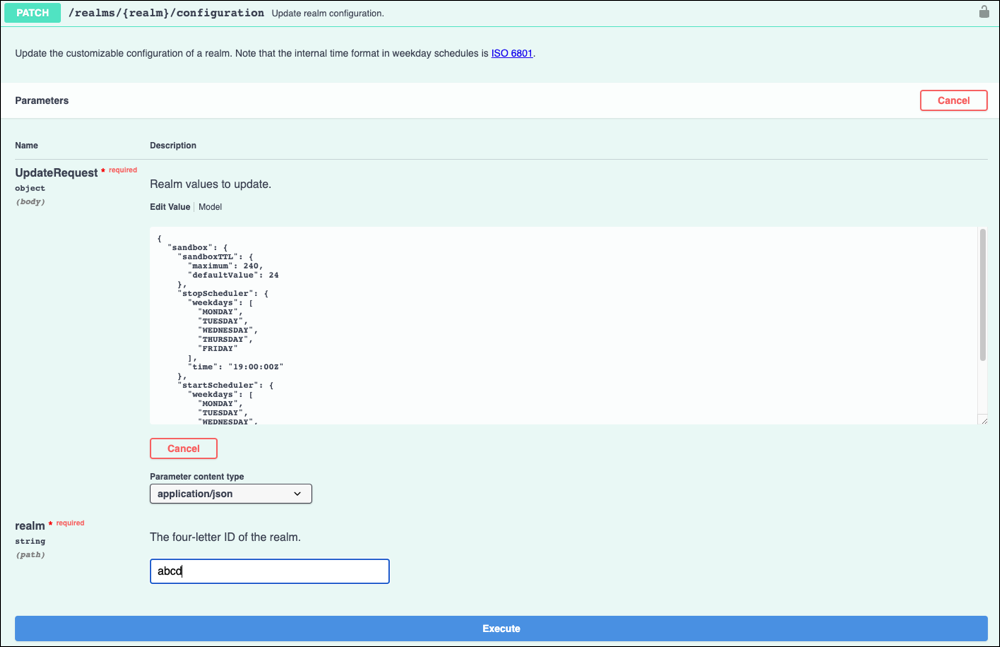
Create an Operation Scheduler using the PATCH/realms/{realm}/configuration method.
To dismiss the authorization window and return to the Sandbox API user interface, click Close.
(Optional) In the Realms section of the Sandbox API user interface, click to expand the PATCH/realms/{realm}/configuration method.
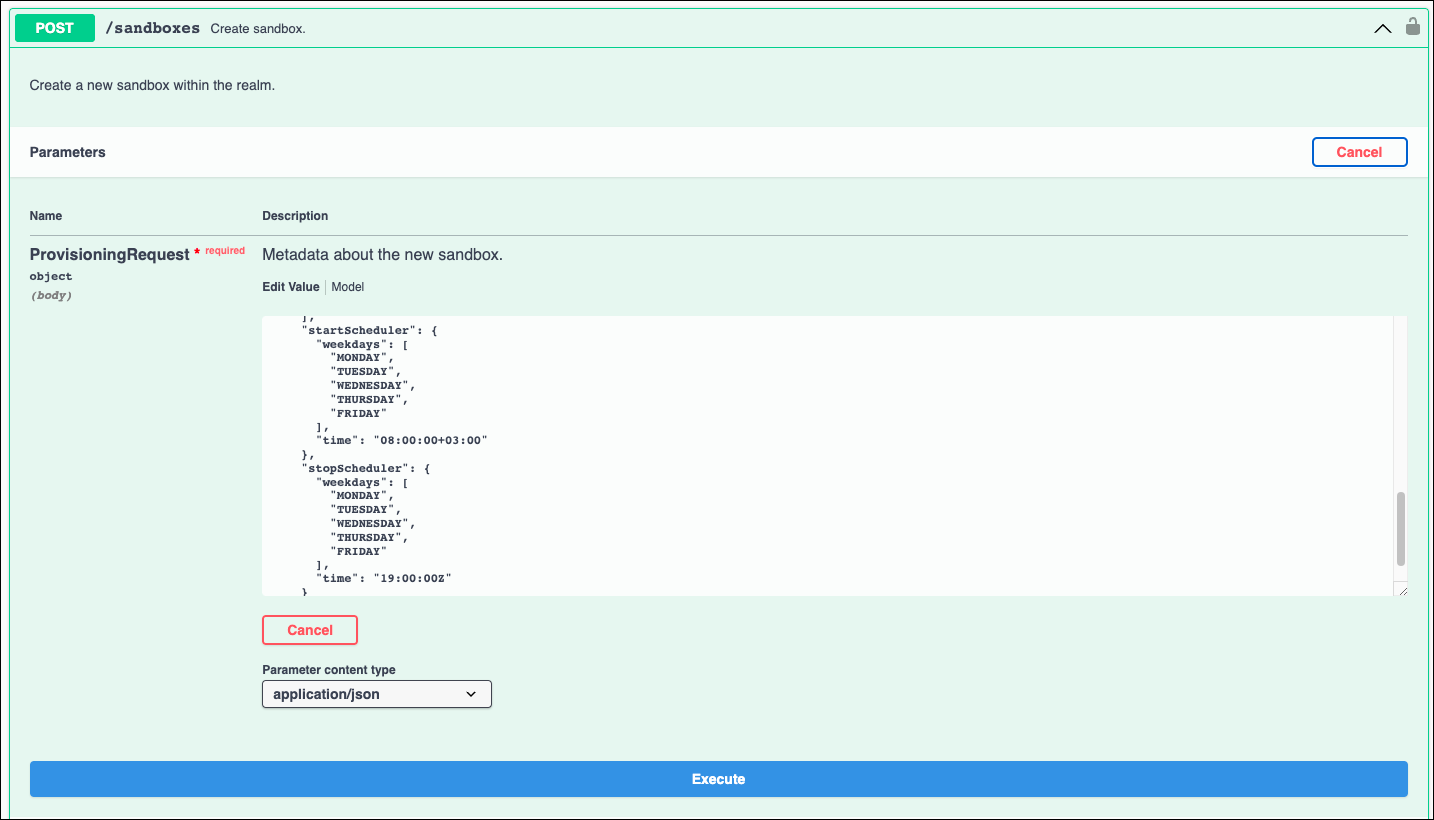
(Optional) In the Sandbox section of the Sandbox API user interface, click to expand the POST/sandboxes method.
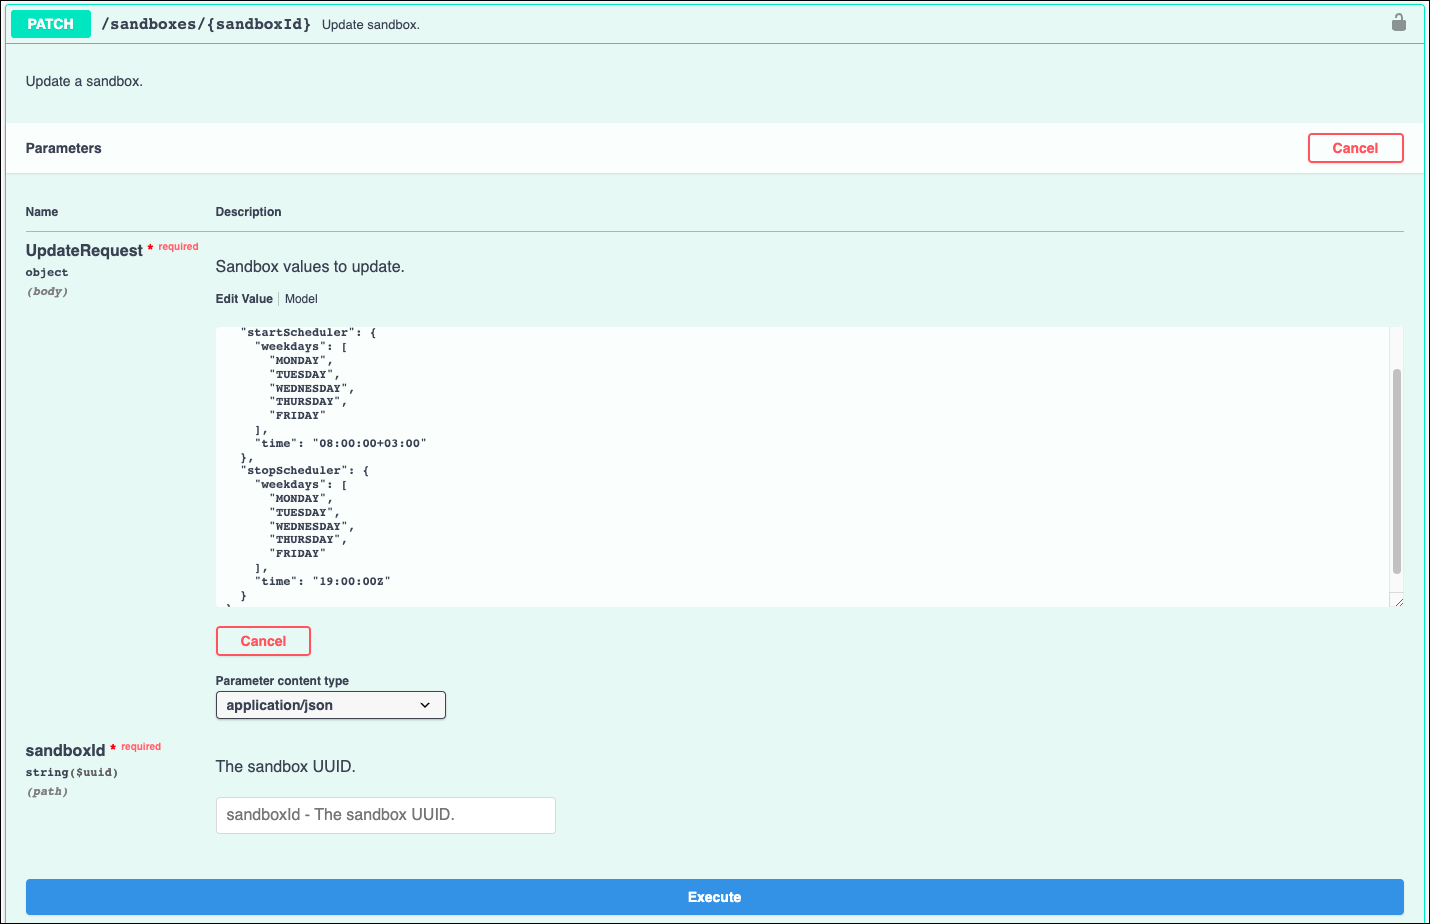
(Optional) To update an operation scheduled, In the Sandbox section of the Sandbox API user interface, click to expand the PATCH /sandboxes/{sandboxId} method.
Click Try it out.
In the request body, modify the startScheduler and stopScheduler weekdays and times to when you want to start and stop auto-scheduled sandboxes.
Specify the four-letter ID for the realm.
Click Execute.
The API creates an Operation Scheduler that manages all sandboxes in the realm with their autoScheduled parameter set to true.
Start, Stop, Reset (DBINIT), and Restart an On-Demand Sandbox
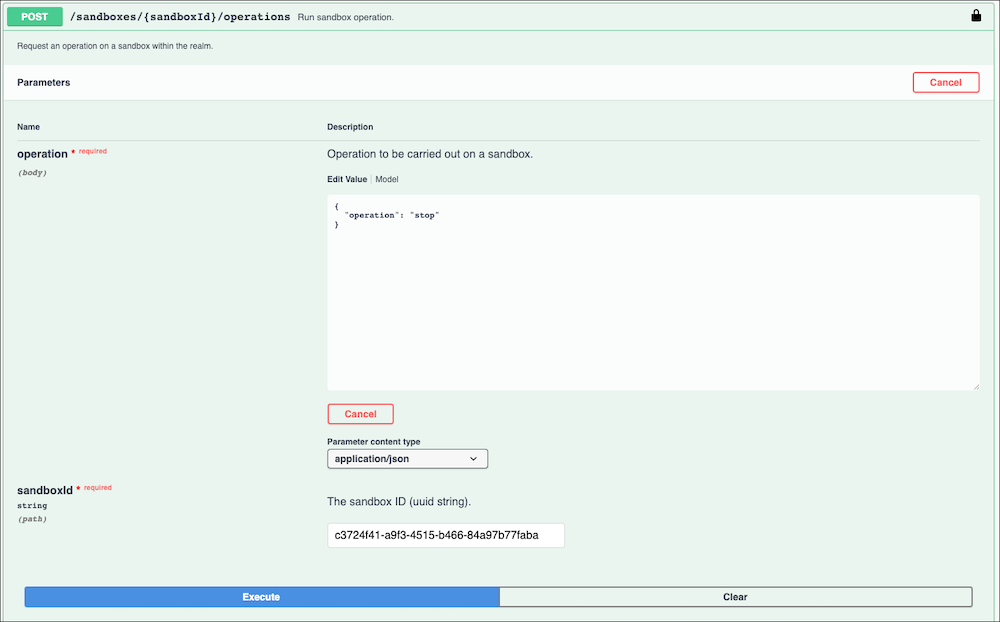
To stop, start, or reset (DBINIT) a sandbox, use the POST/sandboxes/{sandboxId}/operations method. Stopped sandboxes consume fewer credits than running sandboxes.
You currently don’t have to allowlist On-Demand Sandbox IP addresses to gain access to them. However, you might need to allowlist On-Demand Sandbox IP addresses on other systems or firewalls to communicate with On-Demand Sandboxes.
When allowlisting sandbox IP addresses, keep the following in mind:
We don’t restrict sandbox outbound data. If your receiving systems reside within the same VPN or an unrestricted network,allowlisting the On-Demand Sandbox IP addresses is unnecessary.
When allowlisting IP addresses for On-Demand Sandbox access, include all outboundIps and systemIps addresses to make sure the system can access them.
If you want to allowlist sandbox IP addresses on another system, get the IP addresses using the GET/system method.
To dismiss the authorization window and return to the Sandbox API user interface, click Close.
In the Common section of the Sandbox API user interface, click to expand the GET/system method.
Click Try it out.
Click Execute.
Use the retrieved outbound IP addresses when allowlisting addresses on an external system.
Use an Alias for an On-Demand Sandbox
Test storefronts by reusing a hostname alias for multiple sandboxes, or create a hostname alias that is unique to one sandbox.
Reuse a Hostname Alias
Reuse a hostname over multiple sandboxes by creating a non-unique alias and generating a registration link to access the sandbox.
Reuse a hostname alias to do local testing by accessing the sandbox without a proxy or CDN between the node and the sandbox. This option requires sending a cookie manually with every request or by using a registration link.
Before defining a sandbox alias, define a custom host name, such as www.merchant.com, in your site’s alias configuration under Merchant Tools > SEO > Aliases.
Note
Define a reusable on-demand sandbox alias using the POST /sandboxes/{sandboxId}/aliases method.
To dismiss the authorization window and return to the Sandbox API user interface, click Close.
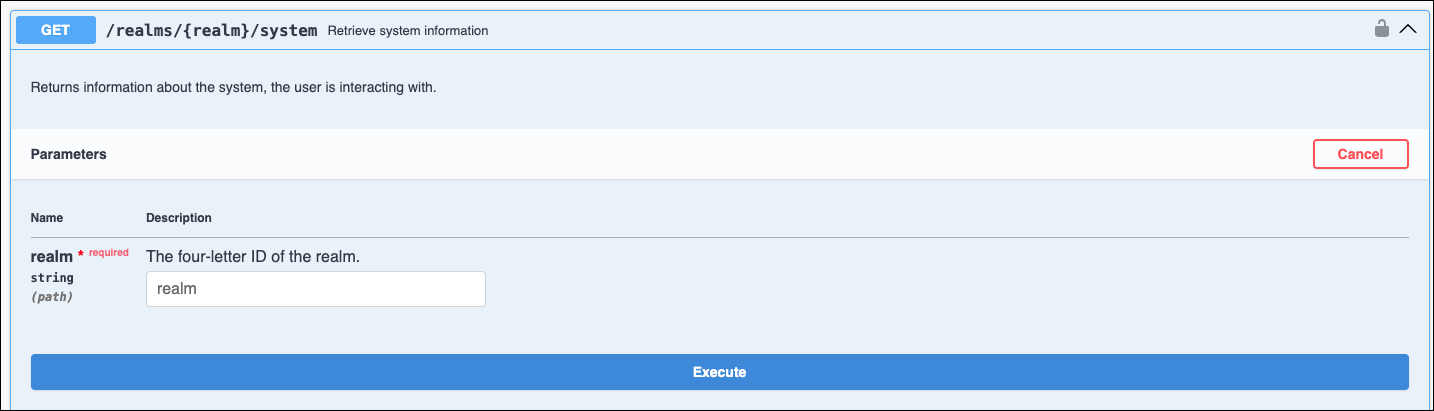
In the Common section, click to expand the GET/realms/{realm}/system method.
Click Try it out.
Click Execute.
The results contain one or more string values. These values appear as IP addresses surrounded by quotation marks, for example, “3.210.241.243”.
Copy a string value under systemIps and add it, along with the custom hostname, to your local hosts file, for example, 3.210.241.243 www.merchant.com. You need admin rights to edit this file.
In the Sandboxes section of the Sandbox API user interface, click to expand the GET /sandboxes method
Click Try it out.
Click Execute.
From the results, copy the desired Sandbox ID.
In the Sandboxes section, click to expand the POST /sandboxes/{sandboxId}/aliases method
Click Try it out.
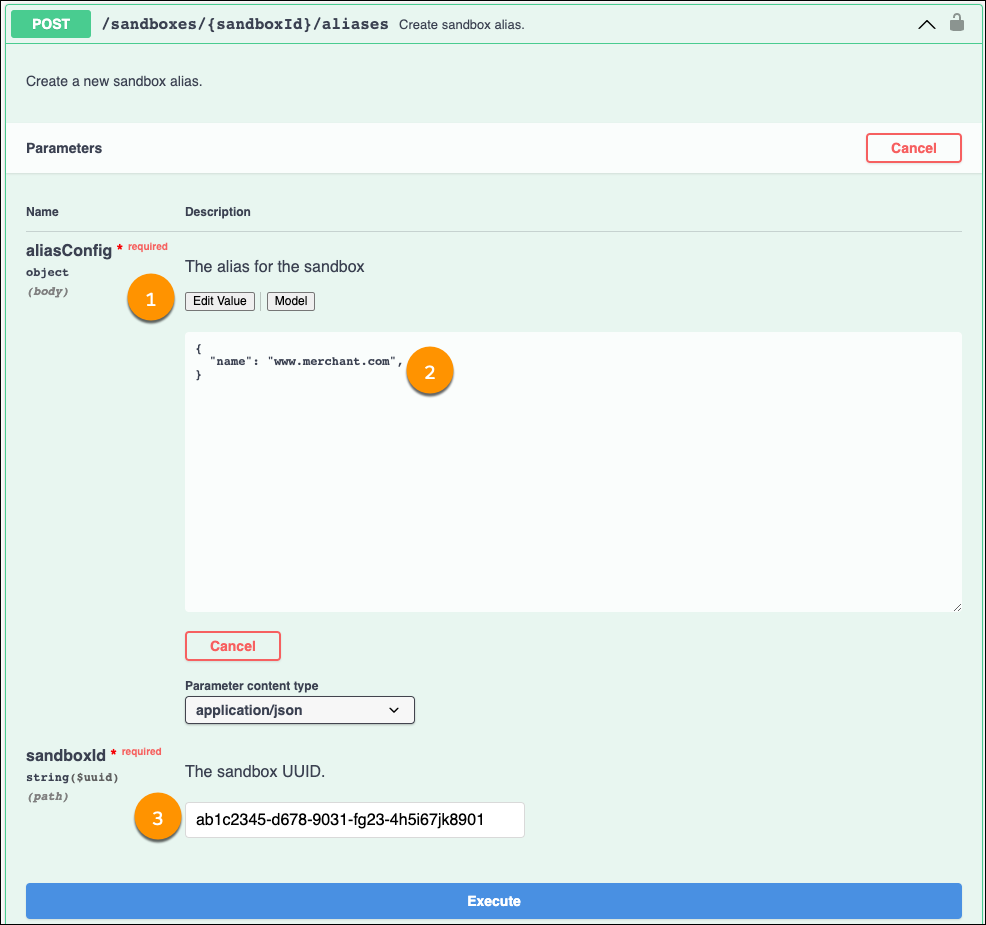
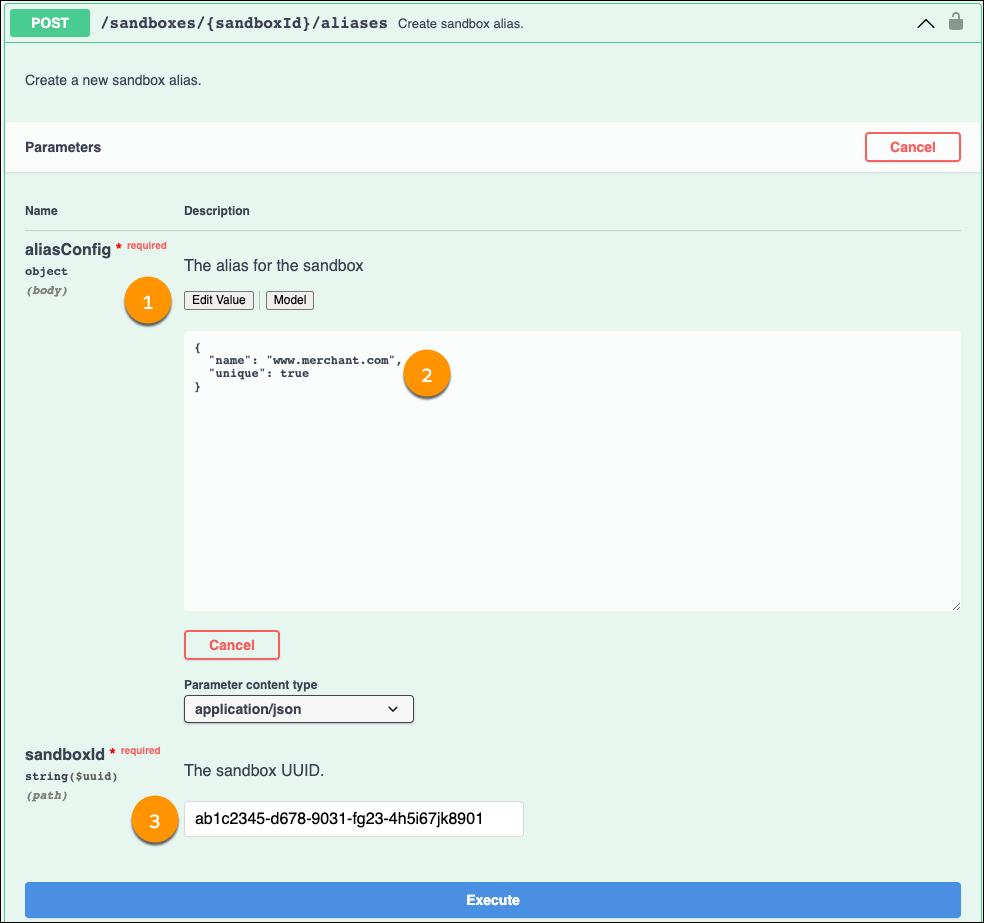
Register the hostname by editing the alias value (1), adding the hostname (2), and specifying the Sandbox ID copied (3).
The API payload supports a unique hostname parameter. Unless you explicitly set it, the unique parameter is assumed to be false. If you’re using one hostname for multiple sandboxes, either omit the unique setting from the payload or specify a value of false.
Note
1{2"name": "www.merchant.com",3"unique": false4}
Click Execute.
The call response generates a cookie and provides a registration URL.
Copy the registration URL from the call response, and paste the link into a browser.
After a short time, the browser redirects to the sandbox alias where you can perform SEO testing.
What If I Don’t Use a Browser?
When testing REST APIs, you typically don’t use default browser access to a site. When using tools like Curl or Postman, you define a cookie header manually using the hostname and information that you obtain from the GET /system API response.
For example,
1curl -X GET -k -H 'Cookies:2b2codds_df69b6df-a4fb-3e8b-ada3-d0ded26e9fe0=83f05593-6272-382f-be1c-bc8e5021a243'3'https://www.merchant.com/dw/shop/v20_1/products/foo'
Use a Unique Host Name Alias
To use a unique hostname alias to access a sandbox, create or use an already existing DNS CNAME record that points to the sandbox origin, or create a unique hostname alias using the aliases API.
Creating or using an already existing DNS CNAME record provides a global, one-to-one mapping to the sandbox. For this option, you don’t need to use the aliases API.
Note
If you choose to create a unique hostname alias using the aliases API, you must add a text record containing a unique domainVerificationRecord value to either the DNS sub- or root-domain. Unlike reusing a hostname alias, this option doesn’t require using a registration link or any cookies.
Before defining a sandbox alias, define a custom host name, such as www.merchant.com, in your site’s alias configuration under Merchant Tools > SEO > Aliases.
Note
Define a unique on-demand sandbox alias using the POST /sandboxes/{sandboxId}/aliases method.
To dismiss the authorization window and return to the Sandbox API user interface, click Close.
To test directly from any local system, add the string value, along with the custom hostname, as an address record, to your DNS subdomain or root domain. For example if your realm id is “abcd”, your DNS Record will be:
In the Sandboxes section of the Sandbox API user interface, click to expand the POST /sandboxes/{sandboxId}/aliases method
Click Try it out.
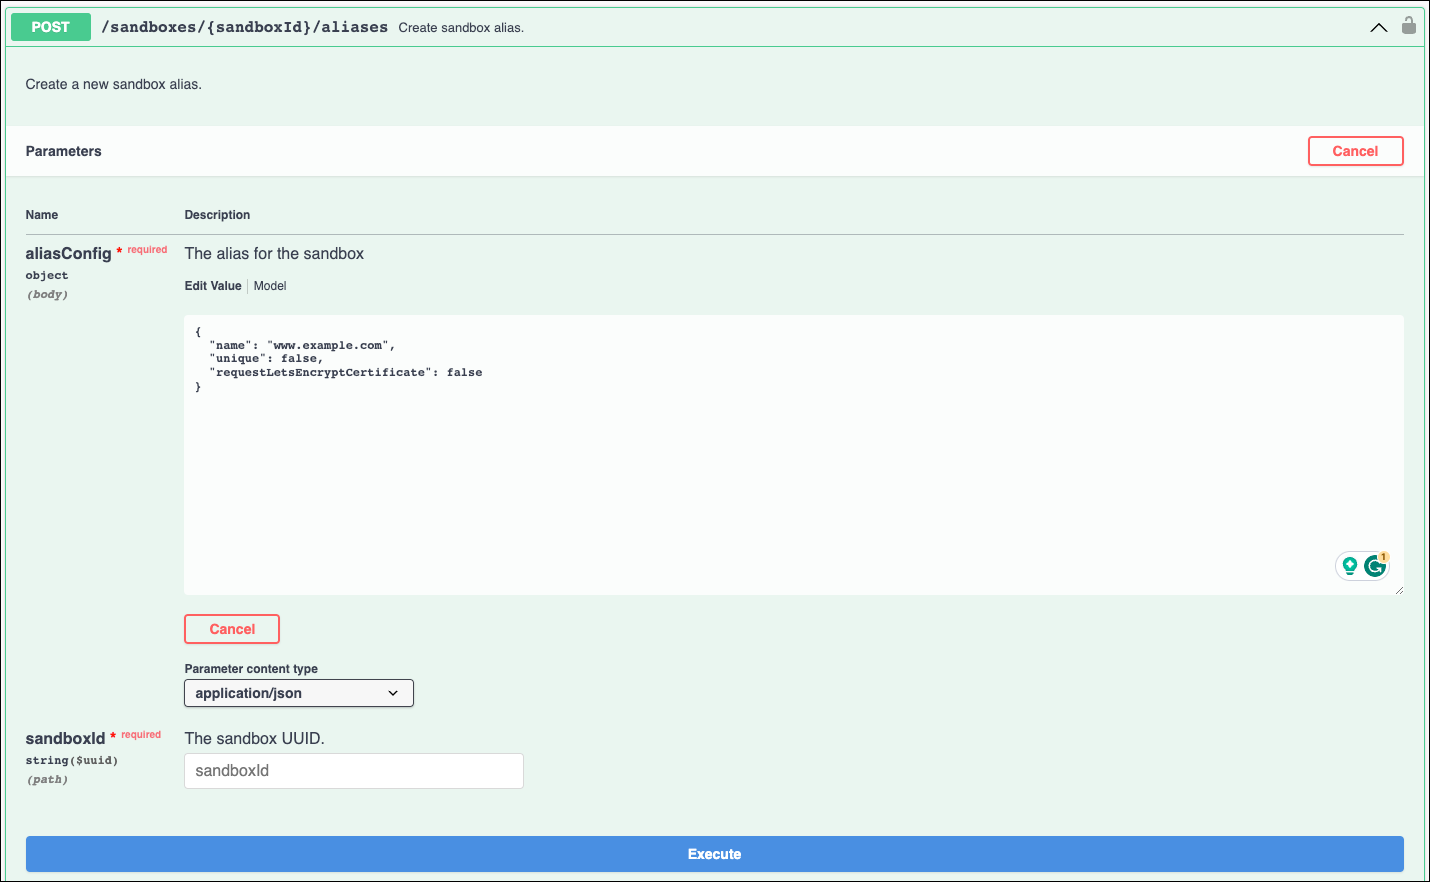
Register the hostname by editing the alias value (1), adding the hostname (2), and specifying the copied Sandbox ID (3), along with a uniqueness value of true.
1{2"name": "www.merchant.com",3"unique": true4}
Click Execute.
Using the domainVerificationRecord value from the response body, add a verification text record to either the DNS subdomain or root domain.
1dev.merchant.com 3600 IN CNAME abcd.dx.commercecloud.salesforce.com.@ 3600 IN TXT "sfcc_verification_abcd=8ee12469a9f6cf17af34eea237595d53608475f8a04840f03c2434bbbd51288d"
Use the hostname to access the sandbox alias directly and perform SEO testing.
Automatically Generate a Domain Certificate
To automatically generate a certificate for your alias, set requestLetsEncryptCertificate to true . The generated certificate certifies the specific host used during alias creation. The certificate is required to show the storefront as secure. If you don’t generate a certificate, your storefront shows as insecure.
ODS sets the certificate quota at 10 certificates generated per week. When you generate a certificate for my-sbx.production.domain.com you consume Let’s Encrypt quotas from production.domain.com. The quota count applies to any certificate issued, whether through ODS or any other internal tool.
Important
Salesforce recommends that you familiarize yourself with the Let’s Encrypt policy.
Delete an On-Demand Sandbox
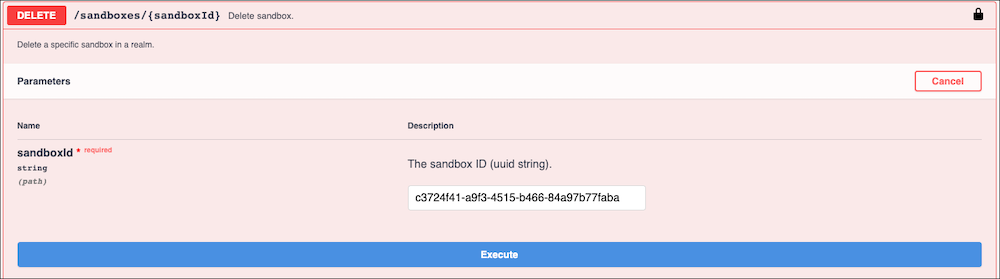
To delete a sandbox, use the DELETE/sandboxes/{sandboxId} method. Save credits by deleting a sandbox when you don’t need it anymore.
When you delete a sandbox, it is permanently deleted. The sandbox and its data are no longer available.
To dismiss the authorization window and return to the Sandbox API user interface, click Close.
In the Sandboxes section of the Sandbox API user interface, click to expand the POST/sandboxes/{sandboxId} method.
Click Try it out.
Enter the sandbox ID.
Click Execute.
Check On-Demand Sandbox Credits
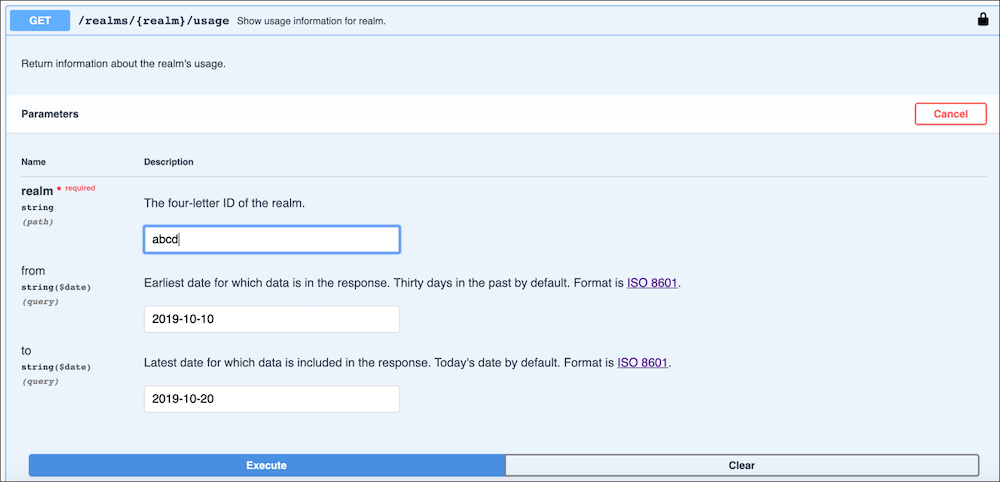
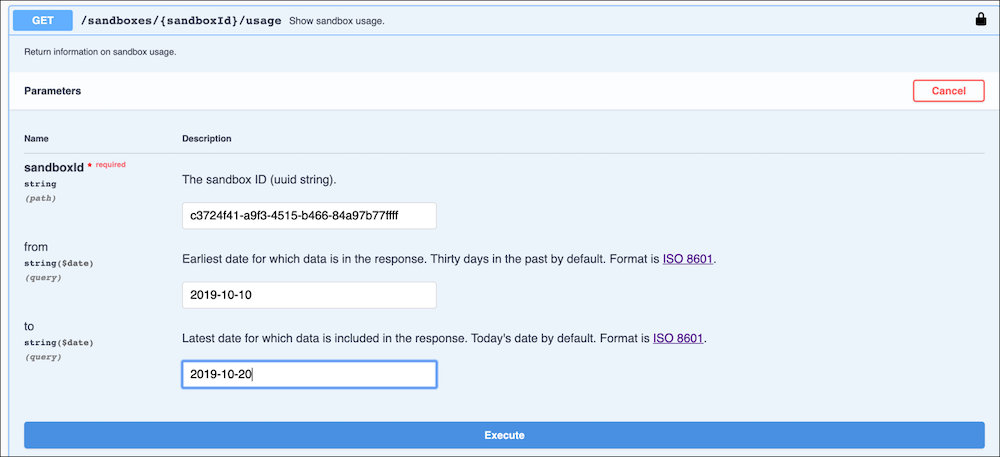
To check the status of credits on the realm, use the GET/realm/{realm}/usage method. To check the status of credits for a specific sandbox, use the GET/sandboxes/{sandboxId}/usage method.
To dismiss the authorization window and return to the Sandbox API user interface, click Close.
To check the status of credits for the realm, click to expand the GET/realm/{realm}/usage method.
Click Try it out.
Enter the realm ID.
Enter the begin and end date for the usage report.
Click Execute.
To check the status of credits for a sandbox, click to expand the GET/sandboxes/{sandboxId}/usage method.
Click Try it out.
Enter the realm ID.
Enter the begin and end date for the usage report.
Click Execute.
On-Demand Sandbox Email Notifications
The on-demand sandbox (ODS) platform sends an email notification when the following events happen.
The License has expired: The on-demand sandbox platform sends an email notification when the following events happen.
Sandbox is about to expire (TTL): When a TTL is defined for the sandbox, the ODS sends two notifications to the email addresses associated with the sandbox. The first notification is sent approximately 48 hours before the TTL expires. The second notification is sent approximately 24 hours before the TTL expires.
The email addresses that receive the message are the email addresses associated with the Sandbox. If there are no email addresses associated with the Sandbox, the system uses the emails associated with the Realm.
Sandbox has expired (TTL): When a TTL is defined for the sandbox and the TTL is expired, the on-demand sandbox sends an email notification and the sandbox is deleted.
The email addresses that receive the message are the email addresses associated with the Sandbox. If there are no email addresses associated with the Sandbox, the system uses the emails associated with the Realm.
To receive email notifications of these events, you associate your email with your realm and sandboxes.
Verify the Email Addresses Associated witha Realm and On-Demand Sandbox
To check if you have emails associated with your realm, use the getRealmConfiguration GET endpoint. To update the associated email addresses, use the patchRealmConfiguration PATCH endpoint.
Sandbox
To check if you have emails associated with your ODS, use the getSandbox GET endpoint. To update the associated email addresses use the patchSandbox PATCH endpoint. Define the emails during the creation of the sandbox as detailed in the postSandbox POST endpoint.
Access On-Demand Sandbox Logs in Log Center
Salesforce B2C Commerce On-Demand Sandbox (ODS) logs are available in Log Center. This enhancement eliminates the need to use a separate URL to access ODS logs for the first-party instance of Log Center.
Start Log Center.
Select a region.
Select a realm, if you’re unsure of your realm ID, ask your Account Executive (AE) or Customer Service manager (CMS) for assistance.
Click Show filtered results.
Select Search > Current Search.
Under Service Type, select ecom or jwa.
To view the ODS logs, from the Host dropdown, select a host.


 j
j