
Appearance
Exercise 3: Distribute a Service Agent
In this exercise, you will add the Coral Cloud Agent to an Experience Cloud site.
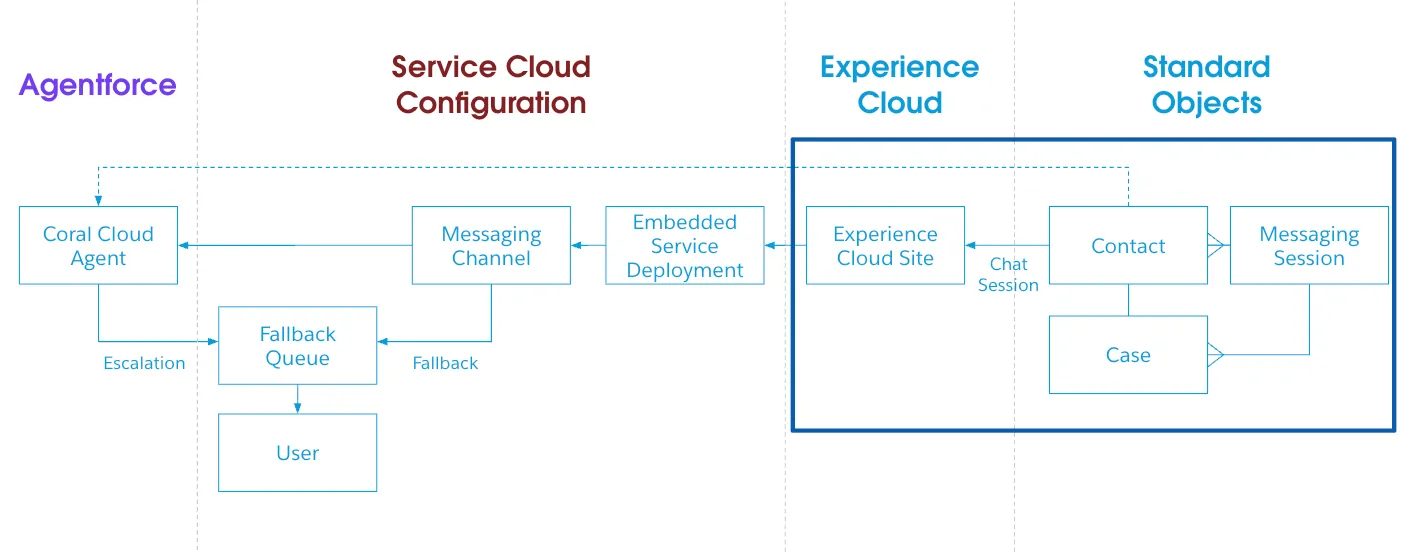
Step 1: Add Embedded Service deployment to Experience Cloud
Update the Experience Cloud page to include your Coral Cloud agent. This exercise assumes you already configured the messaging channel and embedded service deployment in Exercise 2.
Add the agent to the site
Search for Digital Experiences in the Setup Quick Find and select All Sites.
Click Builder next to the
Coral Cloudsite.If a popup appears, click OK.
Click the Components widget.
Search Embedded Messaging and drag and drop the component onto the page (for example, in a hero section or sidebar). Note: exact placement depends on your site template and it may take a few seconds for the component to appear.

Ensure that the Embedded Messaging Configuration you created in Exercise 2 is selected (for example,
Coral_Cloud_Agent).Click Publish in the upper right corner.
Click Publish in the confirmation window.
Click Got It.
View the agent as a customer
Click the Experience Builder menu.
Select View to open the published
Coral Cloudsite.TIP
Note: It may take a few minutes for the site to publish. Go ahead and verify the challenge below while you wait for your Experience Cloud site to publish.
Click on the Messaging icon in the lower right corner to start interacting with the new agent. Try some prompts like:
txtCan you tell me about White Water Rafting Rush?txtCan you book me in for tomorrow session?If asked to provide your email address and membership number, use the following text.
txtCan you book me in for tomorrow?
Summary
You have just created a custom service agent that can be used to interact with your customers. Next, we will use the service deployment capabilities in Service Cloud to deploy the agent to a customer-facing Experience Cloud site.