
Appearance
Exercise 3: Connect to Salesforce and Add Workflow
In this exercise, you'll turn the Partner Command Center into a Salesforce-backed app. You'll replace the mock data, add related Opportunity details, recommend next actions, and polish the interface.
Step 1: Replace Mock Data with Salesforce Data

Use this prompt to connect the app to Salesforce data:
txtReplace the mock partner data in Partner Command Center with real Salesforce data. Load partner Accounts where Type = "Partner". For each partner, calculate: - Partner Name - Partner Tier - Quarterly Quota - Closed Won revenue from partner-attributed Opportunities - Open Pipeline from partner-attributed open Opportunities - Active Deal count Keep the existing filters, search, sorting, summary cards, and detail panel. Add loading and error states.Review the data access approach Vibes chooses.
If Vibes needs to create or update Salesforce metadata, approve the changes only after reviewing what it plans to change.
Preview the app and confirm that loading and error states are handled.
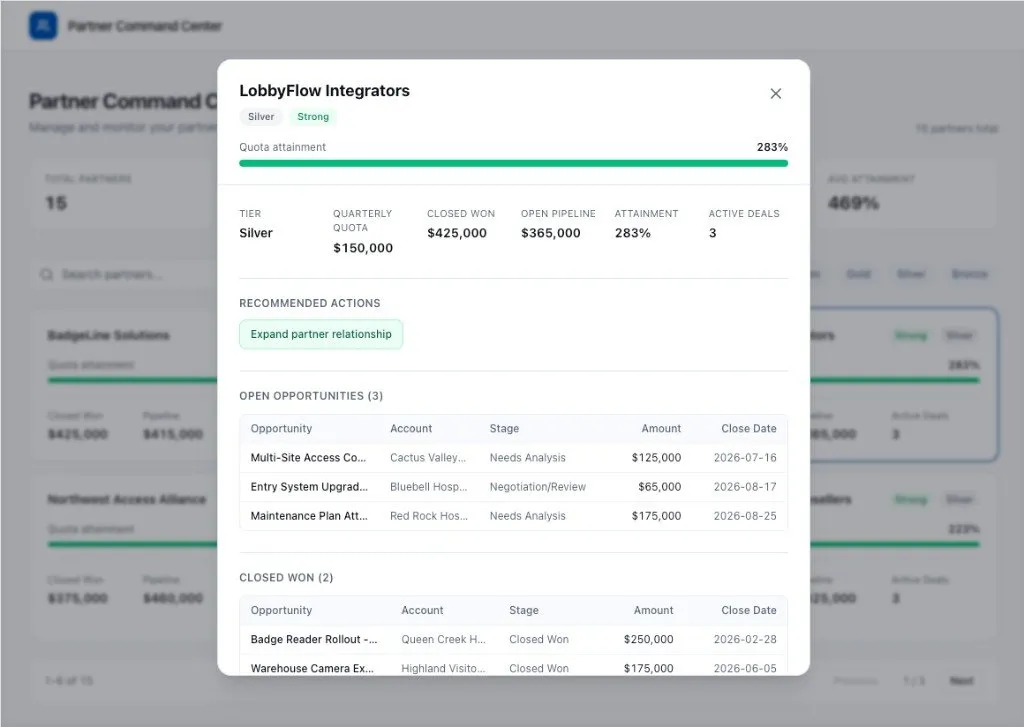
Step 2: Show Related Opportunities
Use this prompt to add Opportunity details:
txtUpdate the partner detail panel to show related Opportunities. For the selected partner, show: - Open Opportunities - Closed Won Opportunities For each Opportunity, display: - Opportunity name - Account name - Stage - Amount - Close datePreview the app and select a partner.
Confirm that the detail panel shows related Opportunities.
If a partner has no Opportunities, ask Vibes to add a clear empty state.
Step 3: Add Recommended Next Actions
Use this prompt to add simple workflow guidance:
txtAdd recommended next actions to the partner detail panel. Use these rules: - If attainment is 80% or higher, recommend expanding the partner relationship - If open pipeline is high but closed won is low, recommend reviewing stalled deals - If open pipeline is zero, recommend creating a partner development plan - If attainment is below 50%, recommend scheduling a partner performance reviewPreview the app and select partners with different performance levels.
Confirm that the recommendation changes based on the selected partner.
Step 4: Polish the UI
Use this prompt to improve the final app without changing the scope:
txtPolish the Partner Command Center UI. Improve spacing, card layout, typography, empty states, and responsive behavior. Update the partner detail view so it opens in a modal instead of a side panel. Keep the design Salesforce-inspired and professional. Do not add new features.Preview the app on a wide screen and a narrower screen.
Confirm that the app still supports filters, search, sorting, the detail modal, Opportunity details, and recommendations.
Step 5: Create a Follow-Up Task from the Modal
Use this prompt to add an action from the modal UI:
txtAdd a Create Follow-Up Task action to the partner detail modal. Add a Create Follow-Up Task button in the footer of the partner detail modal. When a user clicks the button, open a modal form that lets them create a Task for the selected partner Account. The modal form should include: - Subject - Due date - Priority - Comments Default the subject based on the recommended next action. When the user saves, create the Task in Salesforce and relate it to the selected partner Account. Show success and error states. Keep the UI simple and Salesforce-inspired.Preview the app and open a partner detail modal.
Click Create Follow-Up Task and confirm that the form opens.
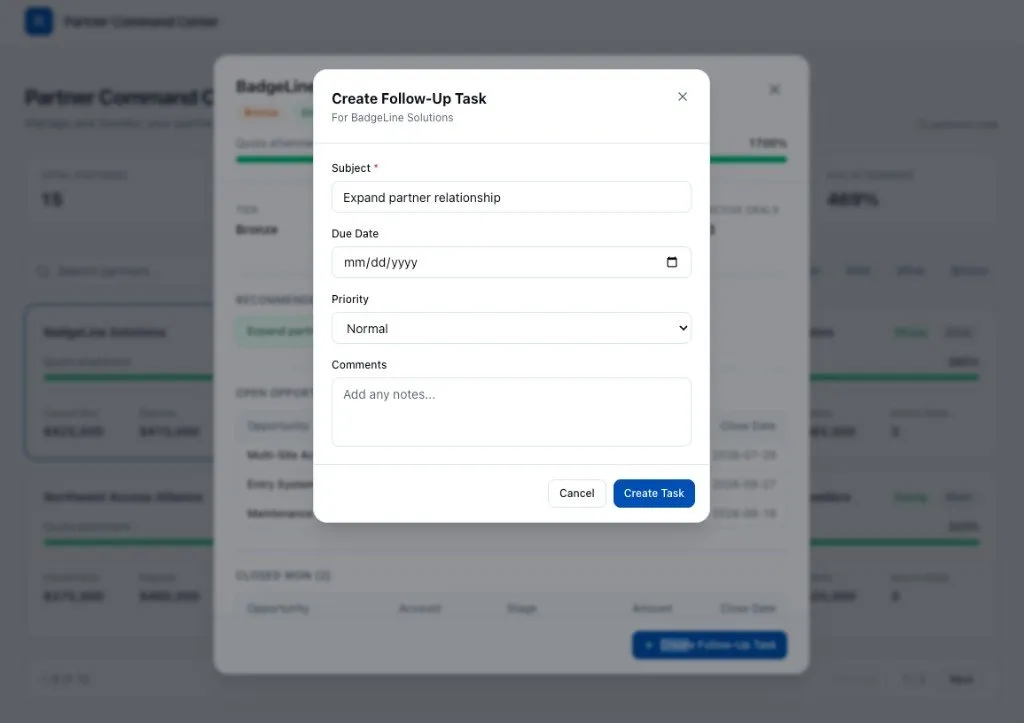
Save a test task and confirm that the app shows a success state.
Summary
- You replaced mock data with Salesforce data.
- You kept the React interactions from the previous exercise.
- You added related Opportunities to the detail panel.
- You added recommended next actions.
- You created follow-up Tasks from the partner detail modal.
- You polished the app without adding extra scope.
You now have a Salesforce-backed React app that helps partner managers understand performance and choose the next best action.