
Appearance
Exercise 3: Create a Custom MCP Server
In this exercise, you'll create your own Custom MCP Server to expose storefront and order tools to end users. You'll first review an Apex action that looks up an order's status and a small Flow that scores a storefront's health from its review data, then work in Salesforce Setup to compose your server with that Flow, an Apex action, and tools from the standard MCP servers. You'll then test your server and its tools in the AIforce Playground.
Step 1: Review the Get Order Status Apex Class
The GetOrderStatusAction Apex class, already deployed with Pronto, looks up a single Order__c record by its record ID and returns its status, customer, storefront, total, and delivery time. You'll expose it as a custom MCP tool in Step 4.
From Setup, in the Quick Find box, enter
Apex Classes, then select Apex Classes.Click GetOrderStatusAction to open it.
Review how the class works:
@InvocableMethod: thegetOrderStatusmethod is labeledGet Order Status, which is what makes the class available as an action and as an MCP tool.- Input:
orderId(required), the ID of theOrder__crecord to look up, and an optionalcustomerId. When acustomerIdis provided, the class checks that the customer has access to the order. - Output: an
orderStatusobject with the order's status, customer, storefront, total amount, order and delivery times, line items, and a link to the record.
Close the class without making changes.
Step 2: Review the Review Storefront Health Flow
Storefront__c already tracks review performance through two fields: Average_Review_Score__c and Total_Reviews__c. The Review Storefront Health Flow, already deployed with Pronto, turns those two fields into a single health label. You'll expose it as a custom MCP tool in Step 4.
From Setup, in the Quick Find box, enter
Flows, then select Flows.Click Review Storefront Health to open it in Flow Builder.
Review how the Flow works:
- Input:
storefrontId, the ID of theStorefront__crecord to check. - Get Storefront: a Get Records element that loads the storefront with that ID.
- healthLabelFormula: a formula that returns
Insufficient Datafor fewer than 5 reviews, otherwiseStrong(4.5 or higher),Healthy(4 or higher),Needs Attention(3 or higher) orAt Risk. - Variables Assignment: an Assignment element that sets the four outputs:
storefrontName,averageReviewScore,totalReviewsandhealthLabel.
- Input:
Notice that the health labels use the same rating cutoffs as the status labels you'll add to the React app later in this workshop.
Confirm that the Flow is Active, then close Flow Builder without making changes.
Step 3: Create the Custom MCP Server
From Setup, in the Quick Find box, enter
MCP Servers, then select MCP Servers.Click Add MCP Server, then click the Salesforce Servers tab.
Click Create Salesforce MCP Server.
Fill in the following fields:
Field Value Label Pronto Order ToolsName ProntoOrderTools(auto-filled)Description A custom MCP server with storefront and order tools.Click Create.
Step 4: Add Custom Tools to the Server
Click Add Server Assets and select Add Tools from the dropdown.
Under Apex actions, enter
Get Order Statusin the search box. Click Get Order Status (not Get Order Status Card), then click Add Tool.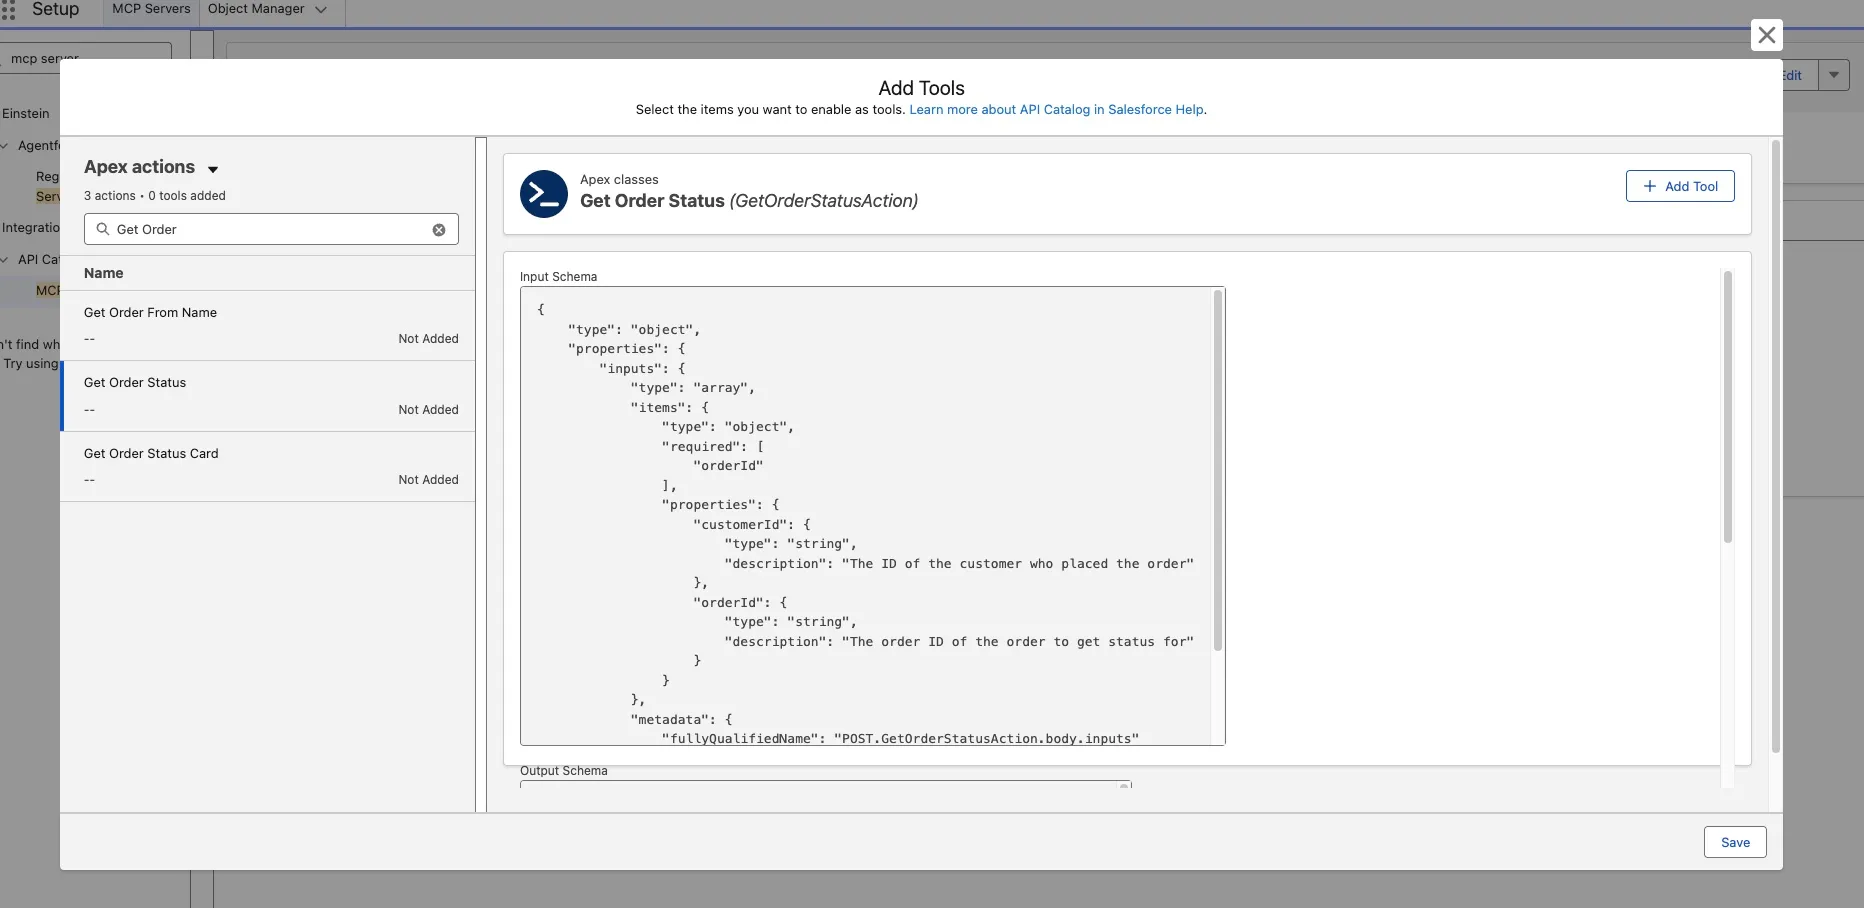
This is the
GetOrderStatusActioninvocable action that is already deployed with Pronto. It looks up a singleOrder__crecord by its record ID and returns its status, customer, storefront, total, and delivery time.In the type dropdown next to Apex actions, select Flows.
Enter
Review Storefront Healthin the search box, click Review Storefront Health, then click Add Tool.Click Save.
At this point, the page header indicates that you have 2 tools in the Pronto Order Tools MCP server.
Step 5: Add Standard Tools to the Server
Click Add Server Assets and select Add from Server from the dropdown.
Search for
sobjectand click SObject Reads.Locate the Query Records (SOQL) row and click Add Tool.
Locate the Search Across Objects (SOSL) row and click Add Tool.
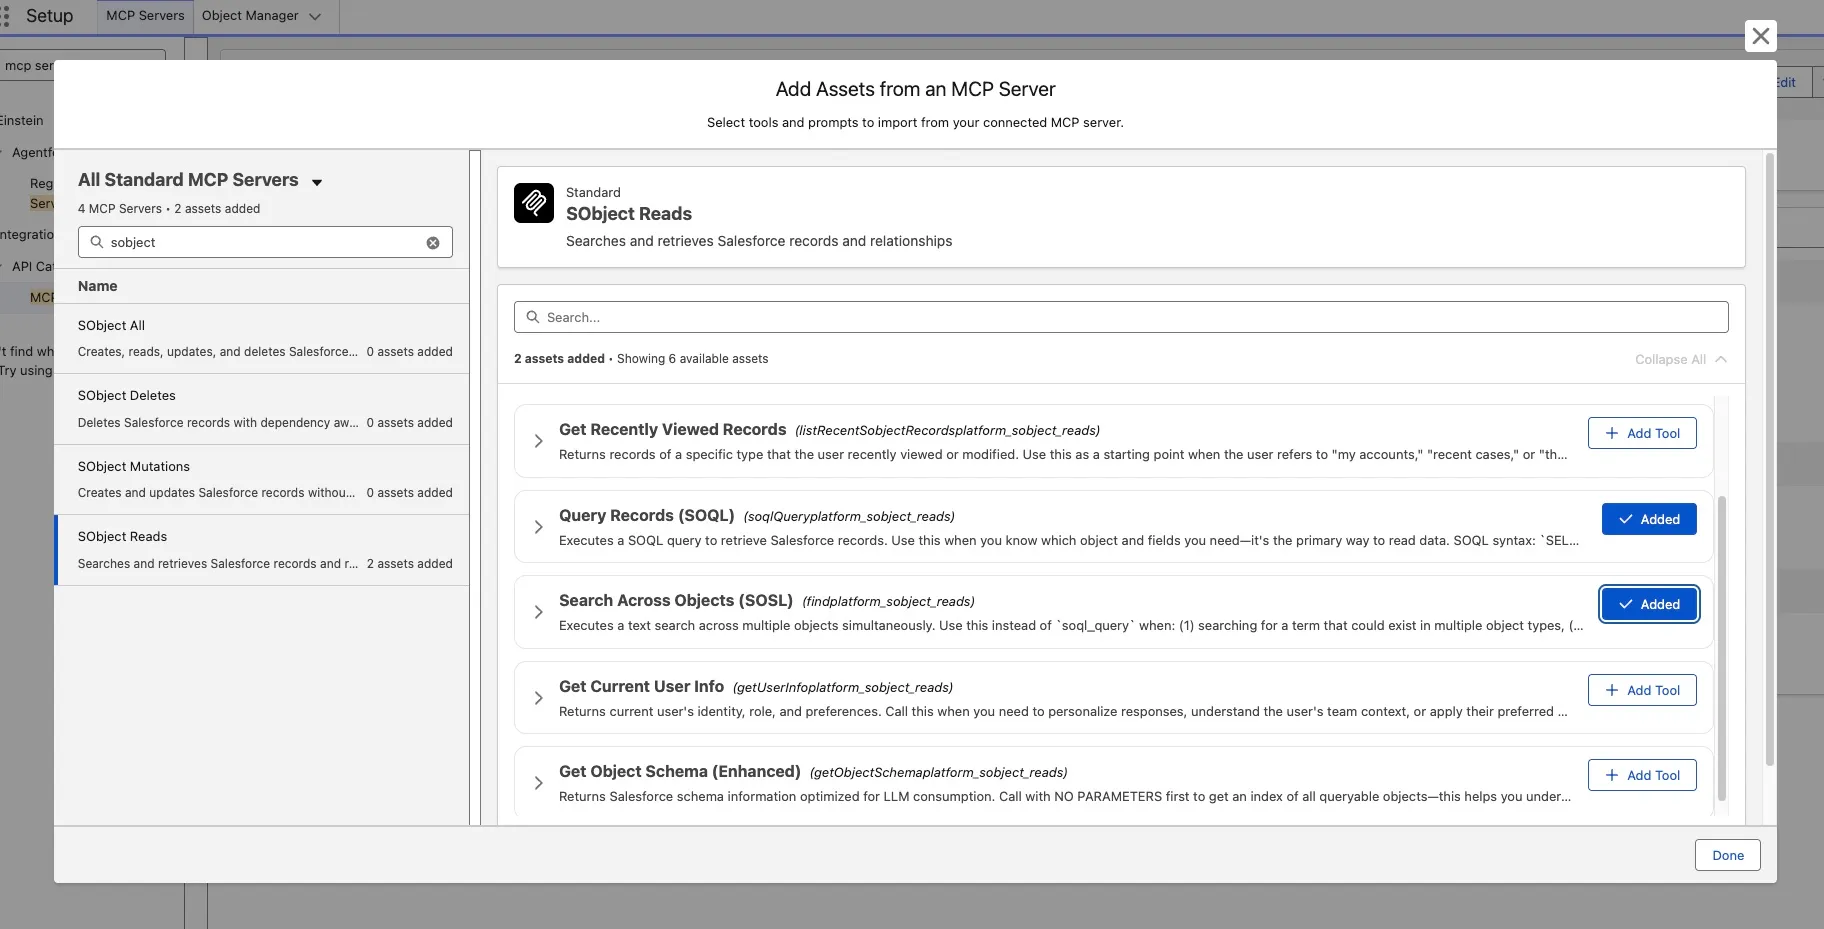
Click Done.
You now have 4 tools in the Pronto Order Tools MCP server.
TIP
The
Get Order Statustool takes an Order ID, not a name, so the LLM needs the Query Records (SOQL) tool to resolve a storefront or customer name to anOrder__cID before it can call it. That lookup-then-act chain is exactly what you'll see in Step 8.
Step 6: Activate and Copy the Server URL
Click Activate to make the server available to MCP clients.
Copy the Server URL. You'll need it in the next step to connect the agent to your server.
Step 7: Add the Custom Server to the Playground
Open the AIforce Playground and navigate to the Servers tab.
Click Add server.
Click Add server again.
Make sure that you are on the From URL tab and paste the Server URL you copied earlier in the URL field. It should be:
https://api.salesforce.com/platform/mcp/v1/custom/ProntoOrderToolsClick Test connection to verify the server is reachable and inspect the four tools it exposes.
Click Add server.
Step 8: Test the Custom Server
Navigate to the Chat tab.
Click New chat.
Click Tools and select your PRONTOORDERTOOLS custom MCP server.
TIP
If all the tools are greyed out, turn off the Auto-select tools toggle at the top of the Tools panel.
Run the following prompt:
txtFind the Storefront__c named Urban Table Downtown and check its storefront health.Notice that the agent called the SOQL query tool to look up the storefront's ID, then the
Review_Storefront_Healthcustom Flow tool with that ID, to return the average review score, total reviews, and a health label.Run the following prompt:
txtCheck the status of the most recent Order__c record for the Storefront__c named Urban Table Downtown.Notice that the agent calls the SOQL query tool again, this time to find the ID of the most recent
Order__crecord for that storefront. It then calls theGet Order Statuscustom Apex action tool with that Order ID to return the order's live status.In your Salesforce org, open the App Launcher and go to the Storefronts tab.
Open Urban Table Downtown.
Review the storefront's Average Review Score and Total Reviews fields, and its related orders, and confirm they match the responses from the last two prompts.
Summary
In this exercise, you reviewed an Apex action and a small Flow that turns two Storefront fields into a health score, then created a Custom MCP Server to expose that Flow, an Apex action, and standard record tools to your users. You saw how the LLM chains a SOQL lookup ahead of both the Flow tool and the Apex action tool, since each expects a record ID, not a name.
You now have three MCP servers working together: live data access, metadata context, and custom business logic through a single natural language interface powered by Salesforce Hosted MCP servers.