


Importing Data into Salesforce
Import Salesforce data in Dataloader from MuleSoft by creating an Import task with a CSV file. Each task stores your connection, object, field mappings, and options so you can save and run it immediately, schedule it, or reuse it as a template.
Step 1. Create and Configure an Import Task
Start a new import task and define the required steps so Dataloader knows which Salesforce org, operation, and object to use.
-
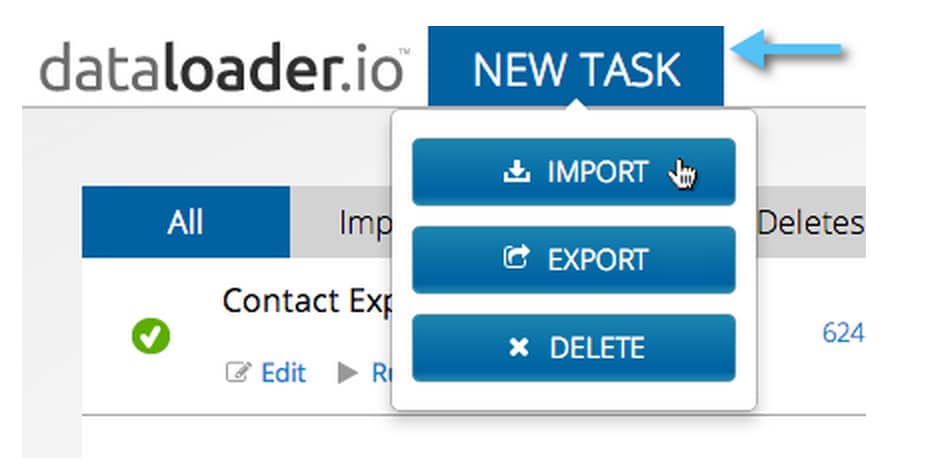
Click New Task then click Import.
-
In the Connection dropdown, select the Salesforce connection you want to use.
Your login credentials apply to your default connection. To use a different Salesforce connection, click the + icon and create a connection.
-
For Object, select the object to import data into. For example, Account, Contact, or Lead.
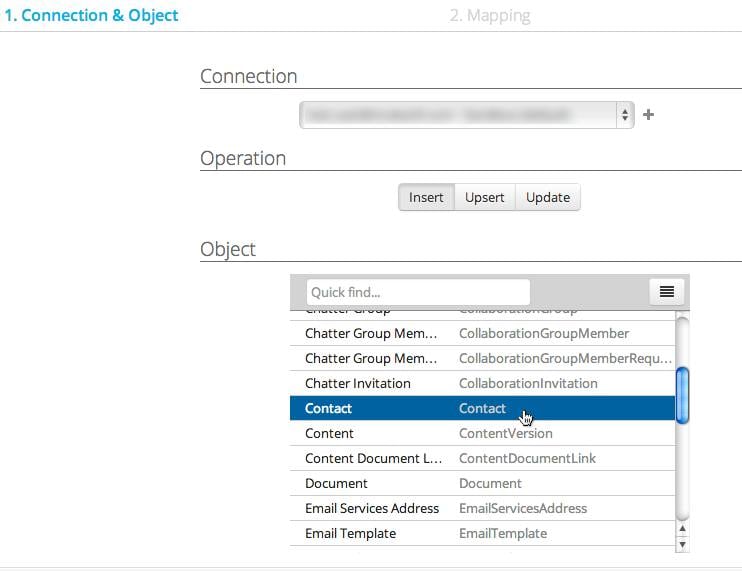
Use Quick find to search through your objects and Menu to filter Standard or Custom objects and show or hide object names.
Tip
Step 2. Upload the File
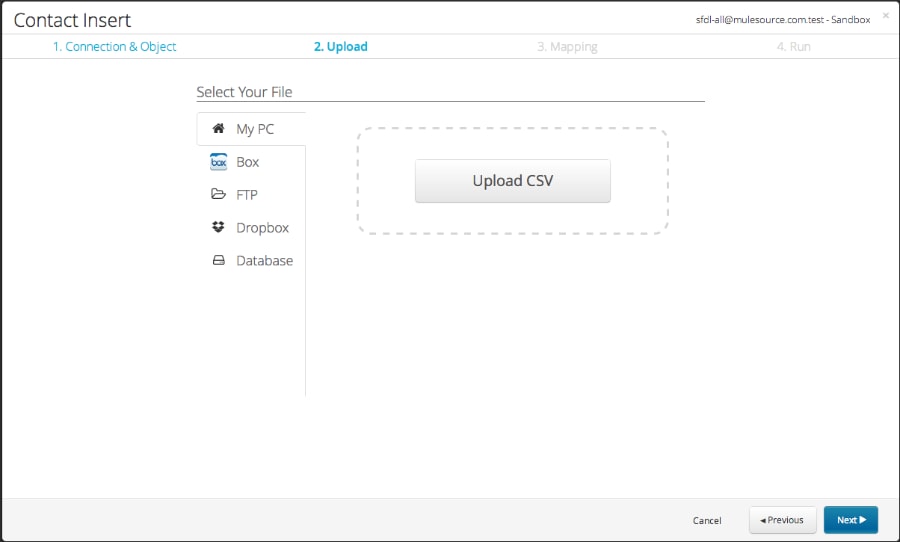
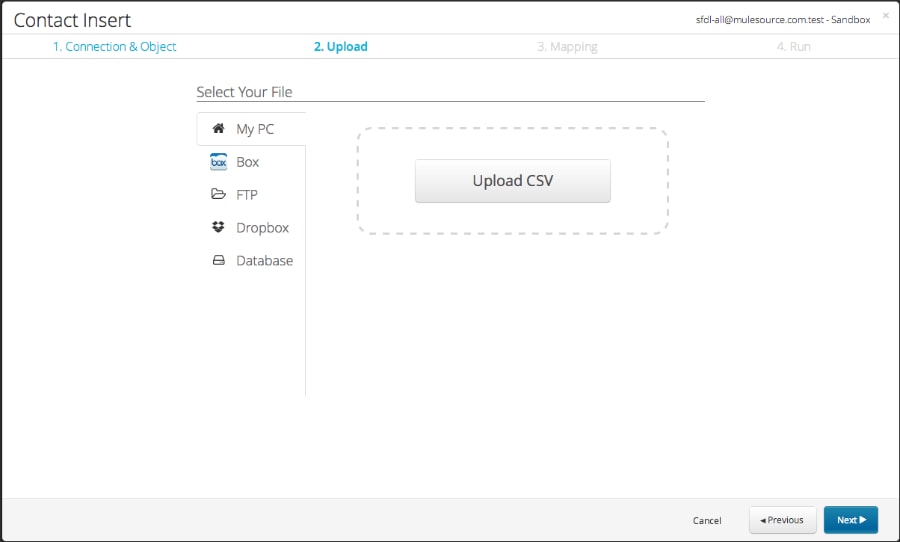
Upload the CSV file from your computer or cloud storage. In the next step, Dataloader maps columns to Salesforce fields.
-
Use a file from your computer or from a cloud repository.
-
To upload the CSV file, click Upload CSV, or drag the file into the upload area.
For more information, see Connecting to Box, Connecting to Dropbox, Connecting to FTP, and Connecting to SFTP.
Step 3. Map the Fields
Match each column in your file to a Salesforce field. Dataloader maps matching headers automatically. Operation-specific rules (Insert, Update, or Upsert) apply depending on what you selected in Step 1.
-
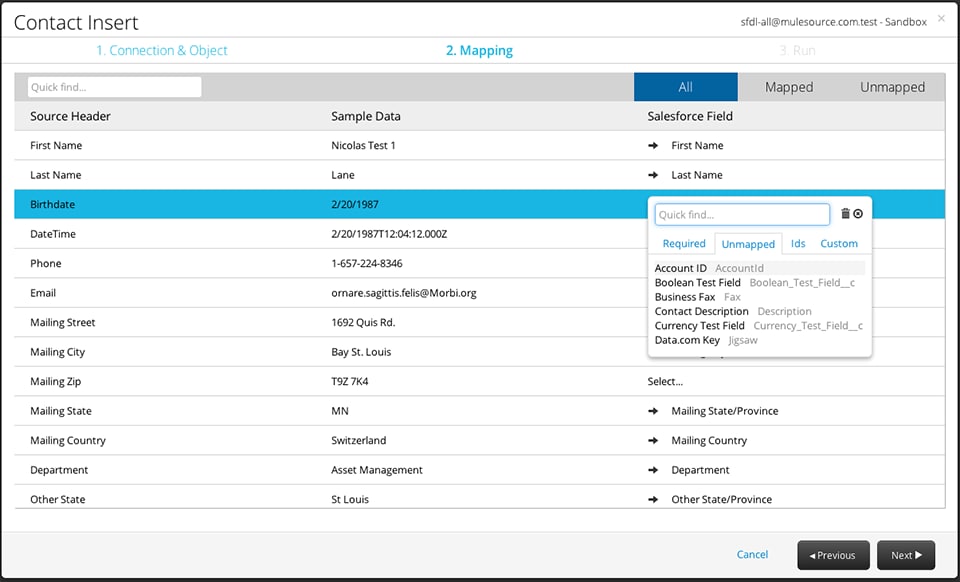
Map each CSV column to a Salesforce field. Dataloader maps matching headers from the input file automatically.
-
To remove a mapping, click the delete icon for the mapped Salesforce field.
Navigate through your mapping
- Use Quick find to search your source fields and locate a column in your file.
- Use the quick filters to show all, mapped, or unmapped Salesforce fields and spot missing attributes.
Navigate through your fields
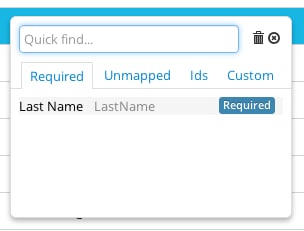
When you work with Salesforce fields, use Quick find to search and the quick filter tabs for Required, Unmapped, IDs, and Custom fields.
Map a Source Field to Multiple Destinations
-
Click the Copy icon for the source field to reuse.
-
Map each copy to a destination field.
For example, one copy for a lookup and one for First Name.
-
To remove a copy, click the delete icon for that mapping.
For example use First Name twice: for a lookup and for the contact First Name field.
Keyboard shortcuts on the mapping page: Press up/down to highlight a field mapping to edit. Press Enter to open the mapping editor.
While editing a field:
- Tab: Cycles through Field search, All, Mapped, Unmapped, field list, Cancel, Previous, and Next.
- Up/Down: Moves up or down in the field list.
- Right/Left: Switches between all IDs and unmapped.
- Enter: Selects the field to map.
- Esc: Closes the field search dialog without selecting a field.
Tip
Insert Data
When you perform an insert, map every required Salesforce field for the object. Continue when the page allows you to proceed.
Update Data
When you run an update, map a column to the Object ID for each row you update. For example, when you import Contacts, map the Contact ID field.
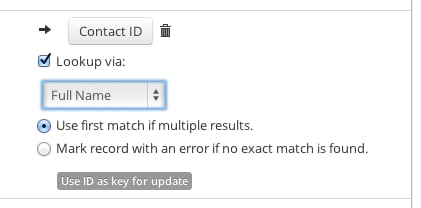
Run an export operation to retrieve the IDs from Salesforce. Add the exported IDs to your source file, and upload the file again. Alternatively, use Import Lookups to retrieve IDs from another field, for example Last Name or an external ID.
Upsert Data
An upsert updates the record if it exists; otherwise Dataloader inserts it.
-
Map a column to an ID field to use as the upsert key.
-
Use either a Salesforce ID or an external ID as that key.
An external ID is a unique identifier from another system (for example, ERP Account Number on accounts).
Look Up Referenced Objects
Use the lookup function when you need a related object ID that you don’t have in the file. For example, when you import Contacts with an account name but no account ID, configure the lookup to resolve the ID. For full steps, see Import Lookups.
Step 4. Save and Run Your Task
Review the summary page, adjust the task name, API, and other options, then save the task or run it immediately.
-
On the summary page, review the overview of your task.
-
Optional: Change the task name.
-
Specify the Bulk API or the Batch API and set the batch size if needed.
-
Optional: Open Advanced Settings in the task configuration.
-
Click Save to save and run later, or Save and Run to run immediately.
Schedule the Task
-
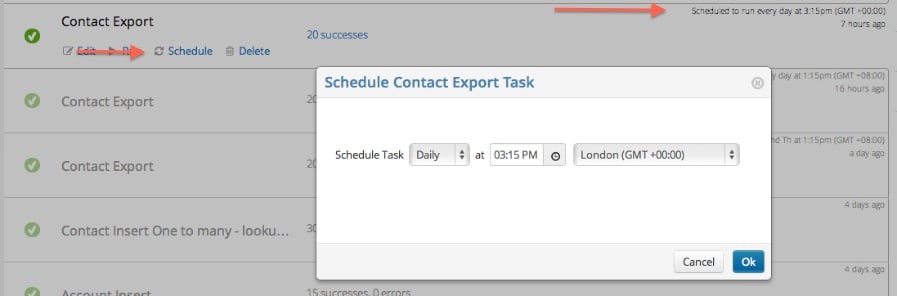
Set how often the task runs: Hourly, Daily, Weekly, or Monthly.
-
Set the time zone if needed.
-
After you create the task, open scheduling from this summary page (edit the task and return here) or from the Schedule button on the task list.
-
Use the Scheduled tab to find scheduled tasks.
Bulk API
Salesforce Bulk API uses REST principles and is optimized for loading or deleting large data sets. Salesforce processes records asynchronously by running submitted batches in the background.
Bulk API has some restrictions. For example, related object exports are not supported.
Bulk API processes data in larger batches than Batch API, which lowers API usage per operation when you load large volumes. For more information, see Introduction to Bulk API 2.0 and Bulk API.
Batch API
When the Bulk API checkbox is cleared, Batch API is in use.
Salesforce Batch API uses SOAP principles and is optimized for real-time client applications that update small numbers of records at a time. Although the SOAP API can process large numbers of records, data sets with hundreds of thousands of records are less practical that way.
For large volumes, Bulk API is the best option. Batch API processes data in smaller batches than Bulk API, which increases API calls per operation when you process large volumes.
Bulk API vs Batch API
| Feature | Bulk API | Batch API |
|---|---|---|
| Protocol | REST | SOAP |
| Best for | Large data sets (10,000+ records) | Smaller data sets (under 10,000 records) |
| Processing | Asynchronous batches | Real-time |
| API calls | Lower (larger batches) | Higher (smaller batches) |
| Related object exports | Not supported | Supported |
Email Notifications
You can configure your task to email you whenever it runs. You can add multiple recipients as well as multiple CCs to the sent email.
When using the free edition of Dataloader from MuleSoft, you are only allowed to have one task set up to send email notifications. Dataloader.io Professional and Enterprise editions allow you to use email notifications on unlimited tasks.
This figure shows the scheduling options for an import task.
Advanced Settings
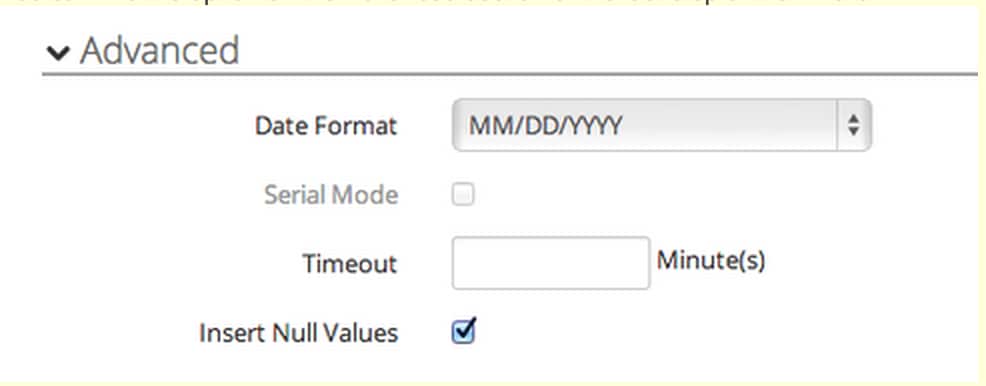
These options appear on the Advanced settings page.
-
Date Format: Available for both Bulk and Batch APIs. Sets the import date format: American (MM/DD/YYYY) or European (DD/MM/YYYY).
-
Serial Mode: Bulk API only. Processes batches one at a time in Salesforce (which helps avoid database contention). This option can significantly increase processing time for a load.
-
Timeout: The maximum time a task can keep running. When the task reaches the threshold, Dataloader cancels it automatically. The default timeout is 2 hours.
-
Insert Null Values: If you check this box and update an existing record, empty values in the new data overwrite previous values. If you clear this option, Dataloader ignores empty values in the update and keeps the existing field values.
-
Stronger Security: Dataloader from MuleSoft uses strong server-side encryption and provides access to resulting files only to their owners. You can remove data from Dataloader servers by deleting the task in the task menu.
You also control where CSV data is stored. Click Save Result Files Externally under Advanced settings so Dataloader doesn’t store CSV files on its servers. This feature works only when you use external storage such as Dropbox, Box, or (S)FTP to save result files.
With this option selected, you can’t download the resulting files from the main page.
See Also
- Use Import Lookups
- Best Practices for Data Import
- Use Supported Date Formats
- Managing Tasks
- Salesforce Developers: Introduction to Bulk API 2.0 and Bulk API
 j
j