Appearance
Exercise 1: Ingest Contacts Using the CRM Connector
Step 1: Install the Salesforce Contacts Data Kit
Data Kits are a Data 360 feature that allows you to package Data 360 metadata, such as data streams, mappings, and calculated insights. Data Kits make it easy to share and reuse components across projects. To jumpstart your implementation, you'll install a data kit that includes a pre-configured data stream for Salesforce Contacts, along with its associated mappings. Don't worry, you'll have the opportunity to create data streams and mappings from scratch in subsequent exercises.
Before you can install the data kit, you must ensure that Data 360 is provisioned.
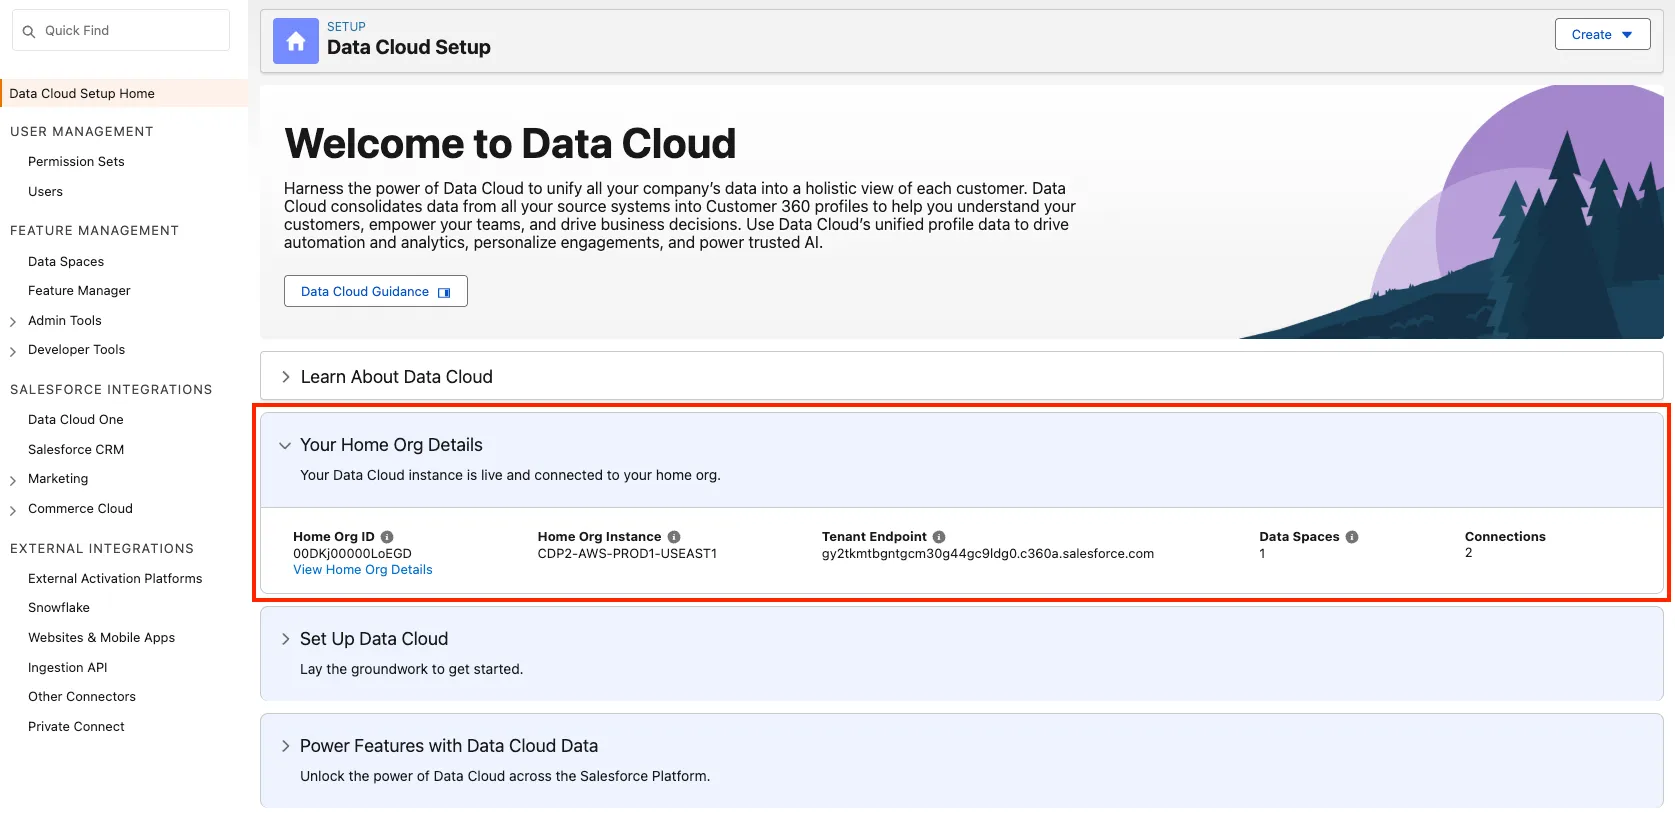
Open the Setup Menu and select Data Cloud Setup.
If you can see the section that displays Your Home Org Details, Then Data 360 has already been provisioned and you can move on to install the Coral Cloud Resorts Data Kit below.
If the banner says Set up Data 360, Data 360 needs to be provisioned.
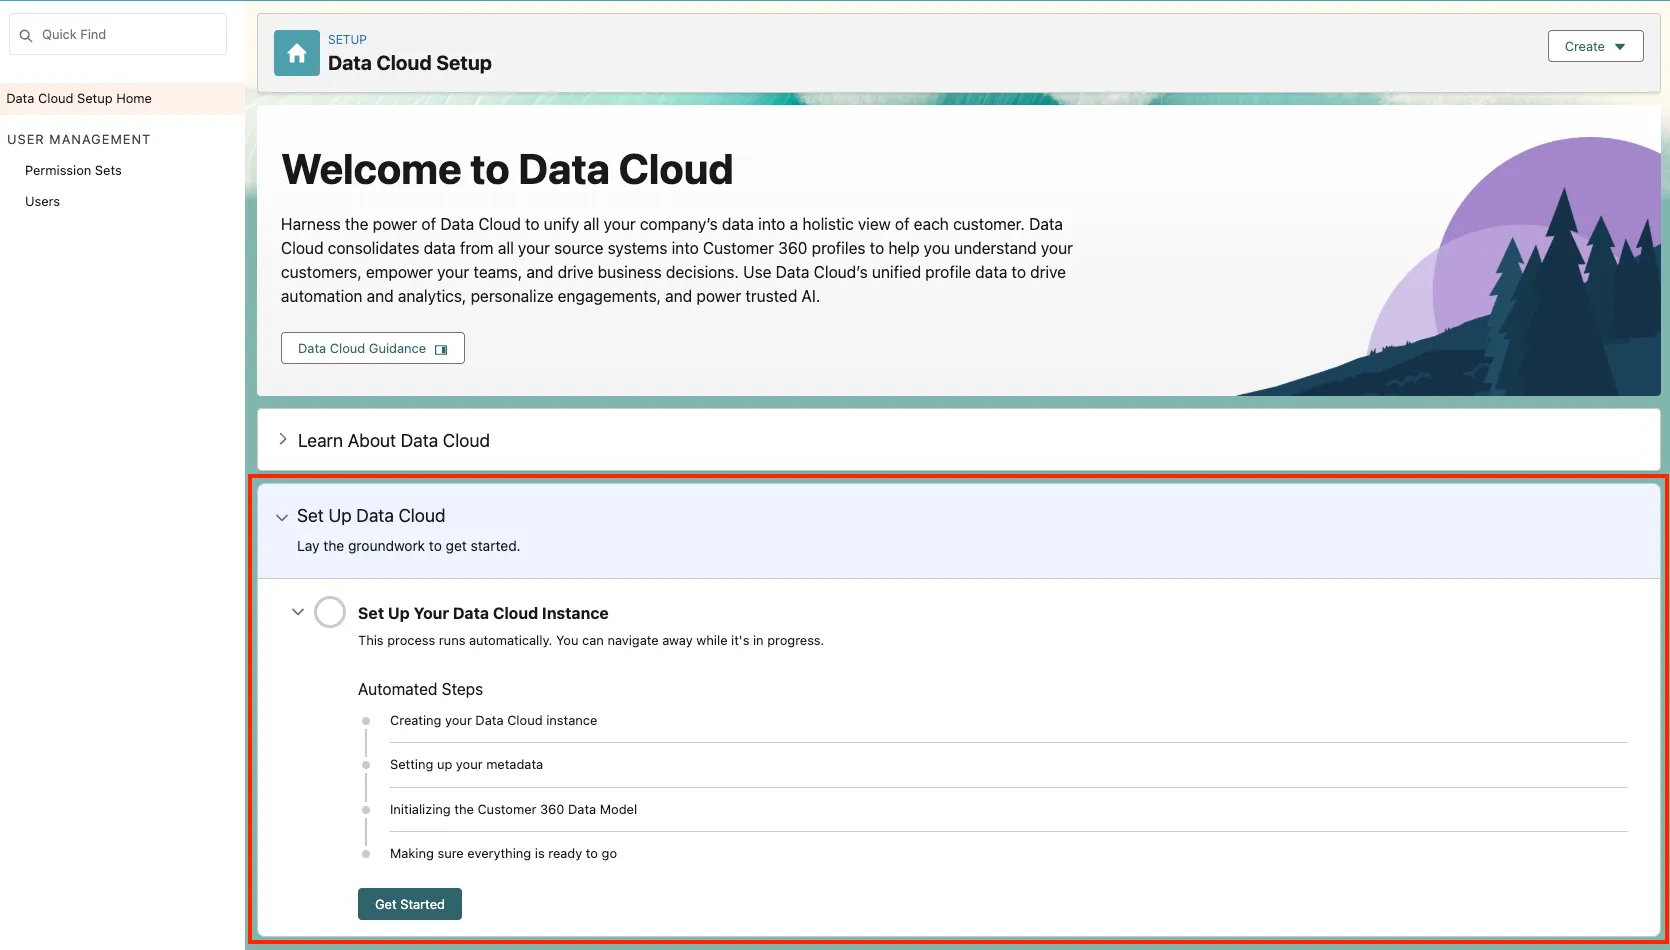
Click on Get Started to begin the provisioning. This can take between 30-45 minutes.
TIP
If you had to click on Get Started, you must wait for the provisioning to complete in order to move on to the next step.
To install the Coral Cloud Resorts CRM Contacts Data Kit:
Once logged in into your org, replace the URL segment that comes after lightning.force.com with:
txt/packaging/installPackage.apexp?p0=04tHr000001BQihPress Enter.
Select Install for Admins Only and click Install.
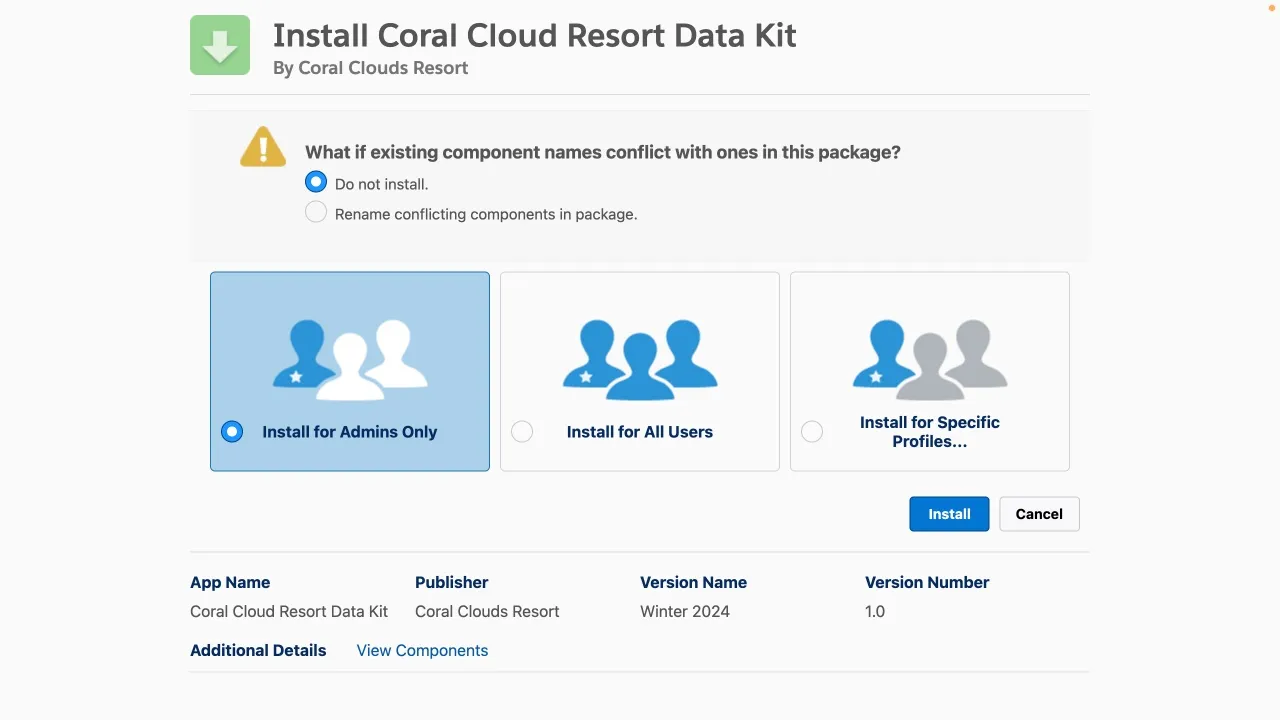
When the package is installed (it should take less than a minute), click Done.
Step 2: Create the Contact data stream using the Salesforce CRM Connector
To ingest the CRM Contacts using the data kit you installed in the previous step:
Using the App Launcher, open the Data Cloud application.
Click the Data Streams tab.
Click New.
Under Connected Sources, select the Salesforce CRM connector, and click Next.
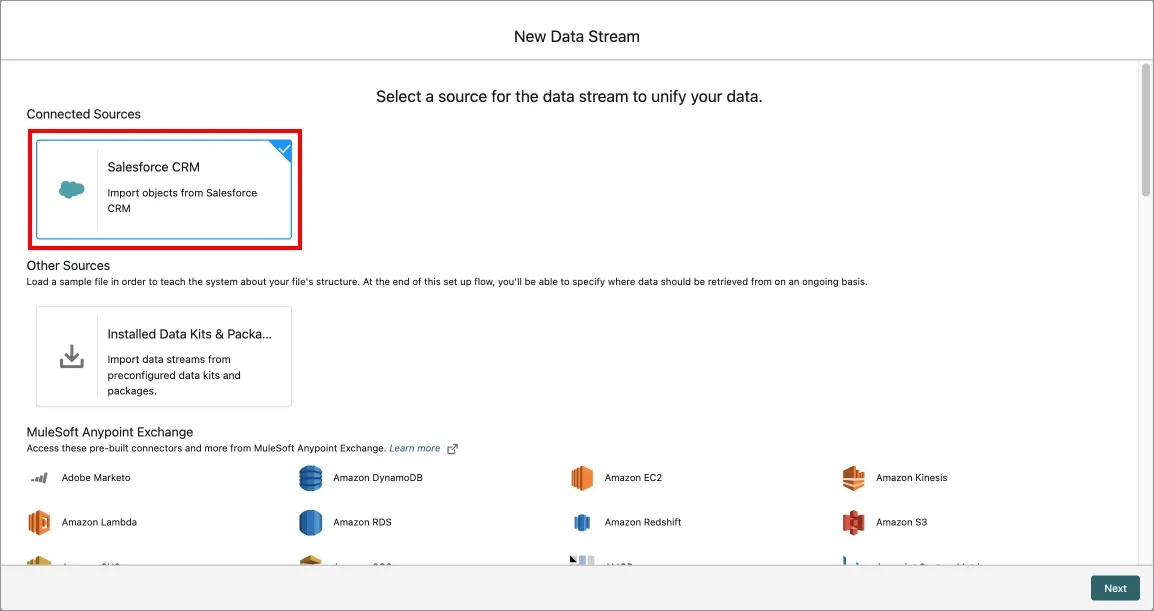
Under Custom Data Bundles, select Salesforce_Contacts, and click Next.
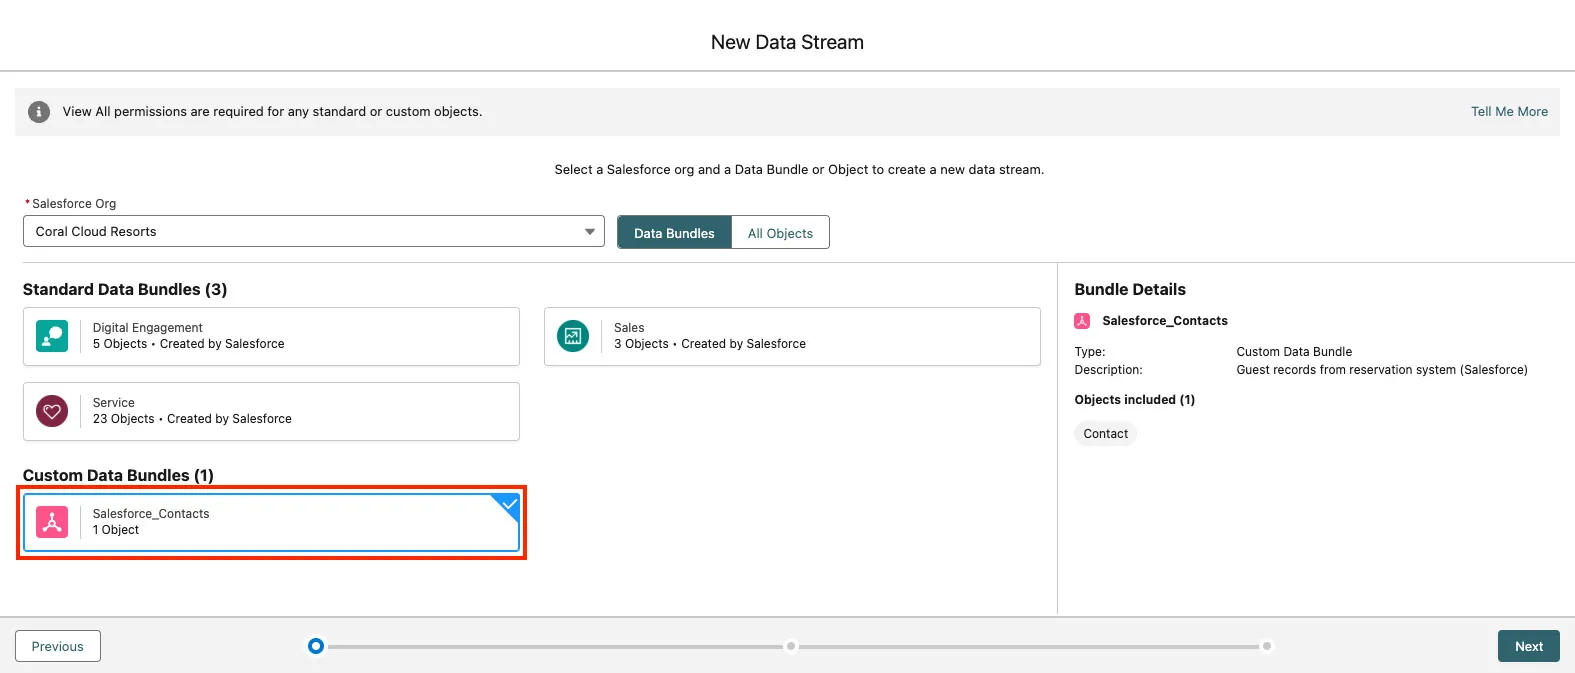
Keep the default Contact Fields selection and click Next.
Click Deploy.
After the deployment, click the arrow down icon to the right of the Contact data stream row, and select Refresh Now.

Click the Data Lake Objects tab, and notice that a Contact_Home data lake object (DLO) has been created.
Click the Contact_Home DLO, and notice all the fields of the Salesforce Contact object.
Step 3: Review the mappings
In Data 360, you map data lake objects (DLOs) to a standardized data model known as the Customer 360 Data Model. This canonical data model ensures consistent representation of the data, regardless of its origin. Mapping data to a common data model facilitates data unification, and makes it easy to access and act on data from various sources in a consistent way.
Coral Cloud Resorts stores Contacts in Salesforce and Guest data in Amazon S3. These systems represent individuals in different ways. For example, Guests in Amazon S3 have a field called "Surname" while Contacts in Salesforce have a field called "Last Name".
Data 360 abstracts these differences by mapping data to the Customer 360 Data Model which includes a generic "Individual" object. Both the Guest object from S3 and the Contact object from Salesforce are mapped to the "Individual" object within Data 360.
To review the mappings of the Contact DLO to the Customer 360 Data Model:
From the Contact_Home data lake object, click the Review button in the Data Mapping panel on the right.
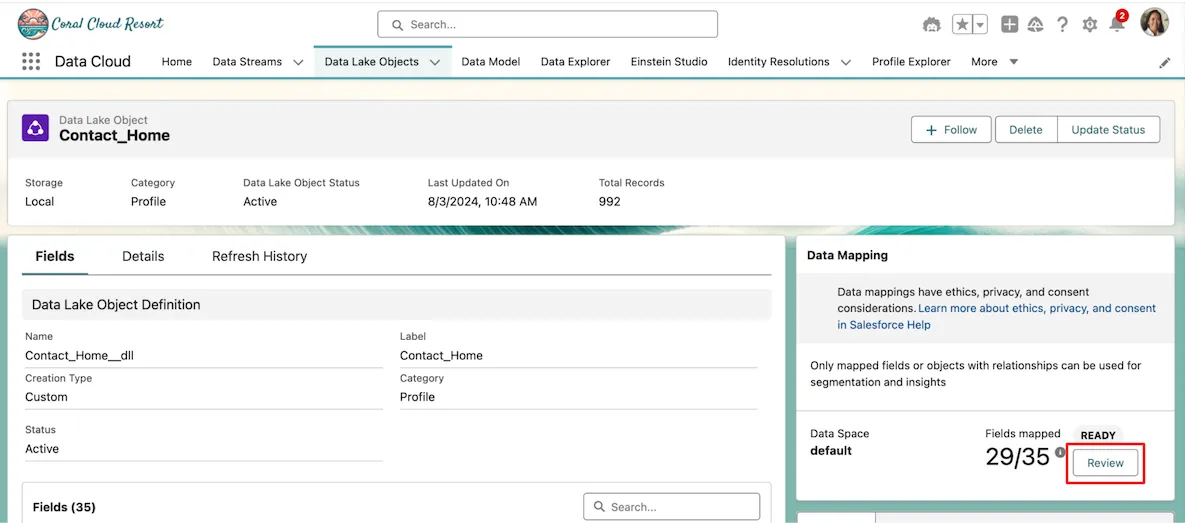
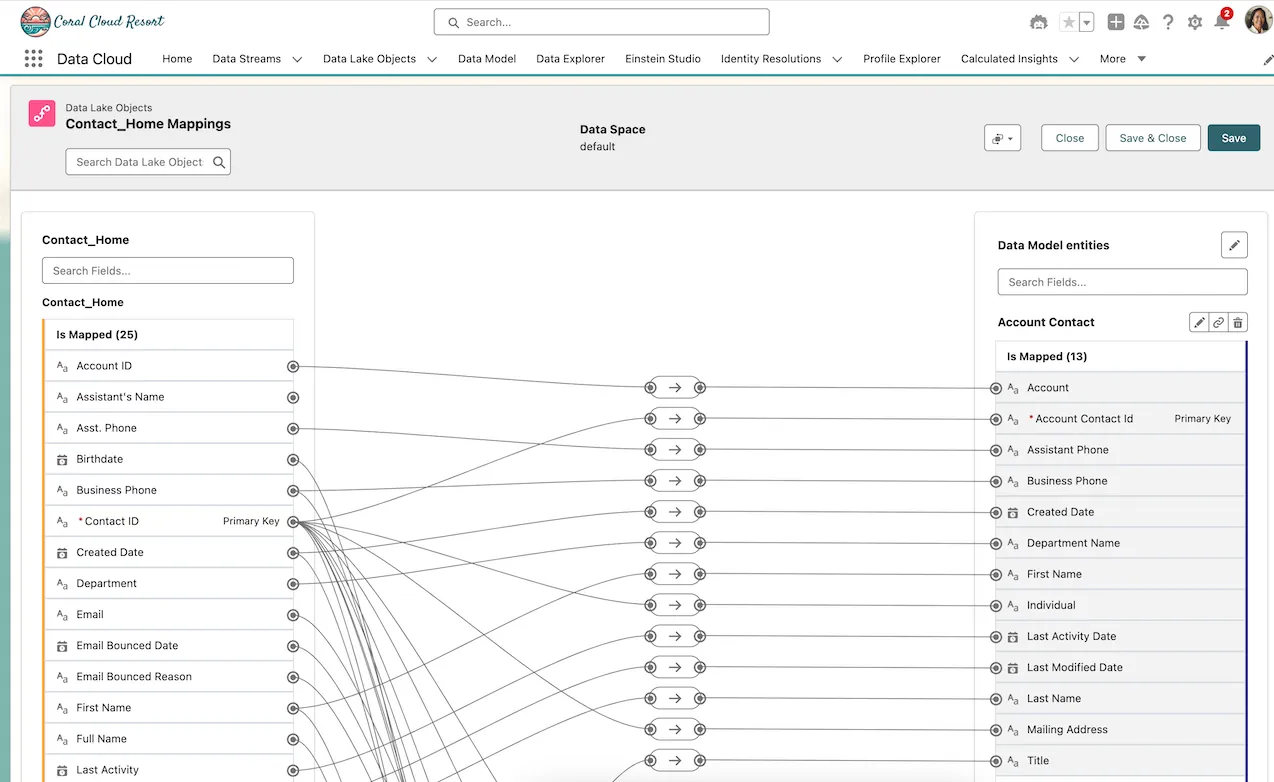
Review the mappings:
Review the Source object on the left-hand side: these are the fields of the Salesforce Contact object that you ingested into a data lake object (DLO).
Review the Destination objects on the right-hand side: these are standard entities within the Customer 360 Data Model, also known as data model objects (DMO). Note that your Contact DLO is mapped to five DMOs: Account Contact, Contact Point Address, Contact Point Email, Contact Point Phone, and Individual.
Summary
In this exercise, you ingested Salesforce Contacts into Data 360. To jumpstart your implementation, you used a data kit that packaged the definition of the Contact data stream and its related mappings. In subsequent exercises, you'll create data streams and mappings entirely from scratch.