
Appearance
Guided Workshop Setup
Sign up for a Salesforce org
Follow the instructions of your instructor to get a Salesforce org provisioned with Data Cloud, Prompt Builder, and Agents.
Make sure that you write down your user ID and password. You'll need them again later in this workshop.
In your browser, go to login.salesforce.com and log in to your org.
Ignore the message that says Code Builder isn't Enabled.
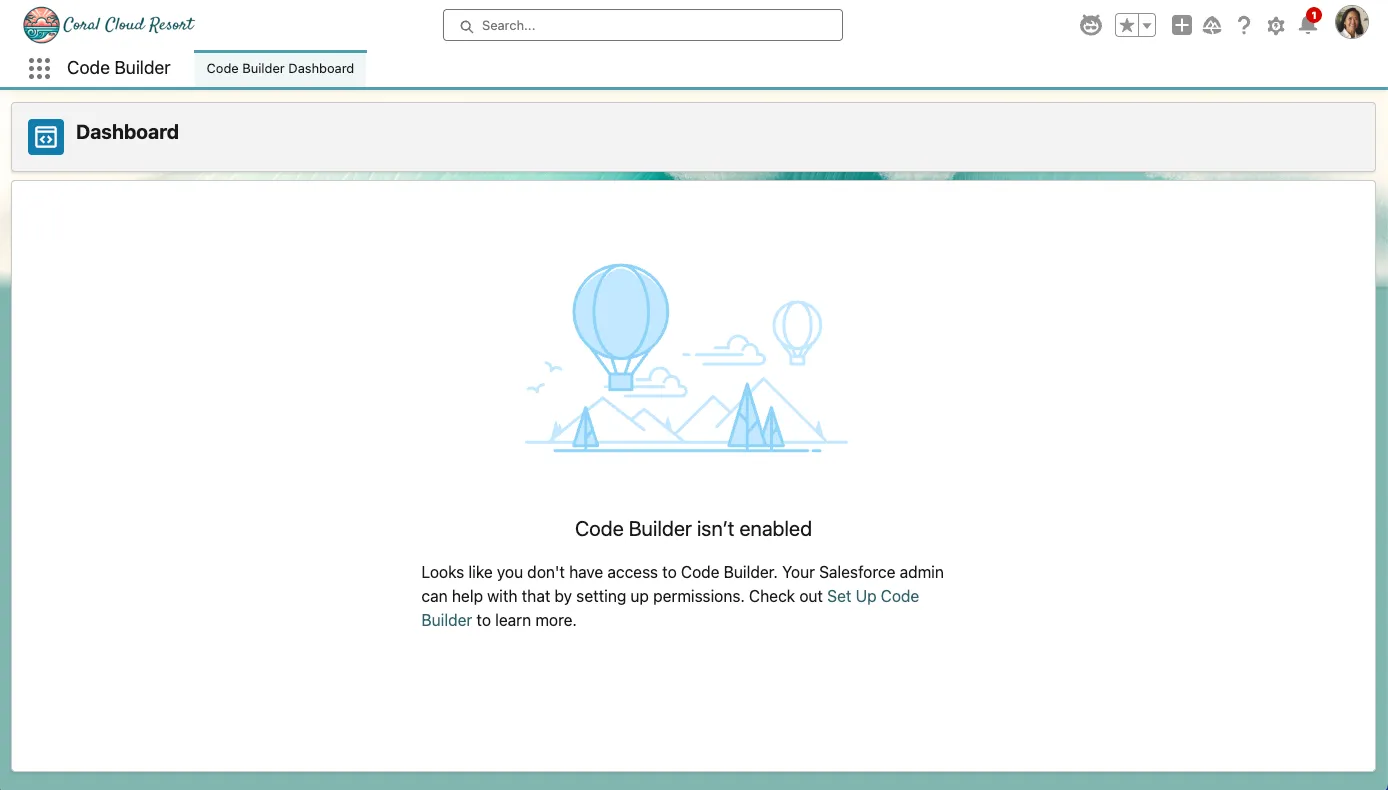
TIP
Code Builder has been pre-installed into each of these environments causing it to be the default landing page when you first log in. This is not an error and you can bypass this message.
Configure the Coral Cloud App
Step 1: Update your Username and Details
In the App Launcher, select the Coral Cloud app
Under Attendee Information, click on Edit
Update your First Name, Last Name, your Companies Name, and the workshop code provided by the instructor.
Click on Save.
Enable Generative AI Features
Step 1: Enable Einstein
Open the Setup Menu and click Setup.
In the Setup Quick Find, search for Generative AI, and select Einstein Setup.
Click the Turn on Einstein toggle.
Step 2: Enable Agentforce
Refresh your browser tab.
Open the Setup Menu and click Setup.
In the quick find, search for Agentforce and click Agentforce Agents (under Agent Studio). If it is not available, continue to refresh the page until the cache has reset.
Turn on the Agentforce toggle.
(Optional) Enable and launch Code Builder
In this workshop, you'll use Code Builder to deploy Apex classes in some Prompt Builder and Agent exercises. Code Builder is a web-based integrated development environment (IDE) built upon the core functionalities of Visual Studio Code (VS Code). It provides a development experience similar to using VS Code with the Salesforce extensions installed, but entirely within a web browser.
Step 1: Launch Code Builder
Click the Setup icon (gear icon in the upper right corner), and click Setup.
In Quick Find, search for Code Builder, and select Code Builder.
Dismiss the error message. This is due to the pre-installation of Code Builder.
Click the Enable Code Builder toggle to enable Code Builder. Review and accept the license agreement.
Click the App Launcher icon (waffle icon in the upper left corner), and select the Code Builder app.
In the Code Builder Dashboard, click the Launch button.
TIP
It will take a few minutes for Code Builder to fully initialize. Wait for the Let’s Get You Started page to appear before you continue.
Step 2: Authorize your Org
You need to connect Code Builder to your org to be able to deploy code:
Open the command palette (press
CMD+SHIFT+Pon Mac orCTRL+SHIFT+Pon PC).Search for Authorize an Org. If it is not yet available, wait for Code Builder to fully initialize. If this command is not available, please follow the steps below to create a new project.
Select SFDX: Authorize an Org.
Select Project Default.
Enter
AI-WORKSHOPfor the org alias and press Return.Click Connect.
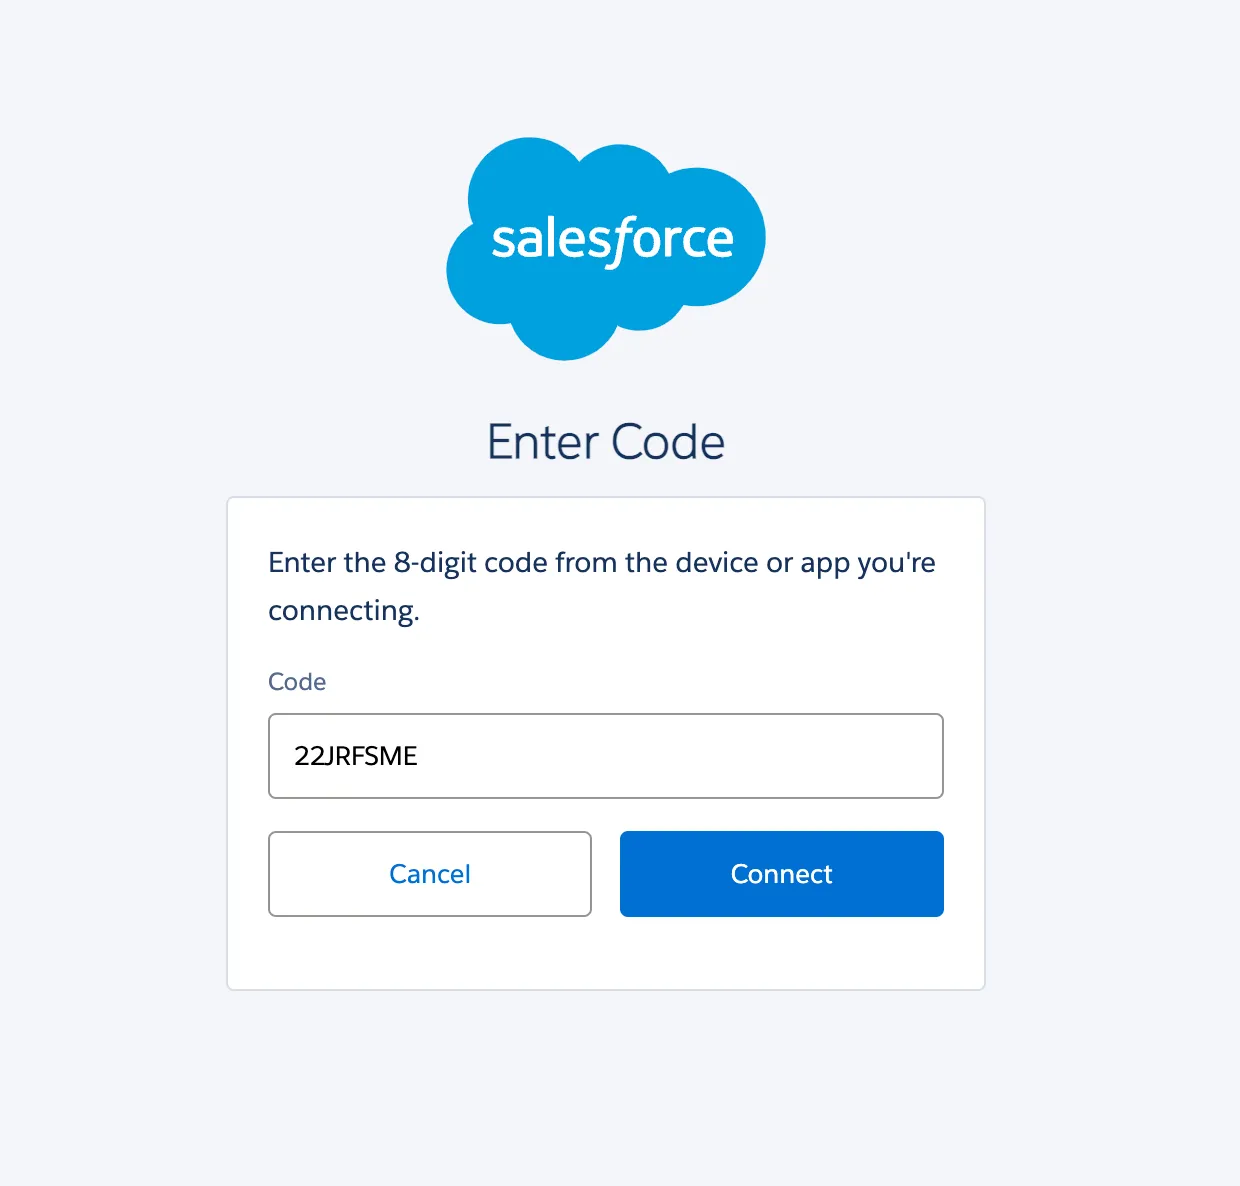
Log in to your org using your credentials.
Click Allow.
Click Continue.
TIP
Since Code Builder takes some time to load, we recommend that you leave it open in a browser tab.
Optional: Create an SFDX Project
Open the command palette (press
CMD+SHIFT+Pon Mac orCTRL+SHIFT+Pon PC).Search SFDX and click on SFDX: Create Project with Manifest.
Click Standard.
Enter
AI_NOW_WORKSHOPfor the org name and press Return.
The project will now load and you can repeat Step 2 to authorize your org.