Appearance
Exercise 7 (Optional): Enhance Data with Calculated Insights
In this exercise, you'll learn how to create calculated insights to extract valuable information from the data you unified in Data Cloud.
TIP
Before starting this exercise, make sure that the identity resolution job (Exercise 5) has completed successfully.
Step 1: Create the calculated insight
Using the App Launcher, open the Data Cloud application.
Click the Calculated Insights tab.
Click New.
Select Create with Builder and click Next.
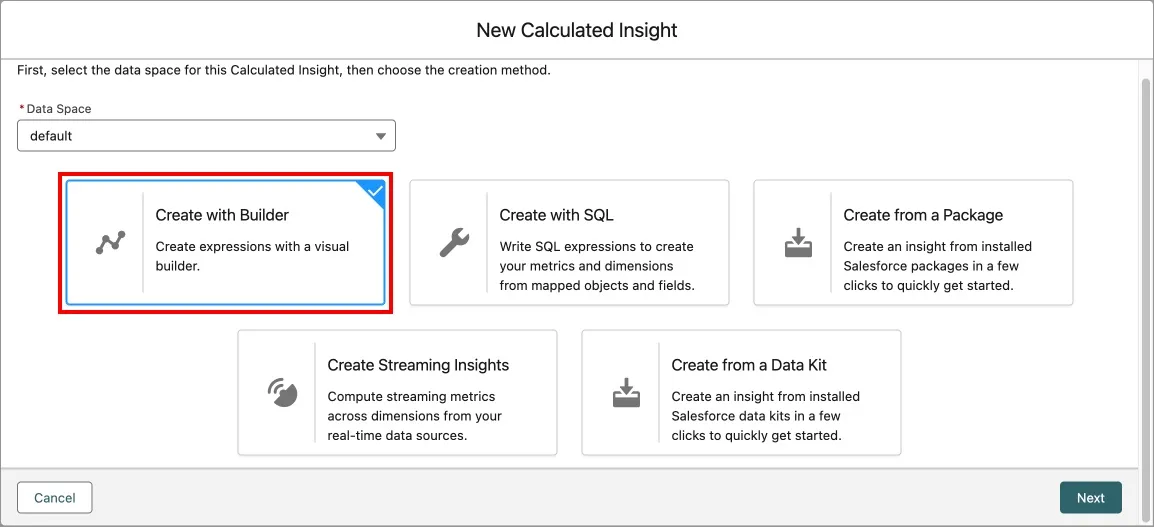
Keep Calculated Insight selected and click Next.

Click Select an Object.
TIP
Try scrolling or zooming out if you don't see the Select an Object button.
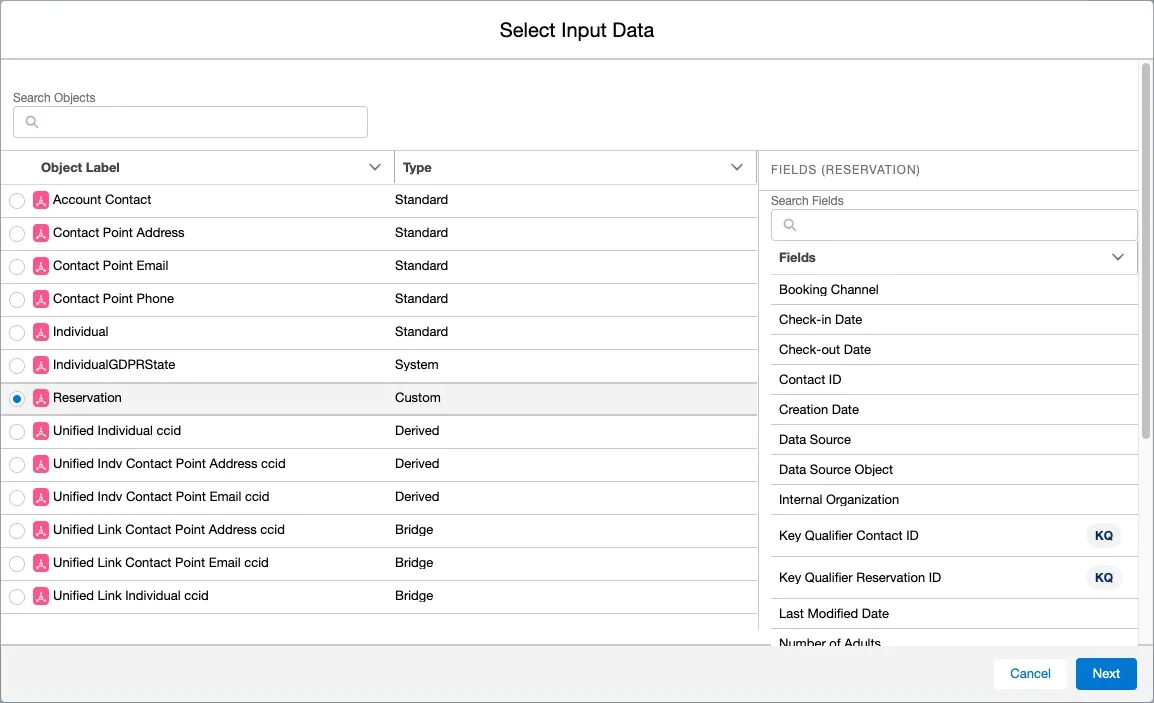
Select the Reservation Data Model Object, and click Next.
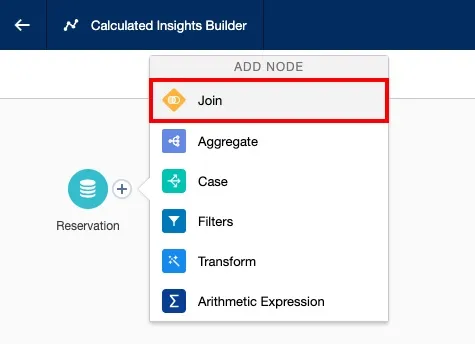
Click the Plus (+) icon next to the Reservation object and click Join.
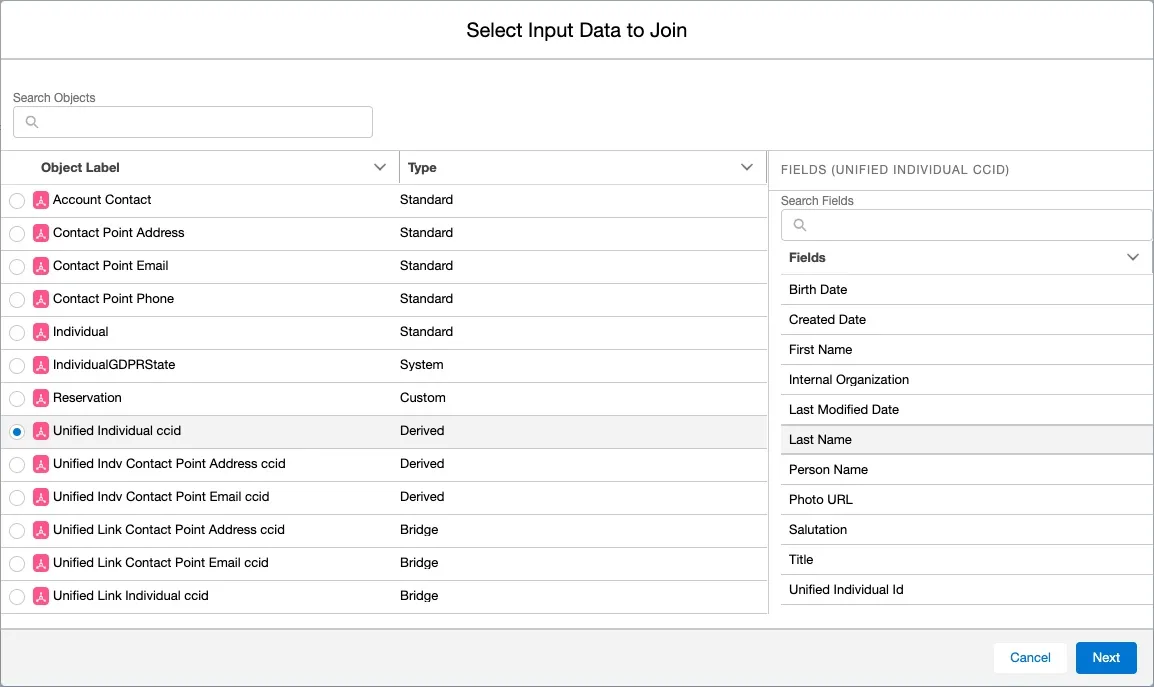
Select the Unified Individual ccid Data Model Object and click Next.
Examine the joins that Data Cloud automatically created to link a reservation to a unified profile in the Unified Individual ccid object.
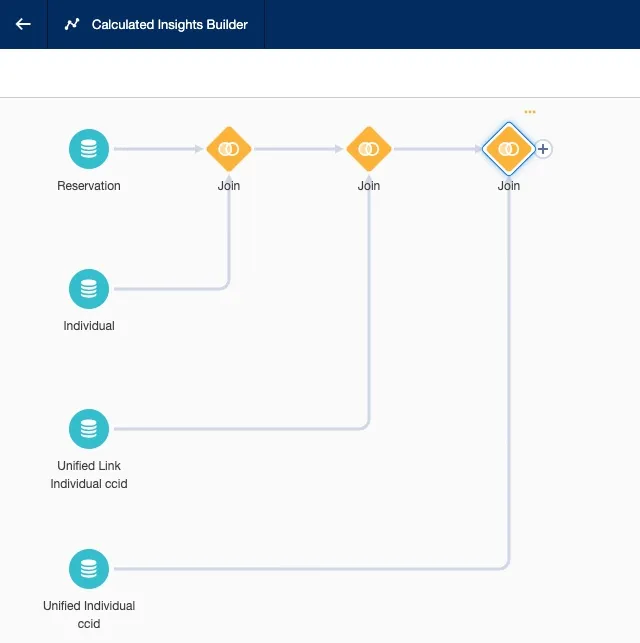
- The join to the Individual object provides guest information for the reservation. However, remember that the Individual object may include duplicate profiles.
- The join to the Unified Individual Link object provides a mapping between the Individual Id and the Unified Individual Id.
- Equipped with the Unified Individual Id, we can join to the Unified Individual ccid object, which provides access to the unified customer profile.
Here is another diagram illustrating how tables are joined to connect a reservation to a unified individual:
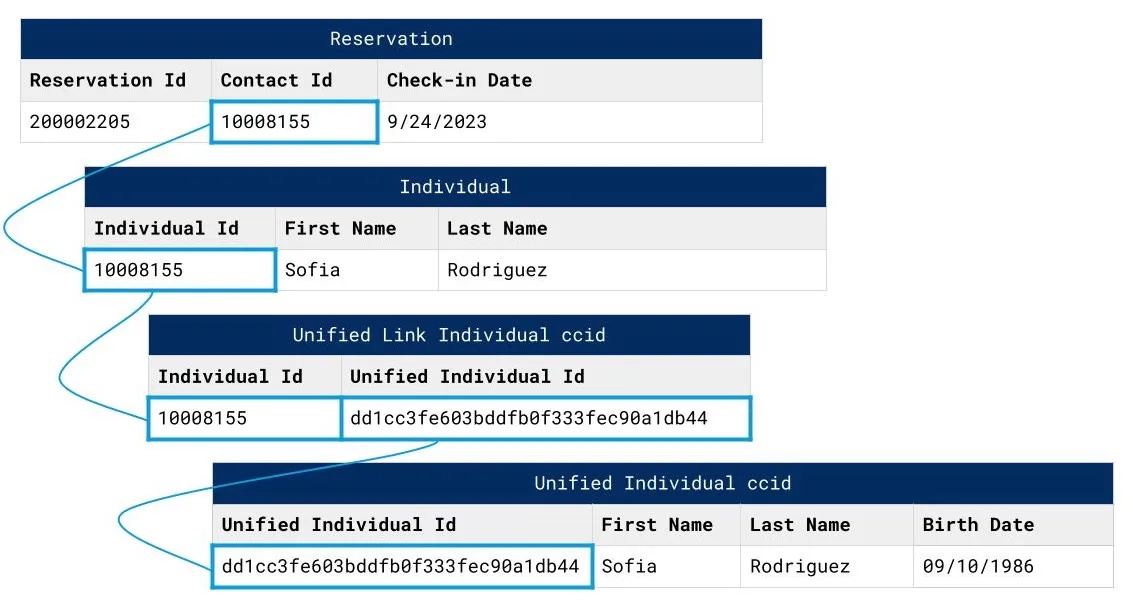
Joining reservations to the unified customer profile will allow you to aggregate data in a more accurate way. For example, you'll be able to calculate the lifetime value of a customer (total amount spent across all reservations), regardless of which profile was used for the reservation, or what system was used to make that reservation.
Click Apply (bottom left of the screen).
Step 2: Create the Lifetime Reservations measure
With the objects and joins in place, you can now define the measures that you want to calculate. In this step, you will calculate the total number of reservations made by a customer (Lifetime Reservations).
Click the Plus (+) icon next to the last join on the right, and click Aggregate.

Under Measures, click the + button.
Under Metric Functions, select Count.
Select the Reservation Id field.
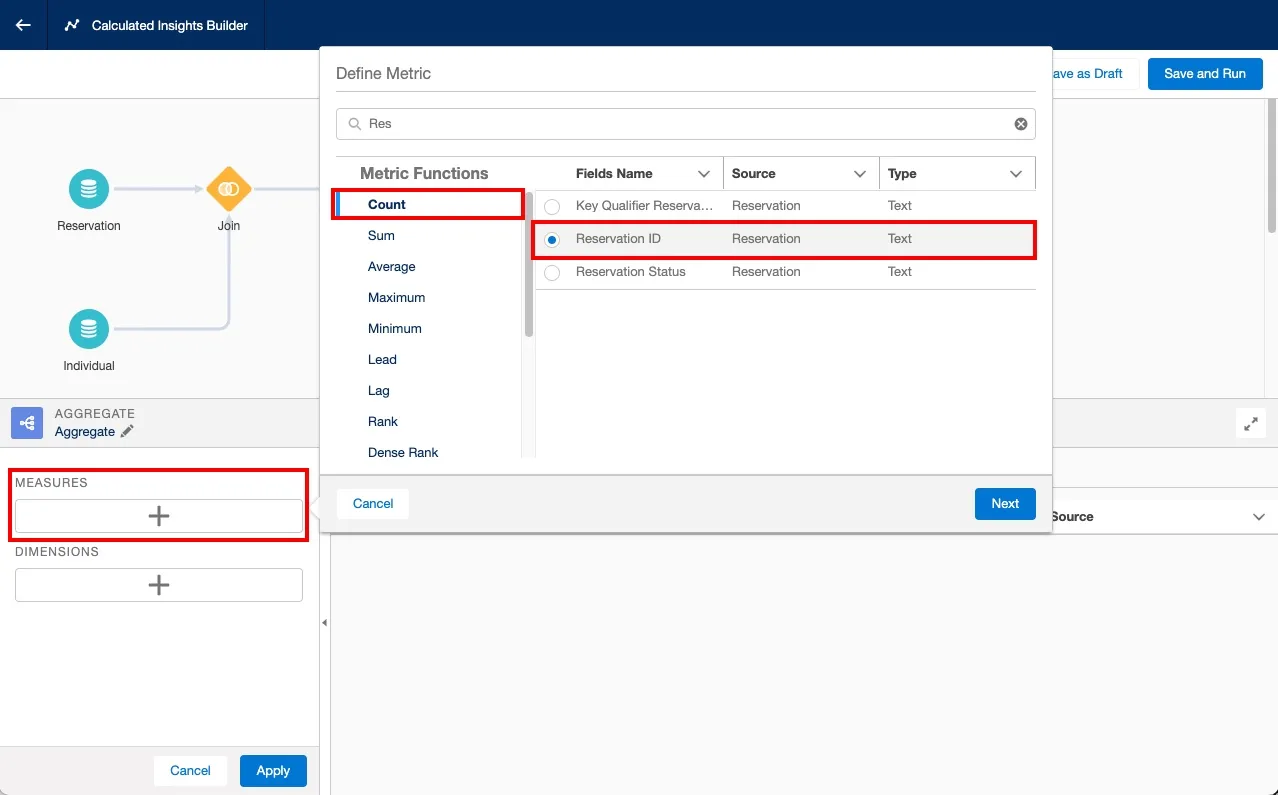
Click Next.
Set the Metric Name to Lifetime Reservations and keep the default API name.
Click Apply.
Step 3: Create the Lifetime Value measure
In this step, you you will create a measure that calculates the customer lifetime value (total amount spent by a customer across all reservations).
Under Measures, click the + button.
Under Metric Functions, select Sum.
Select the Total Price Field.
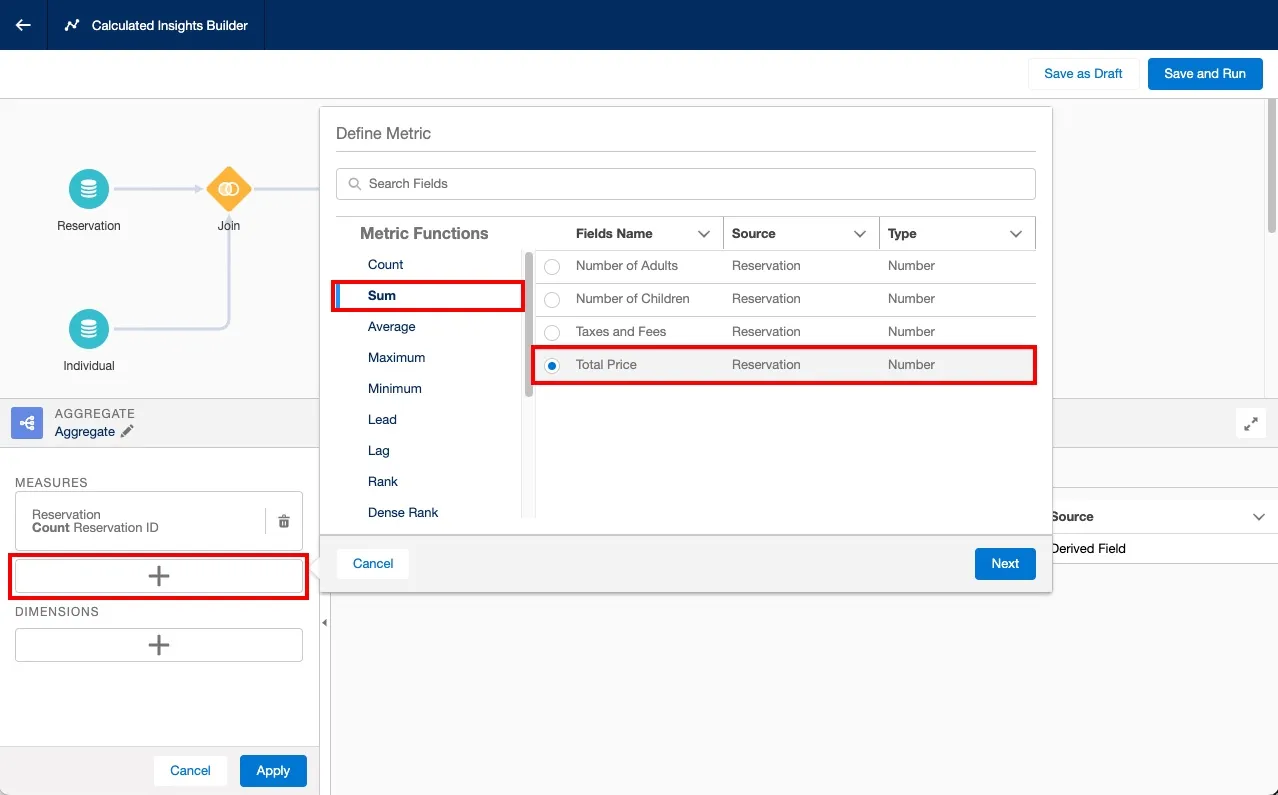
Click Next.
Set the Metric Name to Lifetime Value and keep the default API name.
Click Apply.
Step 4: Create the dimension
Finally, you'll create a dimension that tells Data Cloud to group the data by unified individual.
Under Dimensions, click the + button.
Search for Unified Individual Id and select Unified Individual Id with the source Unified Individual ccid and click Next.
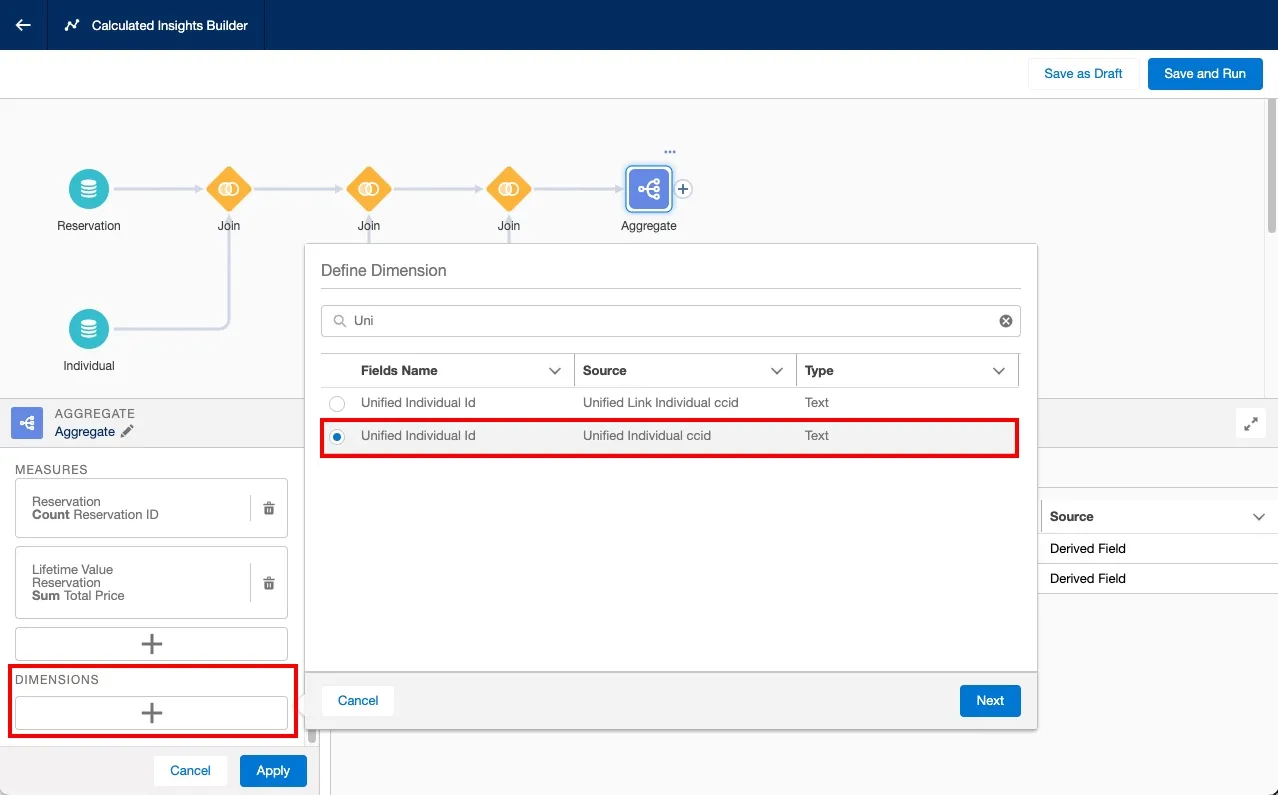
Set the Dimension Name to Unified Id, keep the default API name, and click Apply.
Click Apply (bottom left of the screen) to apply changes to the Aggregate element.
Step 5: Save and run
Click Save and Run (upper right corner of the Calculated Insights Builder).
Set the Calculated Insight Name to Spend Profile By Guest and keep the default API name.
Click Next.
Leave the Schedule field value to Not Scheduled and click Enable.
Refresh the page.
Click Publish Now (if it's not visible, click the arrow down button in the upper right corner).

Make sure that the status of your Calculated Insight is Pending.

Summary
In this exercise, you used the Calculated Insights Builder to create calculated insights that provide the lifetime value and the lifetime number of reservations of a customer.