Appearance
Exercise 5: Create a Unified Profile
Ingesting guest data from both Salesforce (Contacts) and Amazon S3 (Guests) can lead to duplicate customer profiles. This makes it difficult to get a unified view of your customers. Identity resolution addresses this challenge by using matching and reconciliation rules to merge duplicate profiles into a single, consolidated record.
Step 1: Query the Individual DMO using Data Explorer
In this step, you'll use Data Explorer to query an Individual data model object and identify duplicate profiles.
In the Data 360 app, click the Data Explorer tab.
Keep the default Data Space selected.
In the Object dropdown, select Data Model Object.
In the Select an Object search field, select the Individual object.
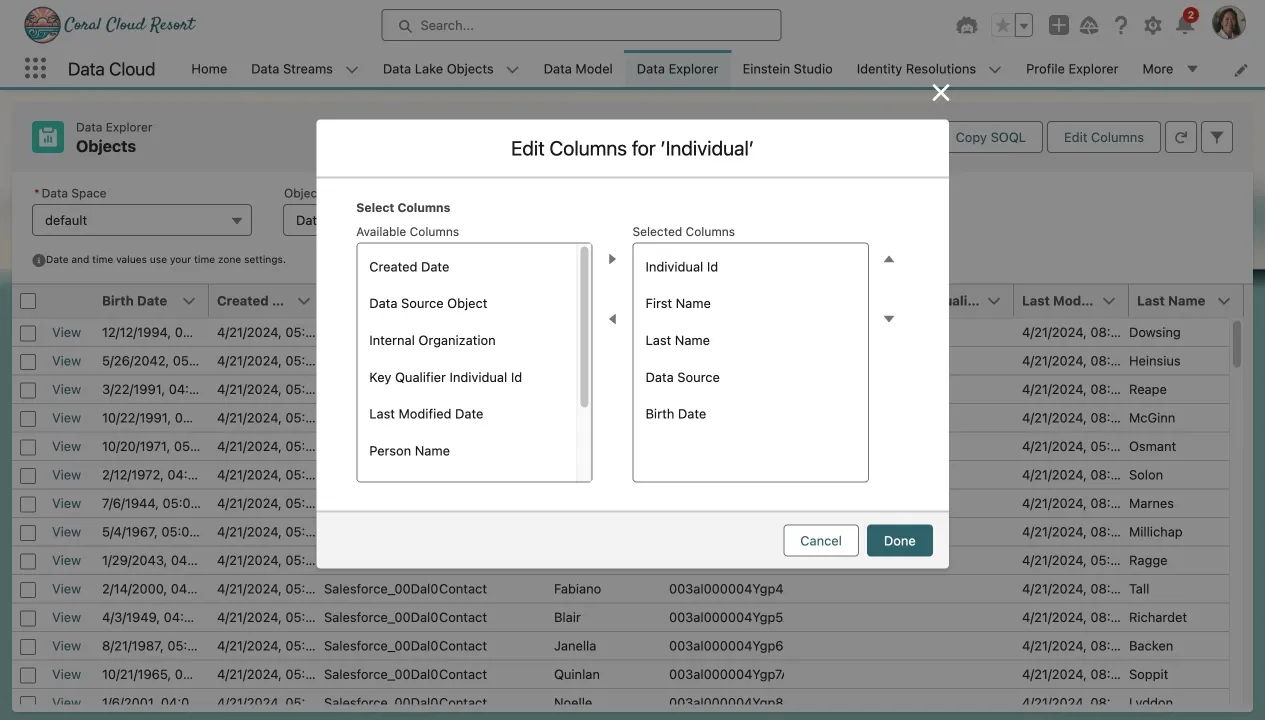
Click the Edit Columns buttons.
Select the Individual Id, First Name, Last Name, Data Source, and Birth Date columns, and click Done.
Click the Filter icon (upper right corner of the screen).
Click Add Filter.
Configure the filter with the following values:
Filter Field Value Field Last NameOperator equals Value Rodriguez Click Done.
Click Apply.
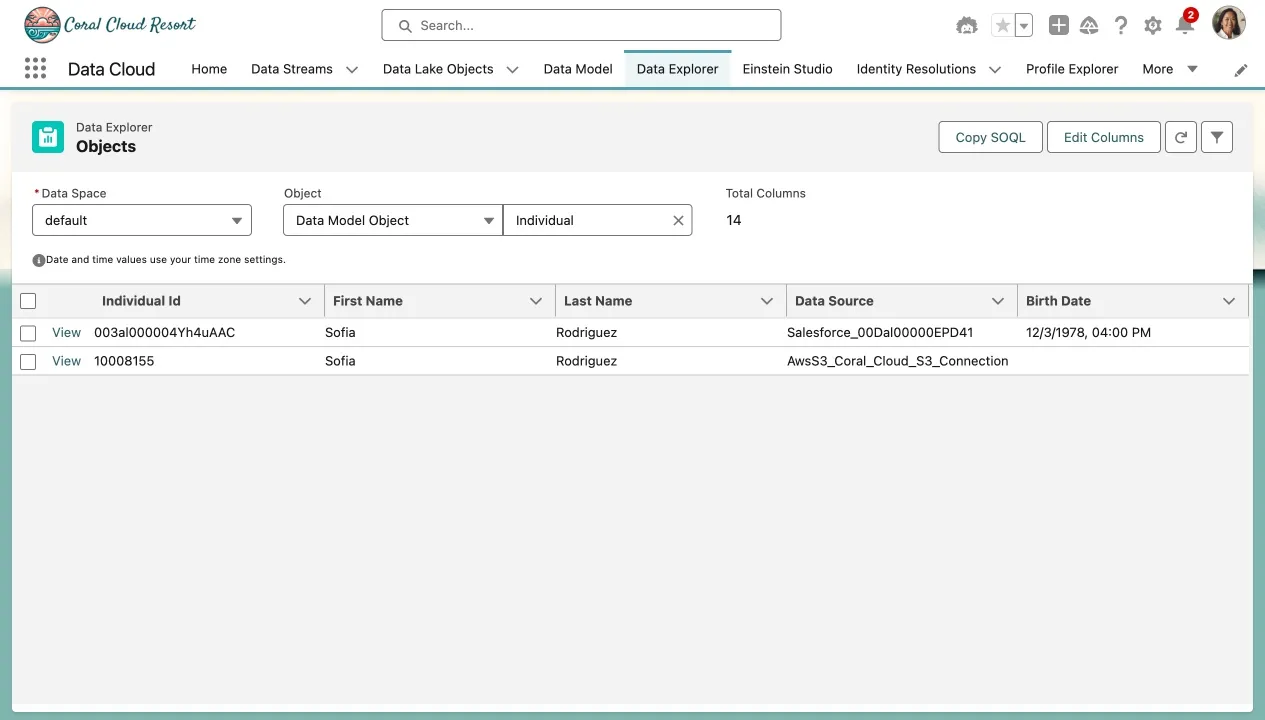
You should see two records for Sofia Rodriguez: one from Salesforce CRM with Individual Id set to the Salesforce record Id and one from Amazon S3 with its own Guest Id.
Step 2: Create an identity resolution ruleset
In this step, you'll use identity resolution to merge matching Contacts and Guests into a consolidated record.
Click the Identity Resolutions tab.
Click the New button.
Configure the Ruleset with the following values:
Field Value Data Space defaultPrimary Data Model Object IndividualRuleset ID ccid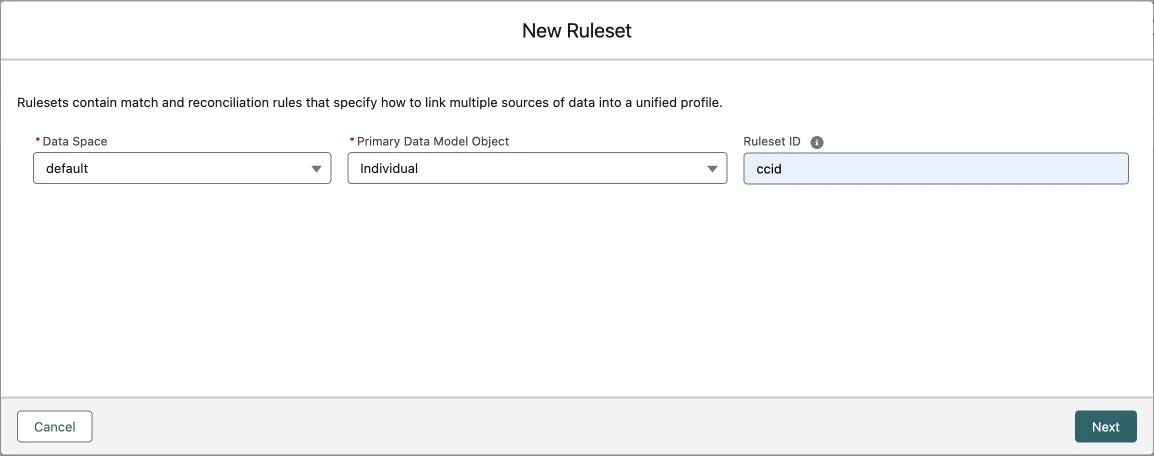
Click Next.
Enter
Guest Name and Emailas the Ruleset Name.Set the Run jobs automatically toggle to Disabled.
Click Save.
In the Ruleset Properties tab, click Configure.
On the Match Rule Instructions screen, click Next.
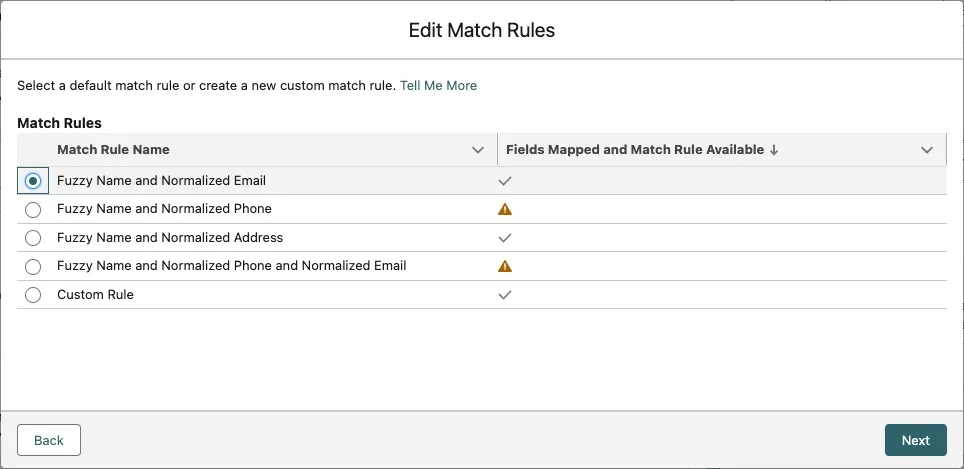
On the Edit Match Rules screen, click Configure next to Match Rule 1.
Select Fuzzy Name and Normalized Email.
- Fuzzy Name allows records to be matched by name even if there are minor variations in how they are written.
- Normalized Email means matching based on the normalized representation of the email address. This is available for email, phone, and address.
Click Next.
Review the Match Rule Criteria. Don’t make any changes. Click Next.
Click Save.
Click Run Ruleset.
TIP
This process can take up to 30 minutes.
Step 3: Query the Unified Individual DMO using Data Explorer
In this step, you'll use Data Explorer to query Unified Individual data model object and confirm that the duplicate profiles you identified in Step 1 have been merged into a single record.
TIP
If your identity resolution job did not yet complete, you can skip this step and come back to it later. To verify that your identity resolution job has completed, navigate to the Identity Resolution record and check Last Job Status. The value will change to Succeeded when the identity resolution job has completed successfully.
To query the Unified Individual DMO:
In the Data Cloud app, click the Data Explorer tab.
Keep the default Data Space selected.
In the Object dropdown, select Data Model Object.
In the Select an Object search field, select the Unified Individual ccid object.
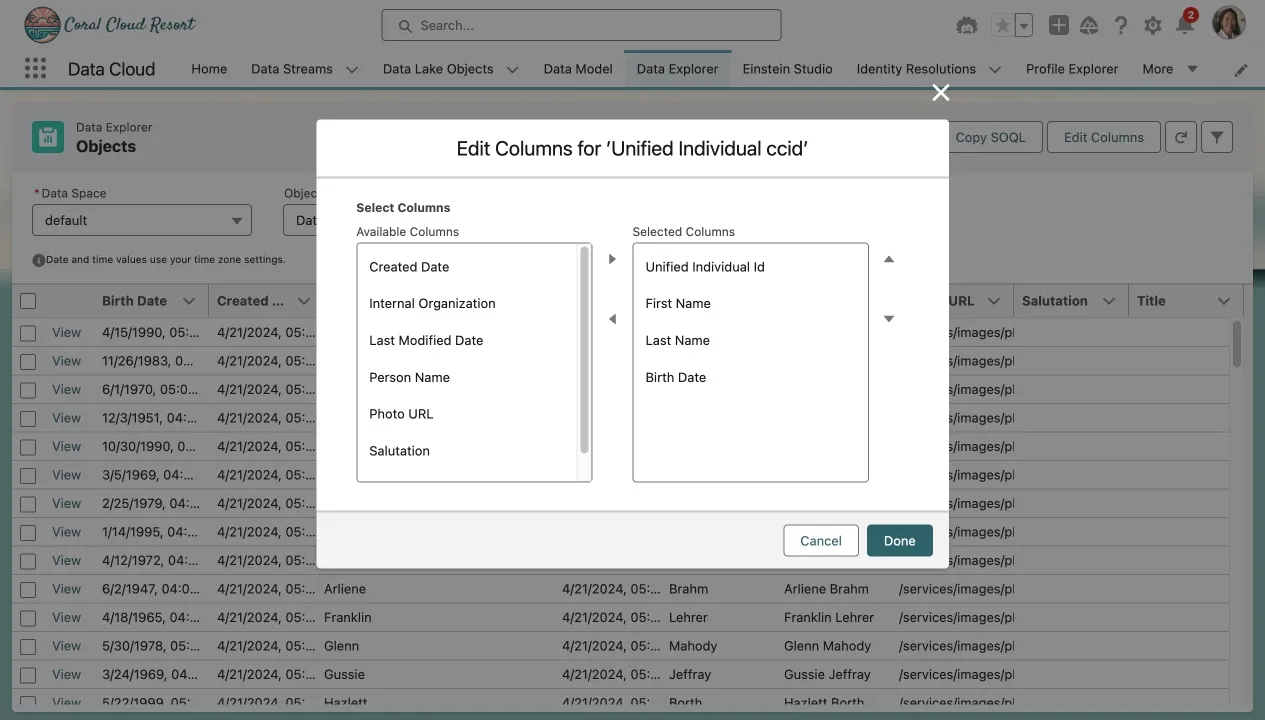
Click the Edit Columns buttons.
Select the Unified Individual Id, First Name, Last Name and Birth Date colums, and click Done.
Click the Filter icon (upper right corner of the screen).
Click Add Filter.
Configure the filter with the following values:
Filter Field Value Field Last NameOperator equals Value Rodriguez Click Done.
Click Apply.
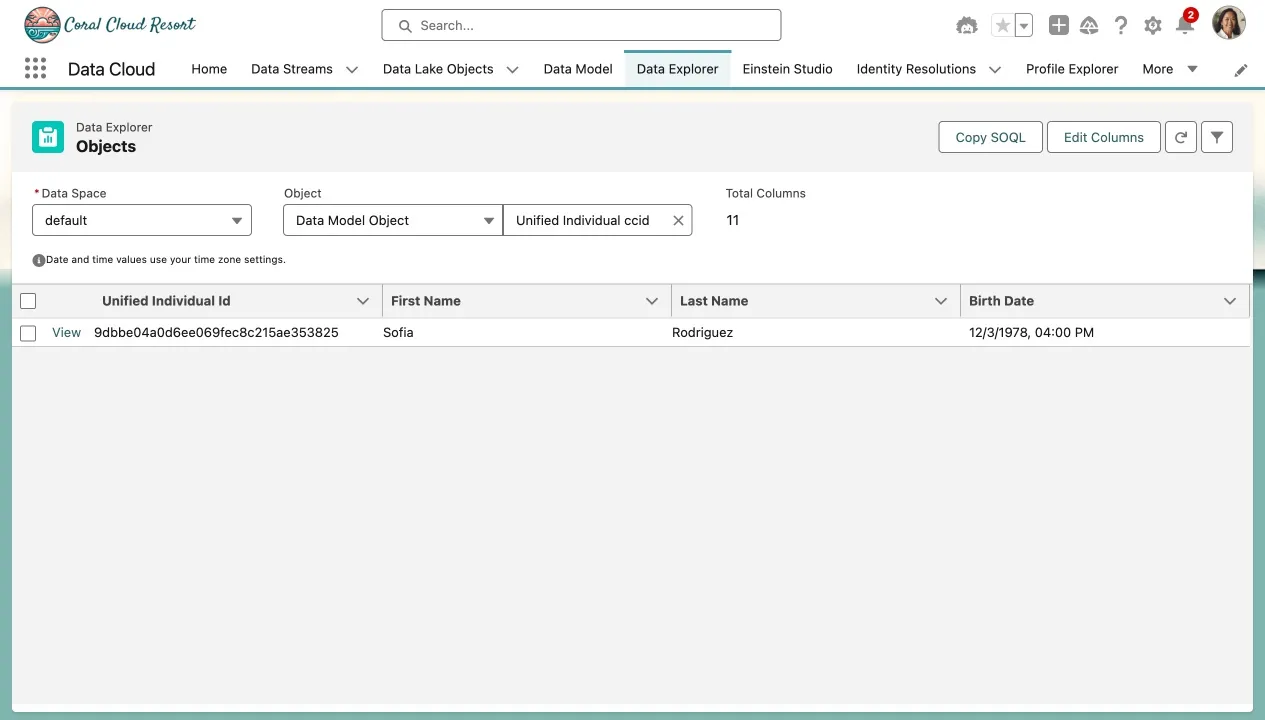
You should now see a single record: the consolidated profile created by the identity resolution process.
Summary
In this exercise, you created an identity resolution ruleset that identifies and merges duplicate customer profiles (ingested from Salesforce and Amazon S3) into a single, consolidated record.