


Health Cloud Administration
 j
jConfigure the Service Appointment Tab for the Contact Center
Enable contact center agents to set up service appointments in the Contact Center. In
Lightning App Builder, create tabs for the Healthcare Appointment Scheduler component.
|
Available in: Lightning Experience Available in: Enterprise and Unlimited Editions with Health Cloud |
| User Permissions Needed | |
|---|---|
| To use the Contact Center for Health Cloud | Manage Contact Center for Health Cloud |
- From the App Launcher, find and select Contact Center.
- Go to Accounts, and select a person account record to open in the Contact Center.
-
Click
 , and
then click Edit Page.
, and
then click Edit Page.
- In the Lightning App Builder, select the person account’s tab section.
-
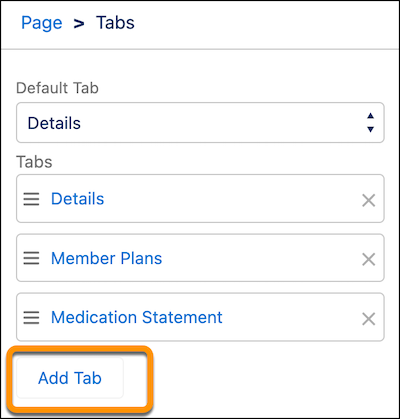
In the properties pane, click Add Tab.
-
Click the new tab, labeled Details, then click
 and select Custom.
- Add a name for your tab. For example, Appointments.
- Click Done.
-
Select the newly created tab, and move the Healthcare Appointment Scheduler component onto
the editable part of the tab.
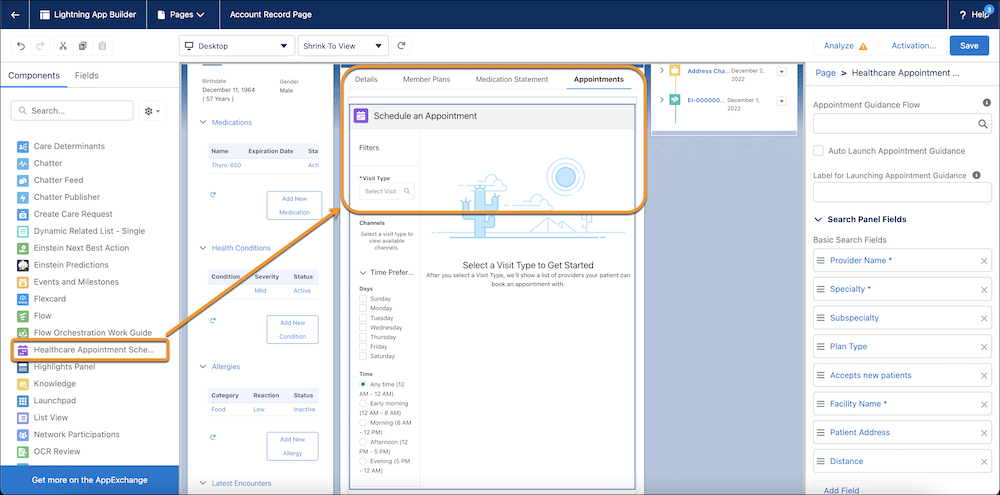
- Review the fields and remove any you don’t want to display on the Appointment tab.
- Save your changes, click Activate, and then set the page as the org default.
-
Next, add the Service Appointment field in the Related List of the Person Account’s Page
Layout.
To add the Care Barrier tab, repeat the preceding steps. Add “Care Barriers” as the Barrier Header Label, and move the Care Determinants component to the newly created tab. You don’t need to add Care Determinants in the Person Account page layout’s Related List tab.